Issue: Not able to configure email settings and/or not able to get a successful e-mail test on your Insteon IP Camera
Solution: Please see below for common SMTP Settings. (Note, while these settings work for most users, you may need to contact your email provider for you specific settings)
Aol:
smtp server: smtp.aol.com
smtp port: 587
Transport layer security: starttls
Apple/iCloud/Me:
smtp server: smtp.mail.me.com
smtp port: 587
Transport layer security: starttls
AT&T/SBC Global:
smtp server: smtp.att.yahoo.com
smtp port: 465
Transport layer security: tls
Comcast:
smtp server: smtp.comcast.net
smtp port: 465
Transport layer security: tls
Gmail:
smtp server: smtp.gmail.com
smtp port: 587
Transport layer security: starttls
Hotmail/MSN/Outlook/Live:
smtp server: smtp.live.com
smtp port: 587
Transport layer security: starttls
RoadRunner:
smtp server: smtp-server.<location>.rr.com
smtp port: 587
Transport layer security: starttls
Time Warner:
smtp server: mail.twc.com
smtp port: 587
Transport layer security: starttls
Verizon:
smtp server: smtp.verizon.net
smtp port: 587
Transport layer security: starttls
Yahool:
smtp server: smtp.mail.yahoo.com
smtp port: 465
Transport layer security: tls
Insteon Camera - invalid params
Symptoms
The Insteon Camera is generating the following error anytime you attempt to save any changes:
invalid params
Causes
The error is cause by invalid characters in the Username or Password of the camera
! @ # $ % ^ & * ( ) - +
Resolution
You will need to factory reset the camera and begin setup from the beginning. You are not able to change the username or password in the camera, as the existing login information is invalid.
Indoor Camera Factory Rest Steps:
Step 1: On the bottom of the camera locate the hole in the bottom of the camera marked RESET.
Step 2: Using a paperclip or similar object to press an hold the RESET button for 30 seconds.
Step 3: The camera will start to pan and tilt within 30 seconds of the reset.
Step 4 Wait 90 seconds before beginning again.
Outdoor Camera Factory Reset Steps:
Step 1: On the cable bundle, locate the reset button
Step 2: Press and hold the reset button for 30 seconds then let go.
Step 4: Wait 90 seconds before beginning again.
Insteon SD WiFi Camera Setup Videos
The links below will take you to specific video tutorials that will help you set up your new SD Insteon wireless IP camera.
Optional Camera steps:
The steps shown in these videos will work for either the Indoor Wireless IP Camera or the Outdoor Wireless IP Camera.
If you are not using your Insteon camera with the Insteon Hub, we recommend the following third party apps:
iOS - CamViewer, Foscam Pro, Live Cams Pro, OWLR
Android - IP CamViewer, TinyCam Monitor, NetEye Camera, OWLR
Windows Phone - IP Cam Controller
Wi-Fi Camera Setup
As of December 31 2016 Insteon customer service will no longer provide technical support for the 75740 series (standard definition) cameras.


Wi-Fi Camera Setup
Getting Started

Connect the ethernet cable to your router and plugin the power adapter. You can disconnect the ethernet cable after setup is complete.

Connect the cables to your camera.

Guides, Manuals and Downloads
Quick Start Guide
Featured


Owner's Manual
Featured

Downloads
Featured

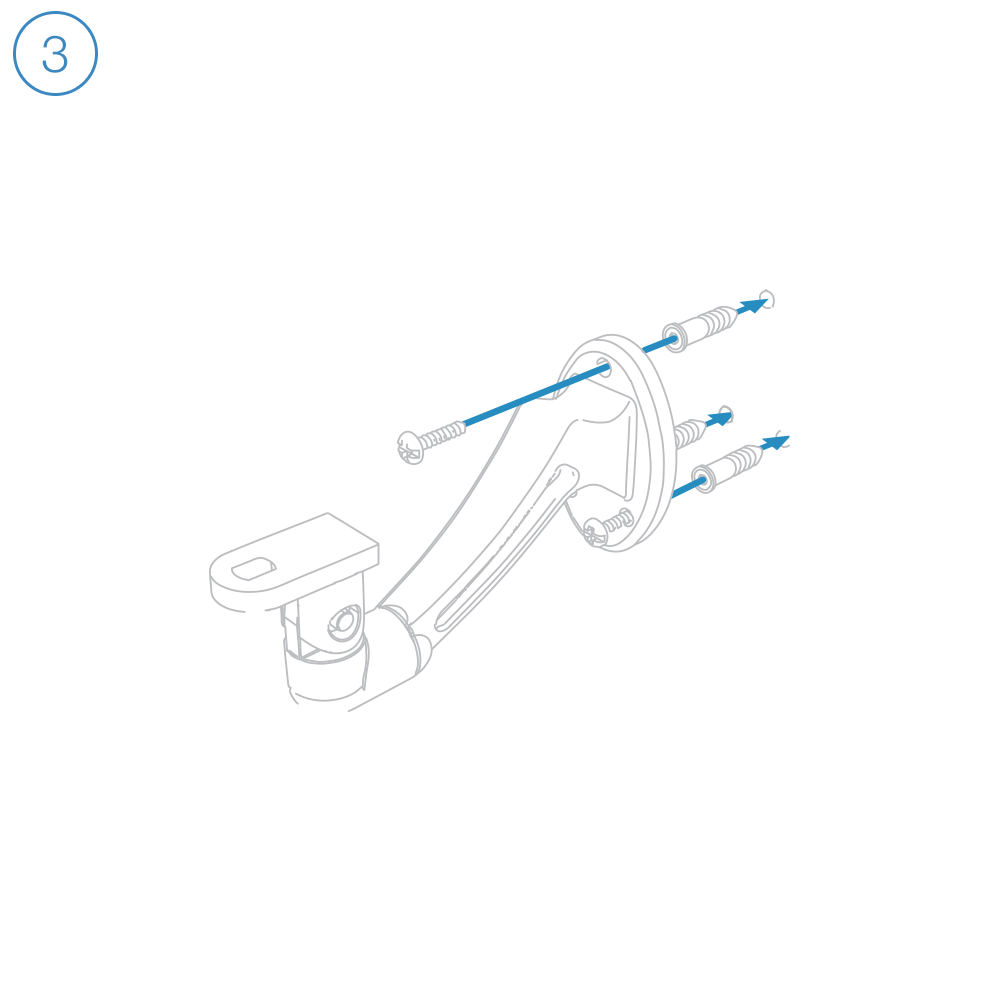
Optional Wall Mount
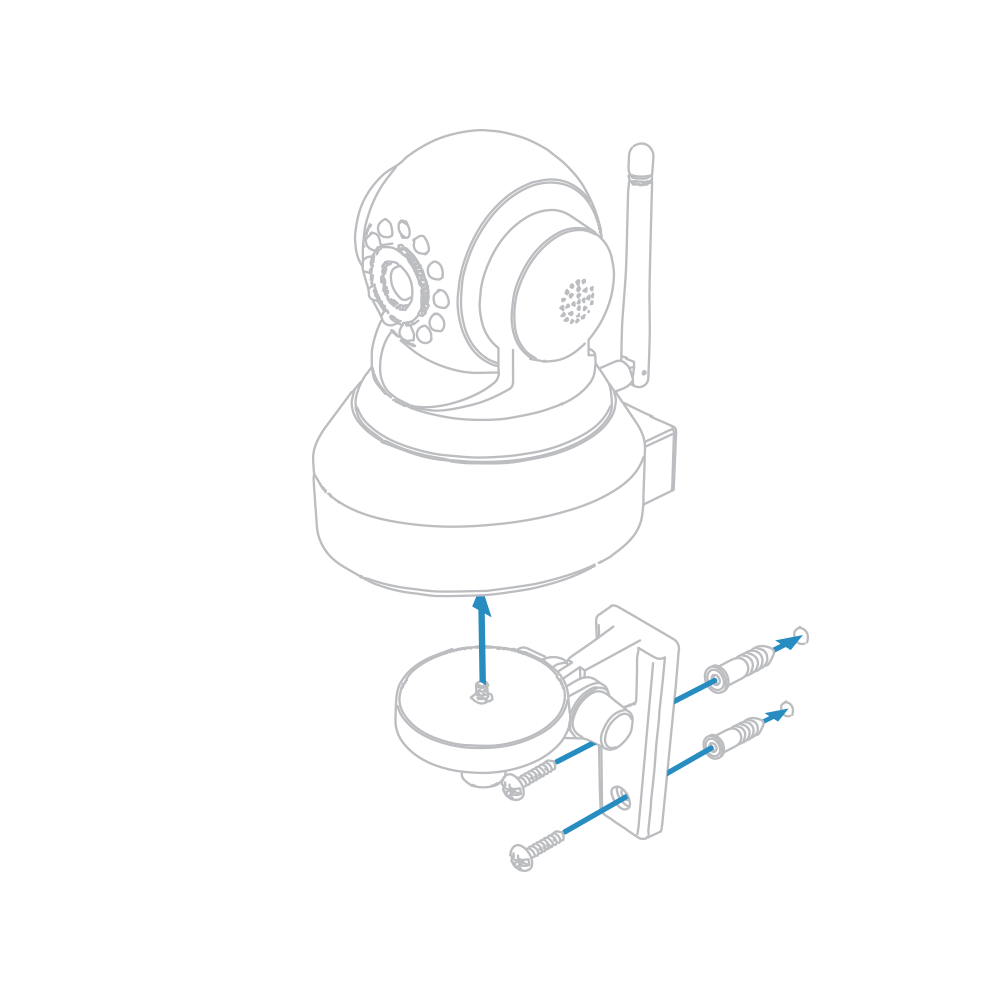
Mount the optional bracket using screws and wall anchors.
Camera Firmware

Current Wi-Fi Camera Firmware
Device 11.37.2.59Web UI 2.001.10.9
Outdoor Wi-Fi Camera Setup
As of December 31 2016 Insteon will no longer provide technical support for standard definition cameras (75791)
Getting Started

Connect the ethernet cable to your router and plugin the power adapter. You can disconnect the ethernet cable after setup is complete.

Connect the cables to your camera.
Mount the bracket using screws and wall anchors.

Position your camera and affix it with the set screw. Secure camera connections in a weather-resistant enclosure.

Guides, Manuals and Downloads
Quick Start Guide
Featured
Owner's Manual
Featured

Downloads
Featured
Camera Firmware
Keep your Outdoor Wi-Fi Camera up-to-date; updates add features, fix bugs and close potential security vulnerabilities.

Current Outdoor Wi-Fi Camera Firmware
Device 11.35.2.59Web UI 2.001.20.6
Outdoor HD Wi-Fi Camera Setup
Getting Started

Connect the ethernet cable to your router and plugin the power adapter. You can disconnect the ethernet cable after setup is complete.

Connect the cables to your camera.

Mount the bracket using screws and wall anchors.

Position your camera and affix it with the set screw. Secure camera connections in a weather-resistant enclosure.

Guides, Manuals and Downloads
Quick Start Guide
Featured

Owner's Manual
Featured

Downloads
Featured
Camera Firmware
Keep your HD Outdoor Wi-Fi Camera up-to-date; updates add features, fix bugs and close potential security vulnerabilities.

Current HD Outdoor Wi-Fi Camera Firmware
Camera Revision 5.0 or Later
System 1.9.3.16Application 2.51.2.33
HD Wi-Fi Camera Setup
Getting Started

Connect the ethernet cable to your router and plugin the power adapter. You can disconnect the ethernet cable after setup is complete.

Connect the cables to your camera.

Open the Insteon for Hub app and select Add a Camera. Insteon cameras require Insteon Hub.
Guides, Manuals and Downloads
Quick Start Guide
Featured

Owner's Manual
Featured
Downloads
Featured
Optional Wall Mount

Mount the optional bracket using screws and wall anchors.
Basic Troubleshooting
Camera Firmware
Keep your HD Wi-Fi Camera up-to-date; updates add features, fix bugs and close potential security vulnerabilities.

Current HD Wi-Fi Camera Firmware
Camera Revision 1.0 - 3.9
System 1.4.1.9Application 2.11.1.12
Current HD Wi-Fi Camera Firmware
Camera Revision 4.0 or Later
System 1.9.3.16Application 2.51.2.33