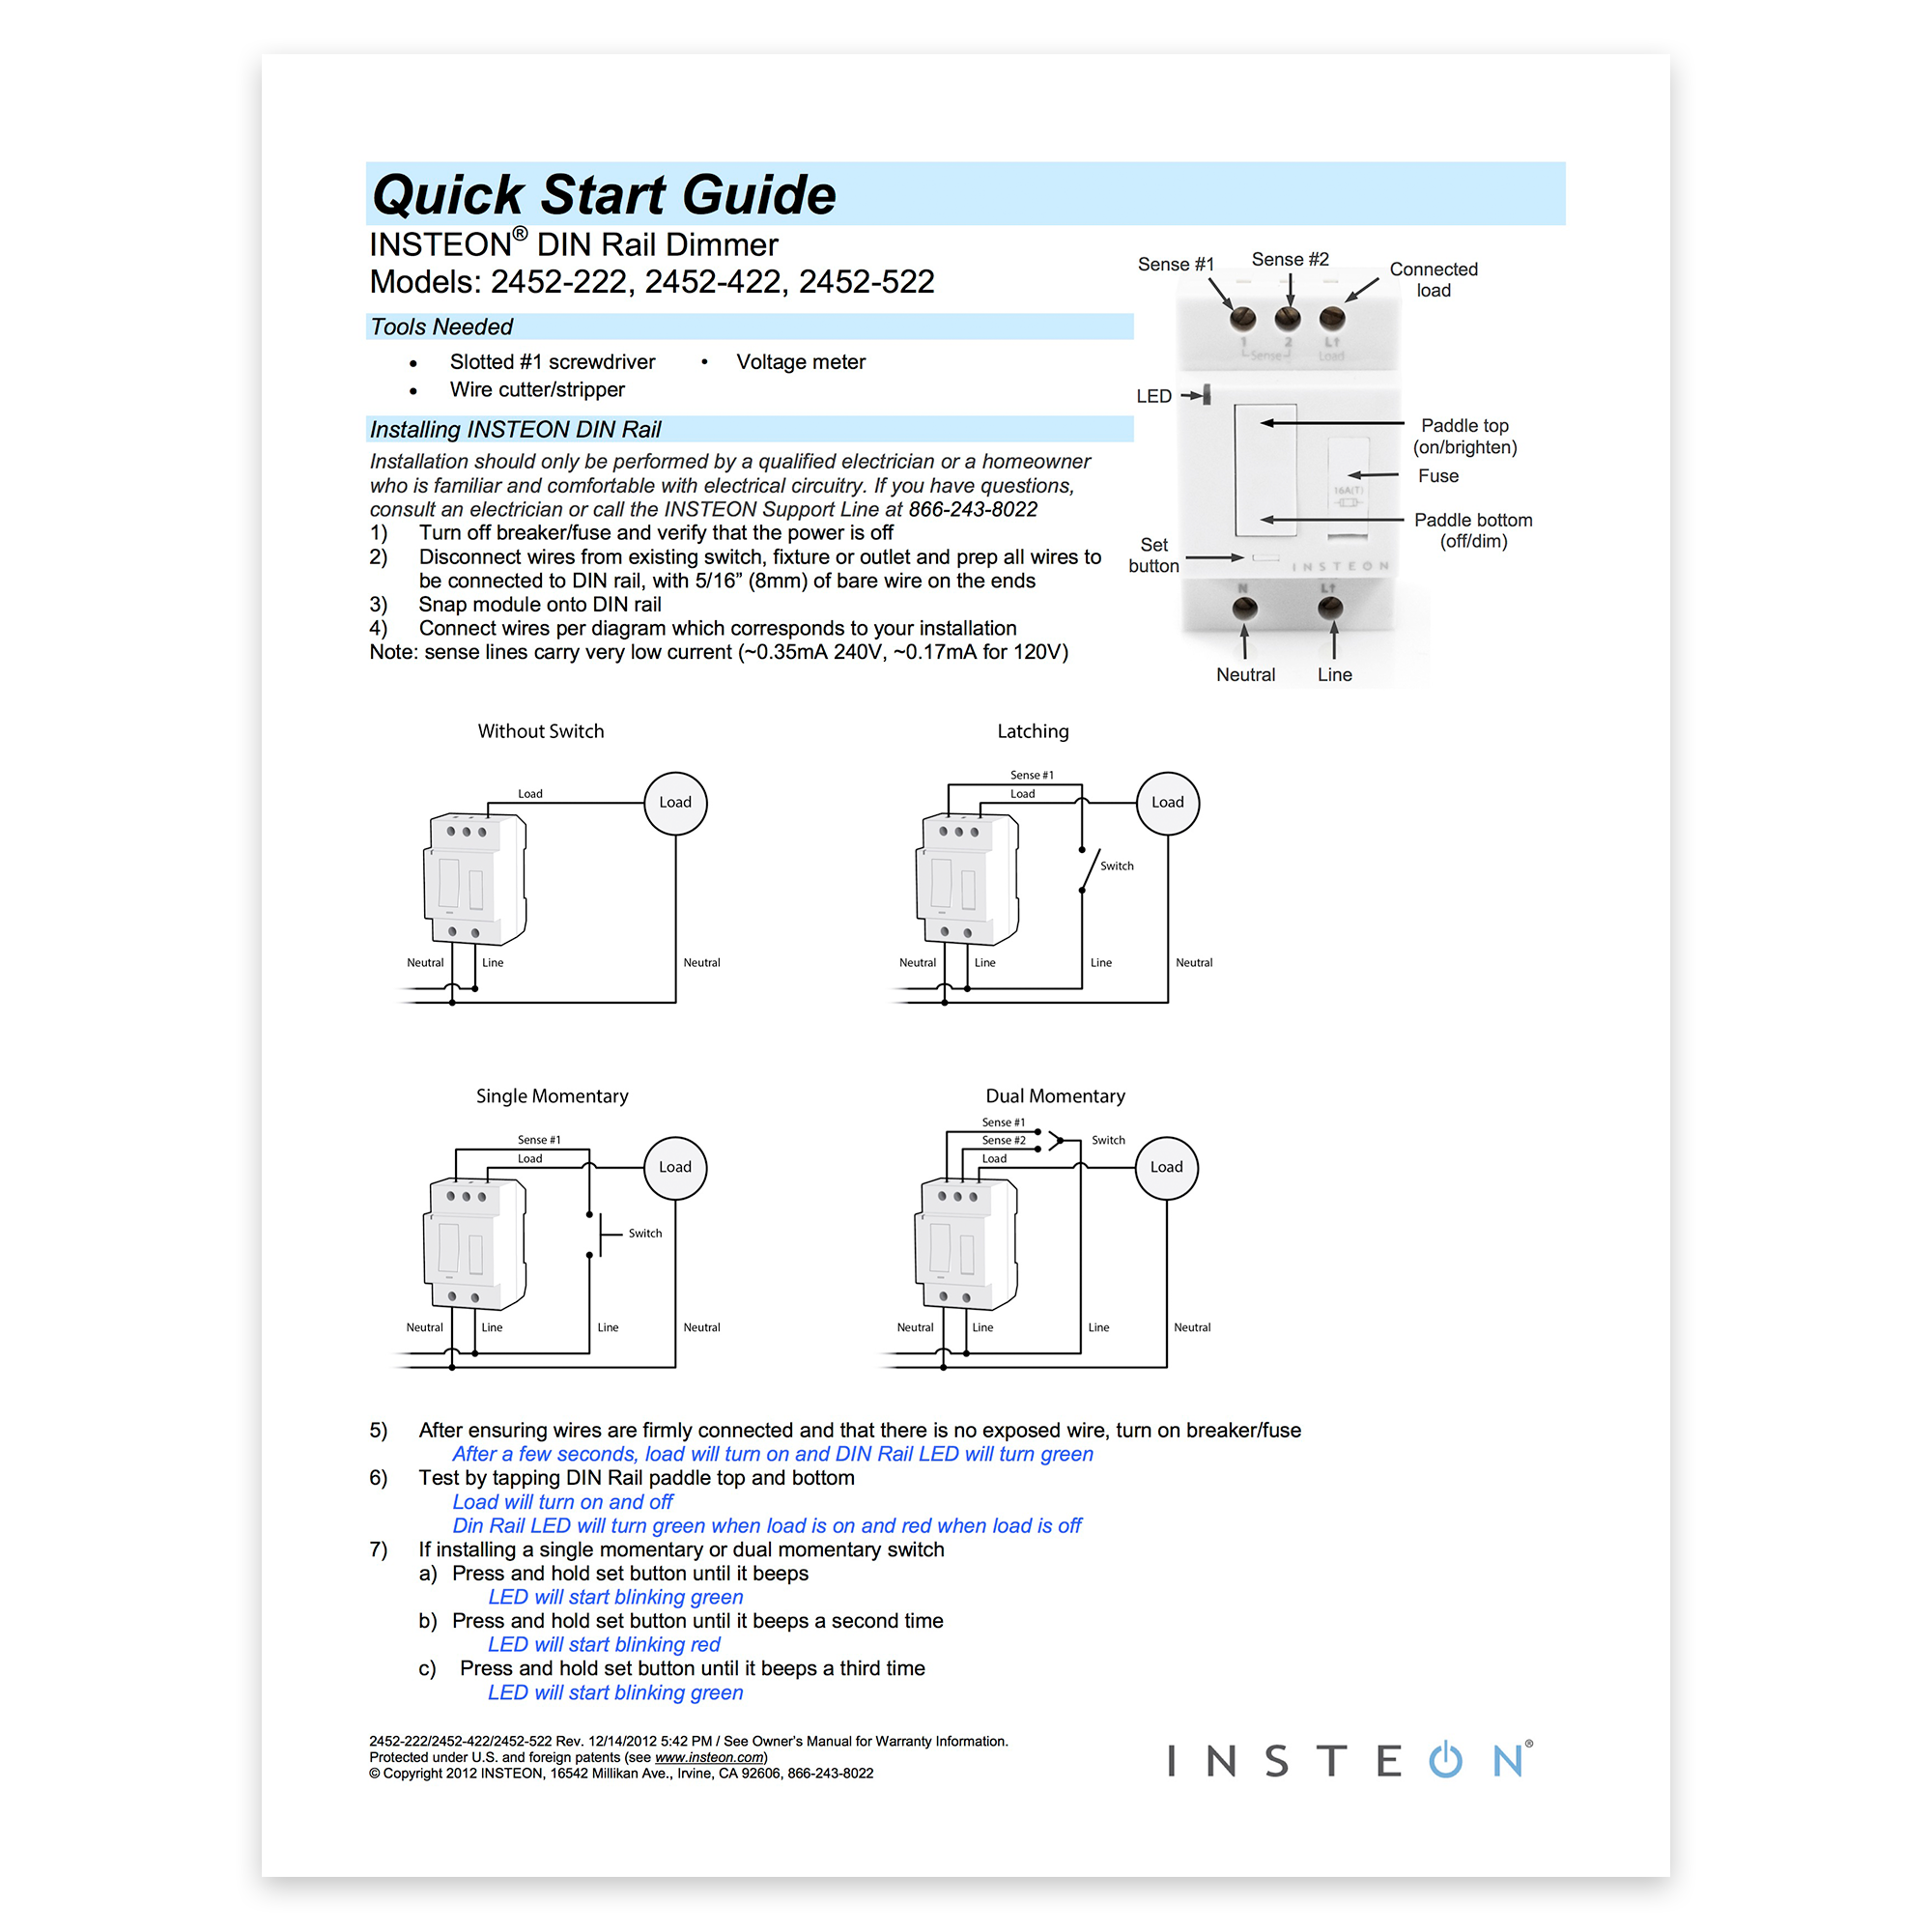
Links are One-Way
When linking Insteon devices, the links that are created are one-way.

Switch A will turn Switch B On and Off but
Switch B cannot turn Switch A On or Off
Links Remember a Device's State
The current state of the controlled device is stored in the link: On, Off, or Dimmed.

The switch will turn on the Lamp Dimmer to 75% brightness.
Controllers
Insteon devices that can turn other devices On or Off are called controllers.

Sensors, Switches, Keypads, and the Hub are common controllers.
Responders
Insteon devices that receive the command of a controller are called responders.

Switches, Keypads, Plug-In Modules and In-Line Modules are common responders.
Controller-Only
Some devices, like sensors, can only control other devices.

The Motion Sensor will turn on the Switch but the switch cannot control the Motion Sensor.
Responder-Only
Some devices cannot control other devices; these devices only receive Insteon commands.

The LED Bulb cannot control the Dimmer Switch but the Dimmer Switch can control the LED Bulb.
Grouping Devices
You may want to group together two devices, for example, in a virtual-three way configuration. For Insteon, this is called cross linking.

To mirror Switch A to Switch B so that they each control one another and the connected load, Cross Linking is necessary.
Use Cross Linking
To Cross Link, simply turn on the devices and perform the linking process twice, once in each direction.

Link Switch A to Switch B and repeat to link Switch B to Switch A