Getting Started

Turn off power at the service panel and remove the existing wall switch.
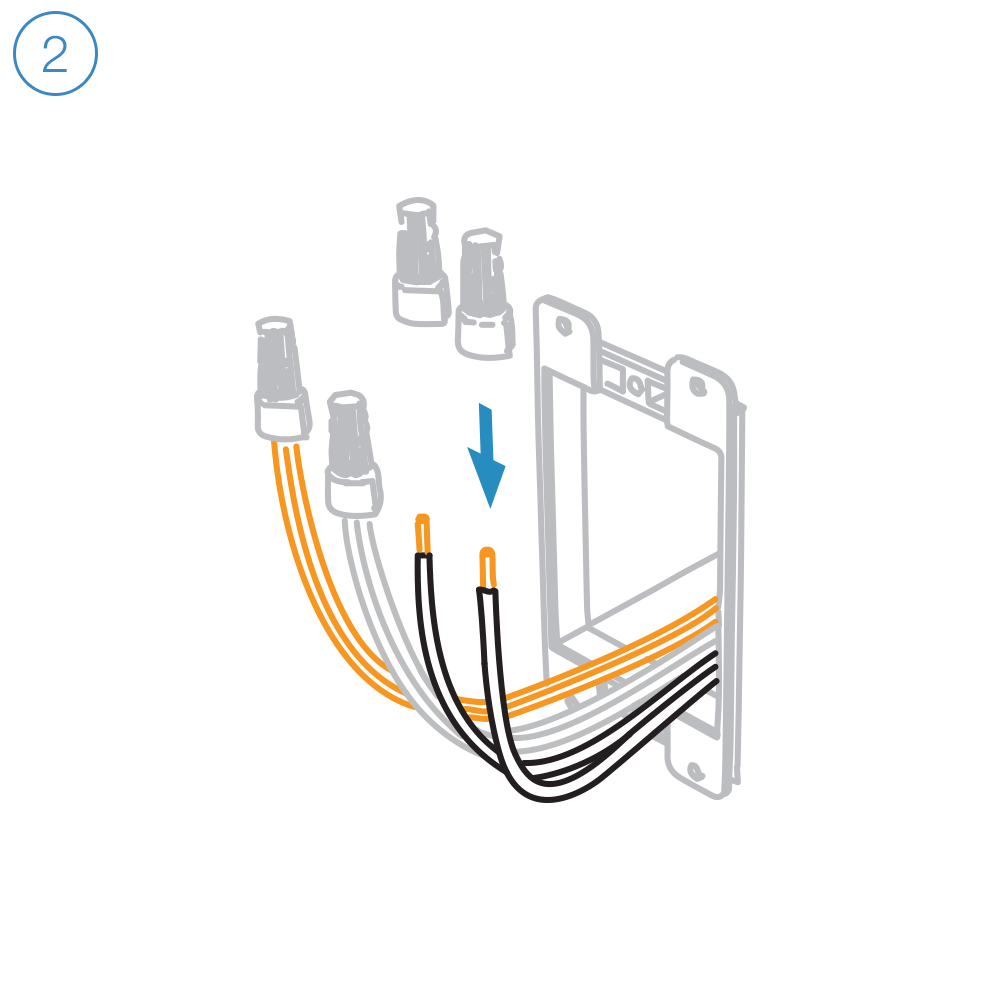
Unfold all of the wires from within the junction box. Separate the black wires and cap them with wires nuts.
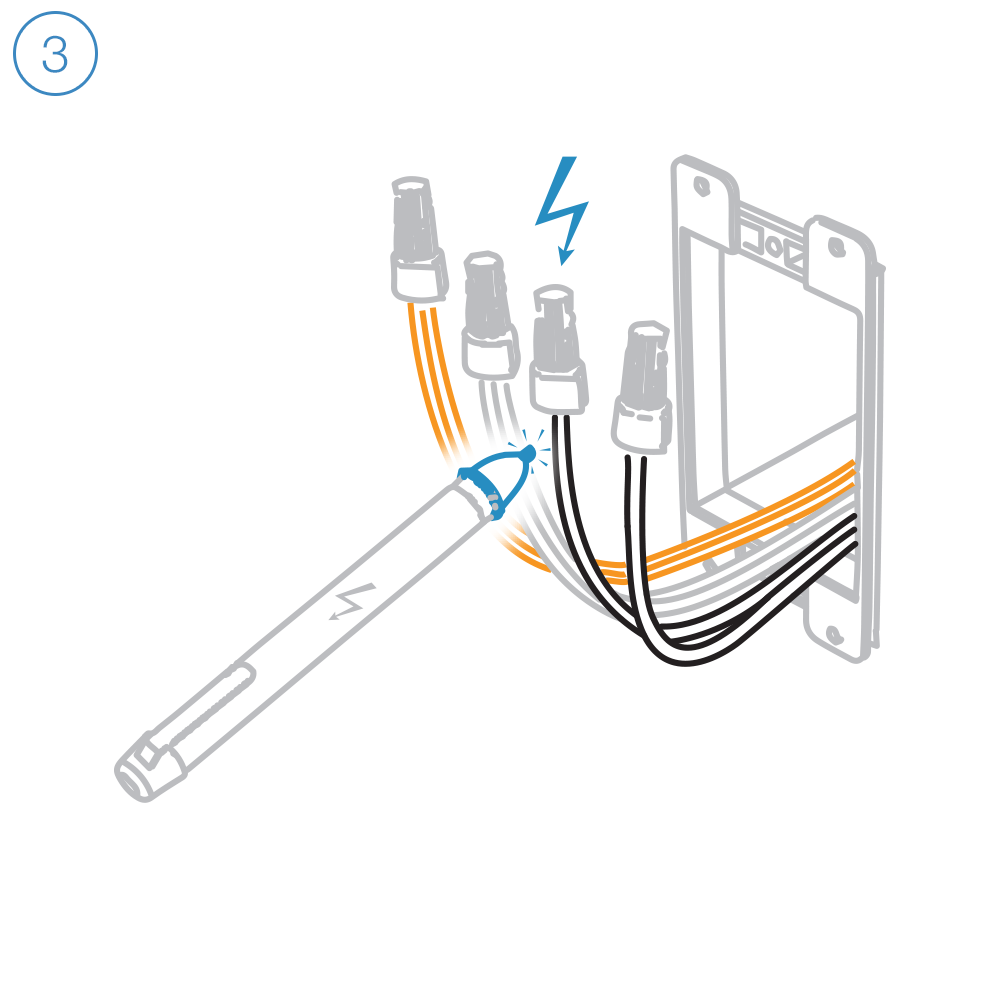
Turn on power and use a voltage detector to identify the live wire; this is your line wire.
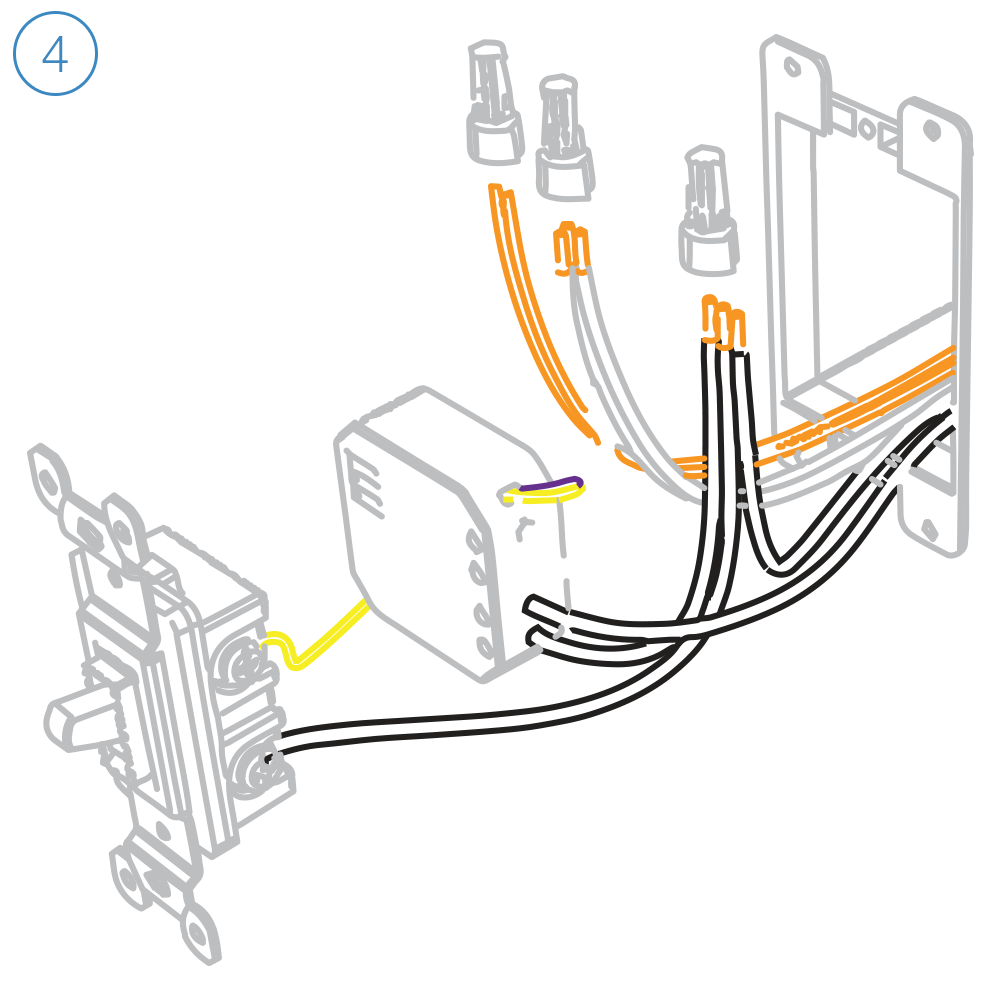
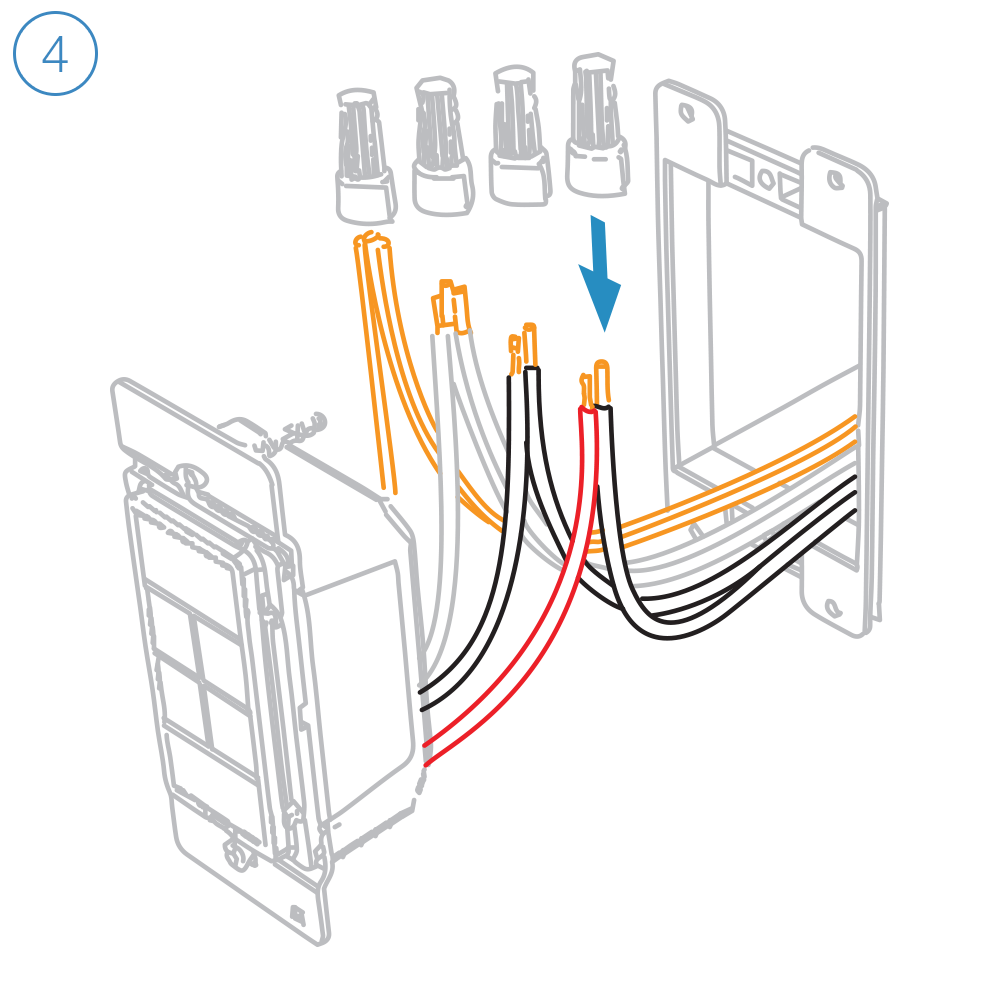
Turn off power and connect the corresponding wires.

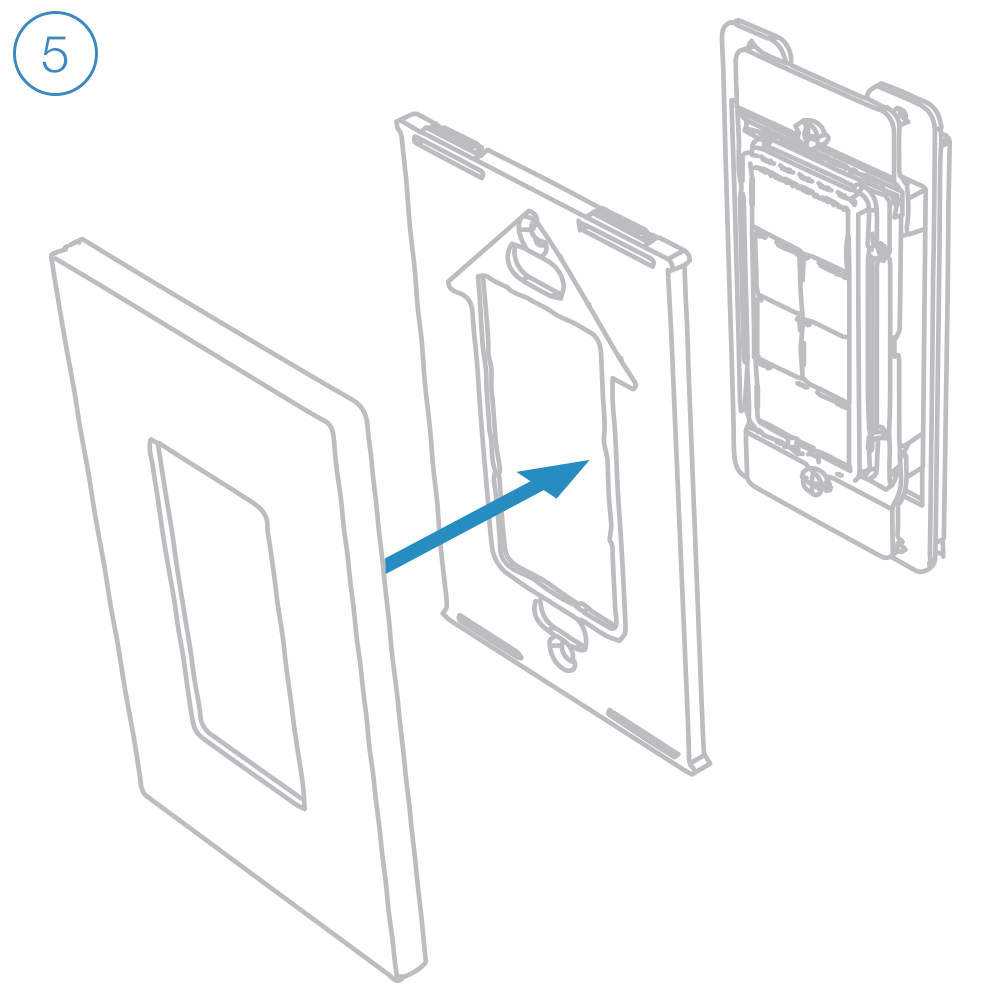
Reinstall your wall switch, attach the wall plate and turn on power.

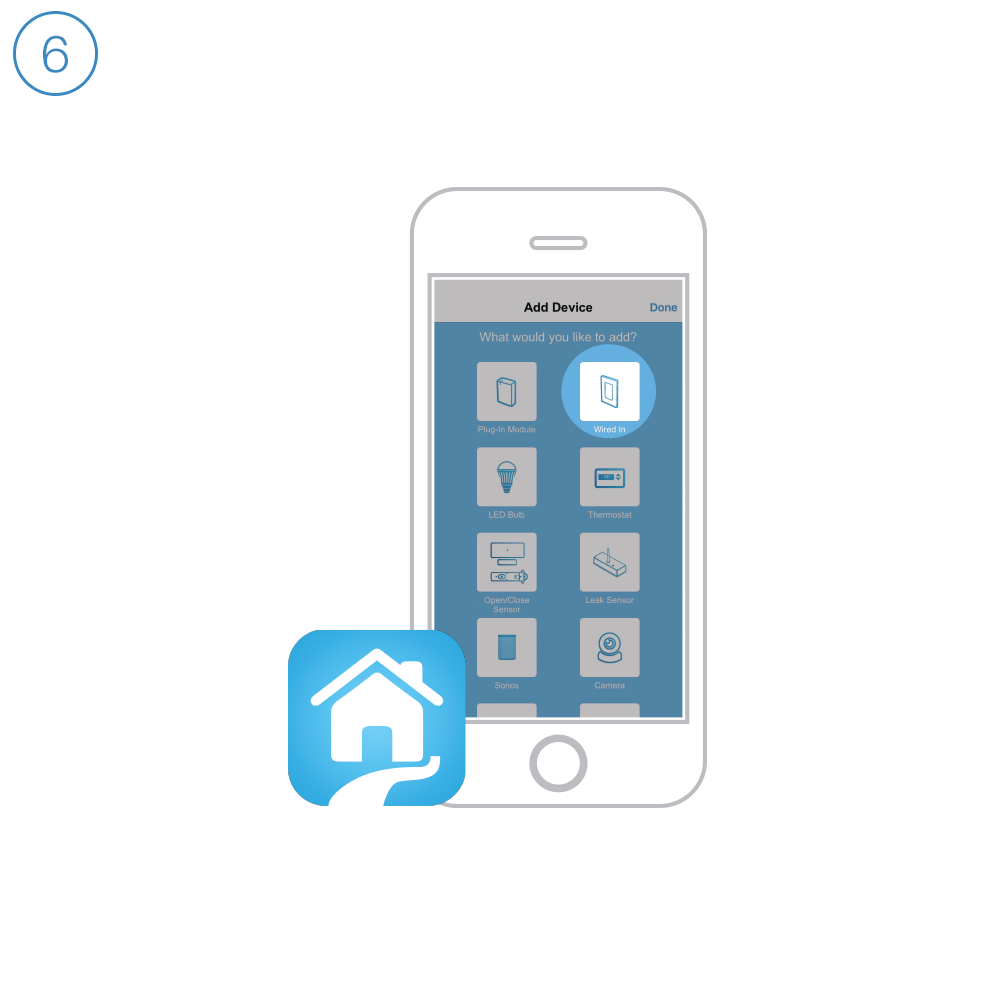
Follow the on-screen instructions in the Insteon app to add Micro Module.
Guides and Manuals
Quick Start Guide
Featured


Owner's Manual
Featured

Going Further
Featured


Insteon Hub lets you schedule lights and appliances to turn on and off throughout the day...