X10 Programming for Insteon Devices

Some (mostly older) Insteon devices are X10 ready, meaning that they can be programmed to respond to or control other devices via X10 commands. The reason Insteon devices have supported X10 is to allow an upgrade path for those with extensive X10 systems that want something more reliable. Now with over 10 years in the market, new Insteon devices have had X10 functionality phased out. X10 is a slower technology and can be significantly impaired with noisy electrical environments. Whenever possible we recommend upgrading X10 hardware to Insteon for the best possible home control experience.

This article covers all the aspects of how to program older Insteon devices with X10 features such as primary address and scene address.

Important: Except for setting or removing the primary address, all steps below require that you have an X10 controller that only sends House and Unit code (no On/Off command). Before attempting these steps you will need X10 hardware or software that supports the ability to send these commands (example: Maxi Controller #PHC02 or #SC503).


Setting the X10 Primary Address

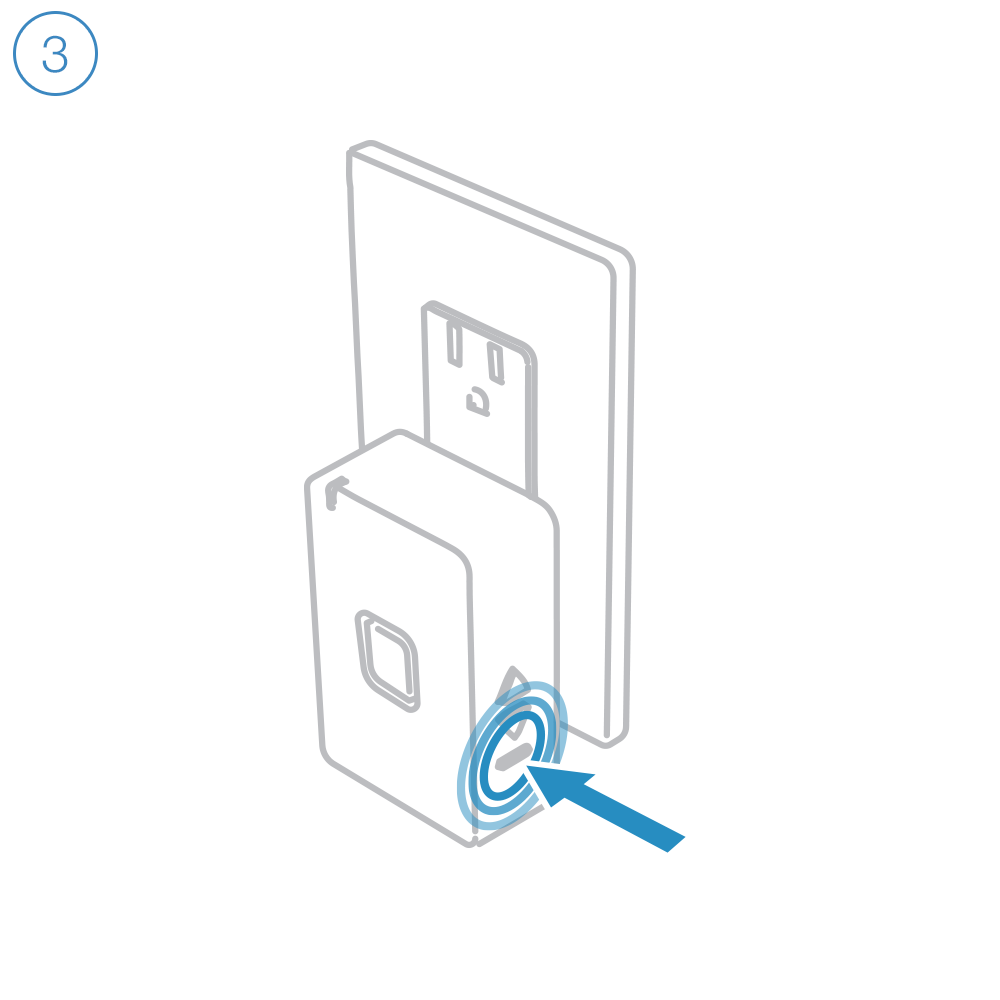
1. Put your Insteon device into linking mode (press and hold the Set button for about 3 seconds

2. Send the desired X10 Primary Address followed by the ON 3 times (e.g. A1-AON A1-AON A1-AON)

Your Insteon device will exit linking mode and its LED will stop blinking


Removing the X10 Primary Address

If you are no longer going to control your Insteon device with an X10 address it is very important that you Unlink it. Otherwise your Insteon device will still respond to stray X10 commands that may cause your Insteon device to turn on at undesired times.

1. Press and hold the Set button (enter linking mode)

2. Press and hold the Set button again (enter unlinking mode)

3. Send the X10 address to be removed followed by the ON command three times (e.g. B5-BON B5-BON B5-BON )  

Your Insteon device will exit unlinking mode and stop blinking


Setting the On-Level for the X10 Primary Address

1. Using an X10 controller, send:

O16   -  N16  -   M16  -   P16   -  M16

2. Send the X10 Primary Address (house code and unit code)

3. Use a Linked Controller to adjust your new Insteon device's load to the desired brightness level. If you skip this step the current On-Level will be used. (If you turn the load off, the ON-Level will become the resume whereby the load will return to the brightness level at which it was at just before turning Off)

4. Send the following X10 address sequence to lock in the new On-Level

P16   -  N16   -  M16   -  O16   -  M16


Setting the Ramp Rate for the X10 Primary Address

1. Using an X10 controller, send:

O16   -  N16  -   M16  -   P16   -  M16

2. Send the X10 Primary Address (house code and unit code)

3. Use an X10 Controller to adjust your Insteon device's load to the brightness corresponding to the desired Ramp Rate using the ramp rate table under Insteon advanced features.

4. Send the following X10 address sequence to lock in the new Ramp Rate

O16   -  P16  -   N16  -   M16   -  O16


X10 Scene Address Programming

Most Insteon devices can be a member of up to 255 X10 scenes. An X10 address is simply a secondary X10 address. When an X10 ON command is sent to an X10 scene address, every X10 device with that X10 scene address will turn on to its independent On-Level at its independent Ramp Rate (if a dimmable device). Sending an X10 OFF command to an X10 scene address will turn off all devices that are members of that X10 scene, each at its independent Ramp Rate. Dimmable X10 devices will react to DIM and BRIGHT commands after the X10 scene address is sent. However, they will ignore ALL ON and ALL OFF commands for the X10 scene address.


Remotely Setting the On-Level for an X10 Scene Address

1. On an X10 controller send:

O16   -  N16  -   M16  -   P16   -  M16

2. Use and X10 Controller to adjust your Insteon devices' load to the desired brightness level. If you skip this step the current On-Level will be used. A scene can trigger your Insteon device to go off by setting the ON-Level to 0%, or Off.

3. Send the following X10 address sequence:

M16   -  N16  -   O16  -   P16

4. Send the desired X10 scene address ( house code and unit code) to lock in the new On-Level


Setting the Ramp Rate for an X10 Scene Address

1. Using an X10 controller, send:

O16   -  N16  -   M16  -   P16   -  M16

2. Send your Insteon devices X10 Primary Address (house code and unit code)

3. Use an X10 Controller to adjust your Insteon devices load to the brightness corresponding to the desired ramp rate using the ramp rate table under Insteon Advanced features.

4. Send the following X10 address sequence:

N16   -  O16  -   P16  -   M16-   Scene Address

5. Send the desired X10 scene address (house code and unit code) to lock in the new On-Level and X10 scene address


Removing an X10 Scene Address

1. Using an X10 controller, send:

O16   -  N16  -   M16  -   P16   -  M16

2. Send your Insteon device's X10 primary address (house code and unit code)

3. Send an X10 ON and Off command.

4. Send the following X10 address sequence:

O16   -  P16  -   M16  -   N16

5. Send the X10 scene address you wish to remove (house code and unit code)


Arm and Disarm Siren from an Insteon Device


Insteon Siren supports remote arming and disarming from other Insteon devices. Follow the steps in this article to configure a Wall Keypad to arm and disarm Siren.


Configure Arm and Disarm Devices on iPhone, iPad and iPod touch

Step 1

Configuring Arm and Disarm devices requires creating a Scene. Swipe right to open the drawer and tap Create a Scene

step-1.png

Step 2

Give your Scene a name and select both Siren and the desired arming and disarming device. If you are using a Wall Keypad, select the desired arming and disarming button.

When ready, tap Next.

step-2.png

Step 3

For the Keypad Button, tap the blue button until it reads Controller.

step-3.png

Step 4

For Siren, tap the green button until it reads Arm/Disarm.

step-4.png

Step 5

When ready, tap Done.

The Insteon app will create your scene.

step-5.png

Multiple Arm and Disarm Devices

You can arm and disarm Siren from multiple Insteon devices. When selecting the devices in Step 2, select all desired arm and disarm devices. Repeat Step 3 for all arm and disarm devices.

step-multiple.png
 

Configure Arm and Disarm Devices on Android

Step 1

Configuring Arm and Disarm devices requires creating a Scene. Navigate to Settings by tapping Settings and then Edit Settings.

step-1.png

Step 2

Tap Scenes.

step-2.png

Step 3

Tap Create a Scene.

step-3.png

Step 4

Give your Scene a name and select both Siren and the desired arming and disarming device. If you are using a Wall Keypad, select the desired arming and disarming button.

When ready, tap Next.

step-4.png

Step 5

For the Keypad Button, tap the blue button until it reads Controller.

step-5.png

Step 6

For Siren, tap the green button until it reads Arm/Disarm.

step-6.png

Step 7

When ready, tap Done.

The Insteon app will create your scene.

step-7.png

Multiple Arm and Disarm Devices

You can arm and disarm Siren from multiple Insteon devices. When selecting the devices in Step 4, select all desired arm and disarm devices. Repeat Step 5 for all arm and disarm devices.

step-multiple.png


Trigger Siren with an Insteon Sensor


Insteon Siren supports both a Chime and Siren notification when armed. Follow the steps in this article to configure an Insteon Sensor to trigger Siren.


Configure Siren on iPhone, iPad and iPod touch

Step 1

Configuring Chime or Siren alerts requires creating a Scene. Swipe right to open the drawer and tap Create a Scene

step-1.png

Step 2

Give your Scene a name and select both Siren and the desired triggering devices.

step-2.png

Step 3

For all triggering devices, tap the blue button until it reads Controller. Sensors are automatically configured as Controller.

step-3.png

Step 4

For Siren, tap the green button until it reads Chime or Siren, depending on the type of alert you would like to configure.

step-4.png

Step 5

When ready, tap Done.

The Insteon app will create your scene.

step-5.png
 

Configure Siren on Android

Step 1

Configuring Chime or Siren alerts requires creating a Scene. Navigate to Settings by tapping Settings and then Edit Settings.

step-1.png

Step 2

Tap Scenes.

step-2.png

Step 3

Tap Create a Scene.

step-3.png

Step 4

Give your Scene a name and select both Siren and the desired triggering devices.

step-4.png

Step 5

For all triggering devices, tap the blue button until it reads Controller. Sensors are automatically configured as Controller.

step-5.png

Step 6

For Siren, tap the green button until it reads Chime or Siren, depending on the type of alert you would like to configure.

step-6.png

Step 7

When ready, tap Done.

The Insteon app will create your scene.

step-7.png


Siren Setup

Getting Started

 
loud.png

Caution

Insteon Siren is loud. Use hearing protection when testing in close proximity.


step-1.png

Plug Insteon Siren into a power outlet.

step-2.png

Follow the on-screen instructions in the Insteon app to add Siren.

The Insteon app requires Insteon Hub.
Learn More →

step-3.png

When prompted, press and hold the set button until Siren beeps.


Guides and Manuals

Quick Start Guide

Owner's Manual


Going Further


Controlling Insteon Scenes with Amazon Alexa

Controlling lights with your voice is a fast and easy way to turn lights on, off or set the lights to a dim level. But what happens if you want to control more than one device at a time? And what if you want each device to do different things (Living room light 50%, Ceiling light 25%, Dining room off, etc.)? Using the Alexa app offers a way to group more than one device together and control them using a single voice command (i.e., Alexa, turn on dinner time). However, with Alexa groups you can only choose between turning the devices on or off all together - no ability to set each light to a unique level or state. In addition, Alexa group members are controlled one at a time, which means you'll see lights activated in a sequence over several seconds, creating a popcorn effect (but without the delicious buttery flavor).

For the best possible experience, we recommend using Insteon scenes. They provide a super-fast and instantaneous response across all devices, regardless if it's a scene made up of 2 or 200 devices. And because you can set each scene member to a unique level, you can create incredible lighting effects. 

Here's an example video clip showing the difference between Insteon scenes and Amazon Alexa/Echo group control.


To learn how to create Insteon scenes, please see the following support articles:

Things to Keep in Mind When Using Insteon Scenes

  • If you already have scenes created, there is no need to do anything to start controlling them with Alexa

  • If a new scene is created you will have to re-run discovery within the Amazon Alexa app, just as you do when adding new devices. Pro Tip: Amazon Alexa does a discovery automatically once an hour or so.

  • Supported voice control commands: On and Off only. Dim, Bright and Set to % are not supported (of course, you can set these when you create each scene)

  • Unsupported devices: all access control/security devices (I/O, lock controller, garage control) are automatically suppressed. So if you have scenes that contain actions for any of these types of devices, you will not be able to control the scene with Alexa.

  • Previously unsupported devices like our ceiling fan controller or the on/off outlet receptacle are now controllable via scenes. If you are an iOS user and have Sonos integrated, you can now activate scenes containing Sonos speakers.

  • Naming conventions may become an issue. If a scene and device are named the same or are similar, Alexa will have difficulty knowing which one you want to control. The obvious fix is to give scenes and devices unique names.

Creating a Scene with the Insteon Hub (iOS)

Using the Insteon Hub, you can create scenes to be able to control groups of devices or have your lights and appliances go ON/OFF at particular times. See below for the steps to create a scene for your Insteon Hub on iOS.

Step 1: Log in to the Insteon for Hub on your mobile device.
 

Step 2: Tap on the 'Menu' button at the upper right of the Hub application.
 

Step 3: Tap '+ Create a Scene'  from the list to create a new scene.
 

Step 4: Fill out the 'Add Scene' page.

  • Name - Name your scene so that you know what it is for
  • Icon - Select an icon that matches the scene
  • Room Memberships - If you have created rooms, you can assign the scene to that room
  • Schedule - If you want the scene to run on a schedule you would set that here

Step 5: Scroll down and select the devices that you want to be apart of this scene. (You will see a check mark appear next to the selected devices) When finished, click 'Next'

Step 6: Select how the devices interact with each other in the scene. Simply tap the blue box to change the device role.

  • Controller - A device set as a controller will respond to devices set to'controller', 'both', the scene icon and the individual device icon. It will also be linked to the other devices in the scene so that if you physically turn ON/OFF the device, all the other devices in the scene will also go ON/OFF. (An example of this would be creating a movie scene where you want a keypad button to control all the lights in a room. The Keypad button would be a controller and the rest of the devices would be responders. This way, if you go to the keypad, and hit the assigned button, the scene will still activate)
  • Responder - A device with this setting will only respond to devices set up as a 'controller', 'both' the scene and its individual device icon. (An example of this would be a scene where all the lights go ON in your house. You do not want to link every device together, but you want them to turn on when you turn ON the scene)
  • Both - This setting applies both the 'responder' and 'controller' attributes to the device. (An example of this would be a three-way light where both switches need to control and respond to each other so that they are always in the same state)

Step 7: Select the level that you want the devices to turn ON to when the scene is activated. Simply tap on the green box to change the state. Relays can be turned ON or OFF while dimmers will allow you to set the brightness level and the ramp rate.
 

Step 8: When finished tap 'Done.' The Hub will take a few moments to write the changes to the devices. When it is finished, it will ask you if you want to turn off the scene. (The Hub may turn the devices ON while setting the scene so it is just checking to see if you want the devices ON at that particular time.)

Keypad Button Grouping for Fanlinc Control

After linking a keypad to a Fanlinc (#2475F, 2445-xxx), the buttons will still need some setup so that they respond as intended when activated. Follow the steps below to get your Keypad buttons grouped without software.

Start from the keypad with all LEDs off

Step 1:  Tap the A button to turn it ON, then press and hold the set button for 3 seconds.

The A button will begin to flash.

Step 2: Next tap the set button again. (This puts the device into multi-linking mode)

The A button will start rapidly flashing in its multi scene mode.

Step 3: Next press and hold button B for 10 seconds, then button C, and finally Button D. 

As you hold them down you will hear a double beep or chirping sound letting you know they have been properly paired.

Step 4: Tap the A button when finished.

Repeat this process for  buttons B, C, and D.

The next steps should be done with all the buttons in their OFF state.  

Step 5: Tap the A button until it is in the OFF state

Step 6: Press and hold the Set button for 3 seconds

The A button will begin to flash.

Step 7: Tap the button again to put the keypad into multi linking mode.

The A button will start rapidly flashing.

 Step 8: Next press and hold button B for 10 seconds, then button C, and finally Button D.  

If the Buttons are backlit, simply tap them once so they turn off then press and hold for 10 seconds.

As you hold the buttons down you will hear a double beep, or chirping sound, letting you know they have been properly paired.

Step 9: Tap the A button when finished.

Repeat this process for all other buttons, starting at B, then at C, and finally at D so that all buttons will control all other buttons.  This will help to make sure that the Keypad LED reflects the current fan speed.

When finished, tap the buttons to make sure that they are turning On/Off as you press other buttons.

For further instructions, the link below will take you to a video that demonstrates this process.

Button Grouping How To Video

How to Wire the Water Shutoff Valve

Follow the steps below on how to properly wire and setup your Insteon Water Shutoff Valve.

Parts required:

2450 - Insteon I/O Linc

70275 - 3/4" Electronic Water Shutoff Valve

70412 - 12V DC Power Supply for Water Shutoff Valve

Wiring Instructions:

Step 1: From the Valve, wire the Green wire to the N/C terminal on the I/O Linc

Step 2: From the Valve, wire the Red wire to the N/O terminal on the I/O Linc.

Step 3: From the power supply***, wire the positive side to the COM terminal on the I/O Linc

***You will need to cut off the barrel of the power supply so you can wire the leads into the IO Linc

Step 4: From the Valve, wire the black wire to the unused wire on the power supply.

After you have finished wiring the shutoff valve to the I/O Linc, plug the I/O Linc into the wall for power. Tap the set button on the side of the I/O Linc. Each press will cause the shutoff valve to close, or open. You can now link the I/O Linc into your Hub app, or manually link it to an Insteon controller, like a water leak sensor.


Calibrating an Insteon Thermostat

Temperature Calibration

Note: Use a calibrated temperature or humidity source when adjusting Insteon Thermostat
1) Press and hold the Program button (The display will go blank). Tap Time/Sensor to enter Temperature Calibration Mode.
2) Tap Mode to step between temperature calibration and humidity calibration.
3) Tap Up or Down arrows to adjust the displayed temperature to match the calibrated source.

Humidity Calibration

1) Once in Setup Mode for temperature calibration (step 1 above), tap Mode button to step between temperature calibration and humidity calibration.
2) Press the Up or Down arrow to select the current humidity level.
3) Press Program to exit calibration mode.
 

Change LED Brightness Levels (Keypads)

Adjust LED Brightness

Keypad LEDs can be set to any one of 32 brightness levels.
If KeypadLinc in 6-Button Configuration
 

  1. Simultaneously tap the A and D buttons

                            Keypad will beep
 

  1. Use the On and Off buttons to adjust the LED brightness
     
  2. When you have reached the desired brightness, simultaneously tap the A and D buttons again

                            Keypad will beep


If Keypad in 8-Button Configuration
 

  1. Simultaneously tap the C and F buttons

                            Keypad will beep
 

  1. Press and hold the On button to adjust the LED brightness. (The button will toggle between brightening and dimming.)
     
  2. When you have reached the desired brightness, simultaneously tap the C and F buttons

                             Keypad will beep

Change LED Brightness Levels (Switchlincs)

Change LED Backlight Brightness


Default = 50% bright.
 

Press and hold Set button until it beeps

            LED will start blinking
 

  1. Press and hold Set button until it beeps

            LED will continue blinking
 

  1. Press and hold Set button until it beeps

            LED will stop blinking
 

  1. Use SwitchLinc on and/or off buttons to brighten or dim LEDs to desired level
     
  2. Tap Set button

            SwitchLinc will double beep and return to ready mode

Installing Multi-way Circuits


Insteon Installation – Circuit with 3 (or more) Switches

Circuits with 3 or more switches are called 4-way (or 5-way, etc.) or multi-way. All switches in multi-way circuits need to be replaced by Insteon devices. Traditional switches also use traveler wires to get electricity from one switch to the next in a multi-way set-up. Since Insteon does not use traveler wires, you will need to turn those traveler wires into line wires so that you can provide power to the other Insteon switches. Then, link the switches together so that they all operate the same way. See the steps below for general instructions on how to do this.

Step 1: Turn off circuit breaker(s) and/or remove fuse(s) feeding wall boxes (verify that power is off)
Step 2: Pull all three switches from their wall boxes (4-way and higher switches have 3 or 4 wires).

***We recommend taking a picture of the wiring before you undo everything just in case.

Step 3: Remove wires from existing switches
Step 4: Make sure wires are safely separated from each other and turn power back on
Step 5: Using a voltage meter measure each wire to ground in all three boxes until you find the single wire supplying line voltage

  • We will now refer to that location as Box 1

  • The location having 2 sets of matching pairs of wires will be Box 2 (i.e. 2 reds and 2 blacks, or other matching colors). There are 2 travelers from Box 1 and 2 travelers leading to Box 3

  • The last box will have the load wire. That will be Box 3 


Step 6: Turn power back off

In Box 1

Step 1: Connect the switches bare copper wire to ground
Step 2: Connect the switches white wire to neutral
Step 3: Cap the switches red wire
Step 4: Connect the switches black wire to line plus one traveler (preferably black) and note color of the traveler you are using as this will carry line voltage to Box 2. This will supply the other Insteon switches with power.
Step 5: Cap any unused traveler wire.

In Box 2

Step 1: Connect the switches bare copper wire to ground
Step 2: Connect the switches white wire to neutral
Step 3: Cap the switches red wire
Step 4: Connect the switches black wire to same color traveler from Box 1 that you connected to line along with same color traveler wires leading to Box 3.
Step 5: Cap the last unused traveler wire(s)

In Box 3 (Load)

Step 1: Connect the switches bare copper wire to ground
Step 2: Connect the switches white wire to neutral
Step 3: Connect the switches red wire to load
Step 4: Connect the switches black wire to line traveler from Box 2 (Line traveled from Box 1 through 2 into 3 usually black)
Step 5: Cap any unused traveler wire
Step 6: With the LEDs on the left, gently place the switches into the wall boxes and screw in place
Step 7: Turn power back on


  • The switches and connected load will turn on


Step 8: Add all the switches to a group. See “Groups”
Step 9: Verify all SwitchLincs are working properly by tapping each on and off


  • All the switches and the connected load will remain in sync


Step 10: Reinstall wall plates


Groups
 

(3-way linking)


Devices in a group remain synchronized. Every device in a group is both a controller of and a responder to all the other devices. The most common example of a group is a circuit with 2 switches (referred to as a 3-way circuit).

Example group for a ‘virtual’ 3-way circuit with switch “A” and switch “B”:


Step 1: Turn both A and B on
Step 2: Press and hold A’s Set button down until it beeps
 

  • A’s LED will start blinking


Step 3: Press and hold B’s Set button down until it double-beeps
 

  • A will double-beep and its LED will stop blinking (A is now a controller of B).


Step 4: With both switches still on press and hold B’s Set button until it beeps
 

  • B’s LED will start blinking


Step 5: Press and hold A’s Set button down until it double-beeps
 

  • B will double-beep and its LED will stop blinking (B is now a controller of A)


  • A and B are now grouped


Step 6: Test by turning load on and off from A and then B
 

  • The load(s) and both A and B LEDs will remain in synch


 (multi-way linking)


Example group for a ‘virtual’ 3-way circuit with switch “A,” switch “B,” and switch “C”:


Step 1: Turn A, B and C on
Step 2: Press and hold A’s Set button down until it beeps
 

  • A’s LED will start blinking


Step 3: Tap A’s set button one (1) time. It will beep one time.
 

  • A’s LED is start double-blinking


Step 4: Press and hold B’s Set button down until it double-beeps
 

  • A will double-beep and its LED will keep blinking (A is now a controller of B).


Step 5: Press and hold C’s set button down until it double-beeps.
 

  • A will double-beep and its LED will keep blinking (A is now a controller of C).


Step 6: Tap the set button on A to exit linking mode.
Step 7: Press and hold B’s Set button down until it beeps
 

  • B’s LED will start blinking


Step 8: Tap B’s set button one (1) time. It will beep one time.
 

  • B’s LED is start double-blinking


Step 8: Press and hold A’s Set button down until it double-beeps
 

  • B will double-beep and its LED will keep blinking (B is now a controller of A).


Step 9: Press and hold C’s set button down until it double-beeps.
 

  • B will double-beep and its LED will keep blinking (B is now a controller of C).


Step 10. Tap the set button on B to exit linking mode.
Step 11: Press and hold C’s Set button down until it beeps
 

  • C’s LED will start blinking


Step 12: Tap C’s set button one (1) time. It will beep one time.
 

  • C’s LED is start double-blinking


Step 13: Press and hold A’s Set button down until it double-beeps
 

  • C will double-beep and its LED will keep blinking (C is now a controller of A).


Step 14: Press and hold B’s set button down until it double-beeps.
 

  • C will double-beep and its LED will keep blinking (C is now a controller of B).


Step 15: Tap the set button on C to exit linking mode.


Verify operation by testing each switch to make sure that they all control and respond to each other.

Insteon LED Bulb not Turning On (No Insteon Hub)

When the LED Bulb ships from the factory, its default setting, when powered ON, is to be at 100% ON. This is so that when the bulb is linked, it will be visible to the user. Sometimes, you will get a bulb that does not turn on, or, the bulb was off when it was moved from one fixture to another. When the bulb is linked in these situations, it will link at 1% intensity, which has no visibility of being ON. This does not mean that the bulb is broken; you just need to perform some troubleshooting steps to correct the issue. You will need the LED bulb and some sort of controller, i.e. switch, remote, etc…

1. Find a fixture that we can use to screw in the LED Bulb. Ensure that the fixture is on.
2. Using a controller, make sure you tap the “ON” portion of the device so it knows it should be “ON” and press and hold the “set” button for 3 seconds to put the device into linking mode.
3. Screw in the LED bulb.
4. From the controller, you should hear a double beep indicating that the LED Bulb linked to that device.
5. On the controller you will need to double-tap the “ON” button. This is a “fast-on” command that will cause the LED bulb to go to full intensity.
6. We now have the LED bulb in its proper linking position.
7. Unscrew the led bulb, while ON. It should not be hot at this point.
8. Tap the ON part of the controller, just to be safe, and then press and hold the “set” button for 3 seconds to put the controller back into linking mode.
9. Screw the LED Bulb back in. It will now link at full intensity and work normally

Common SMTP Mail Settings for Wi-Fi Camera

Issue: Not able to configure email settings and/or not able to get a successful e-mail test on your Insteon IP Camera

Solution: Please see below for common SMTP Settings. (Note, while these settings work for most users, you may need to contact your email provider for you specific settings)

Aol:
  smtp server: smtp.aol.com     
  smtp port: 587
  Transport layer security: starttls

Apple/iCloud/Me:
  smtp server: smtp.mail.me.com     
  smtp port: 587
  Transport layer security: starttls

AT&T/SBC Global:
  smtp server: smtp.att.yahoo.com
  smtp port: 465
  Transport layer security: tls

Comcast:
  smtp server: smtp.comcast.net
  smtp port: 465
  Transport layer security: tls

Gmail:
  smtp server: smtp.gmail.com       
  smtp port: 587
  Transport layer security: starttls

Hotmail/MSN/Outlook/Live:
  smtp server: smtp.live.com      
  smtp port: 587
  Transport layer security: starttls

RoadRunner:
  smtp server: smtp-server.<location>.rr.com     
  smtp port: 587
  Transport layer security: starttls

Time Warner:
  smtp server: mail.twc.com     
  smtp port: 587
  Transport layer security: starttls

Verizon:
  smtp server: smtp.verizon.net     
  smtp port: 587
  Transport layer security: starttls

Yahool:
  smtp server: smtp.mail.yahoo.com      
  smtp port: 465
  Transport layer security: tls