
Starter Kit Setup

Starter Kit Setup

Starter Kit Setup

Dimmer Switch (2-Wire) Setup


Getting Started

Turn off power at the service panel and remove the existing wall switch.
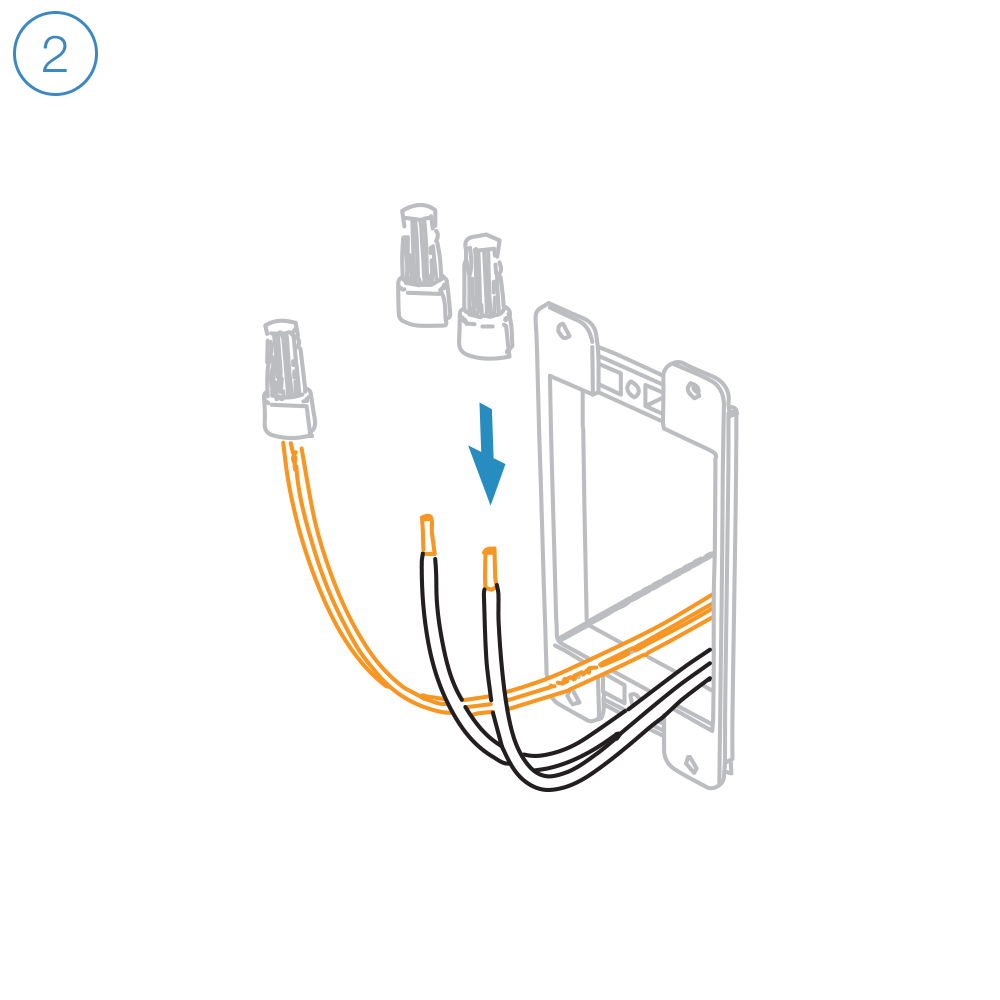
Unfold all of the wires from within the junction box. Separate the black wires and cap them with wire nuts.

Turn on power and use a voltage detector to identify the live wire; this is your line wire.

Turn off power and connect the corresponding wires from the junction box with the Insteon Wall Switch an cap them with wire nuts.

Install Insteon Wall Switch, attach the wall plate and turn on power.
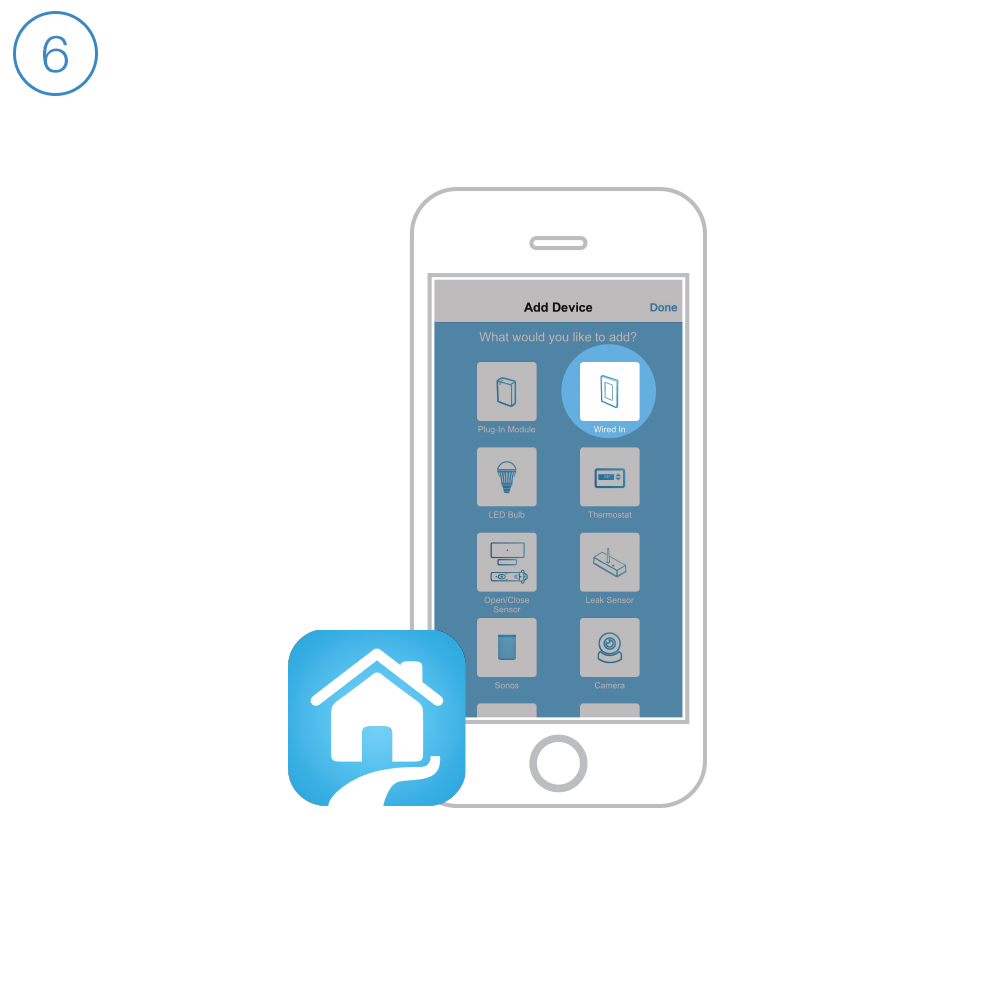
Follow the on-screen instructions in the Insteon app to add Dimmer Switch.
Bulb Compatibility

Due to how this dimmer is able to work using only 2 wires, it is only recommended to use incandescent bulbs.
Dimmer Switch (2-Wire) is able to avoid need of a neutral wire by completing an electrical circuit through the connected load. Bulbs that include a power supply like LED and CFL bulbs may emit a soft glow even when the switch is turned off. However, we have seen applications where dimmable LED bulbs do function with this switch. Typically higher quality LED bulbs and more than one being controlled.
Guides and Manuals
Quick Start Guide
Featured

Owner's Manual
Featured
Starter Kit Setup

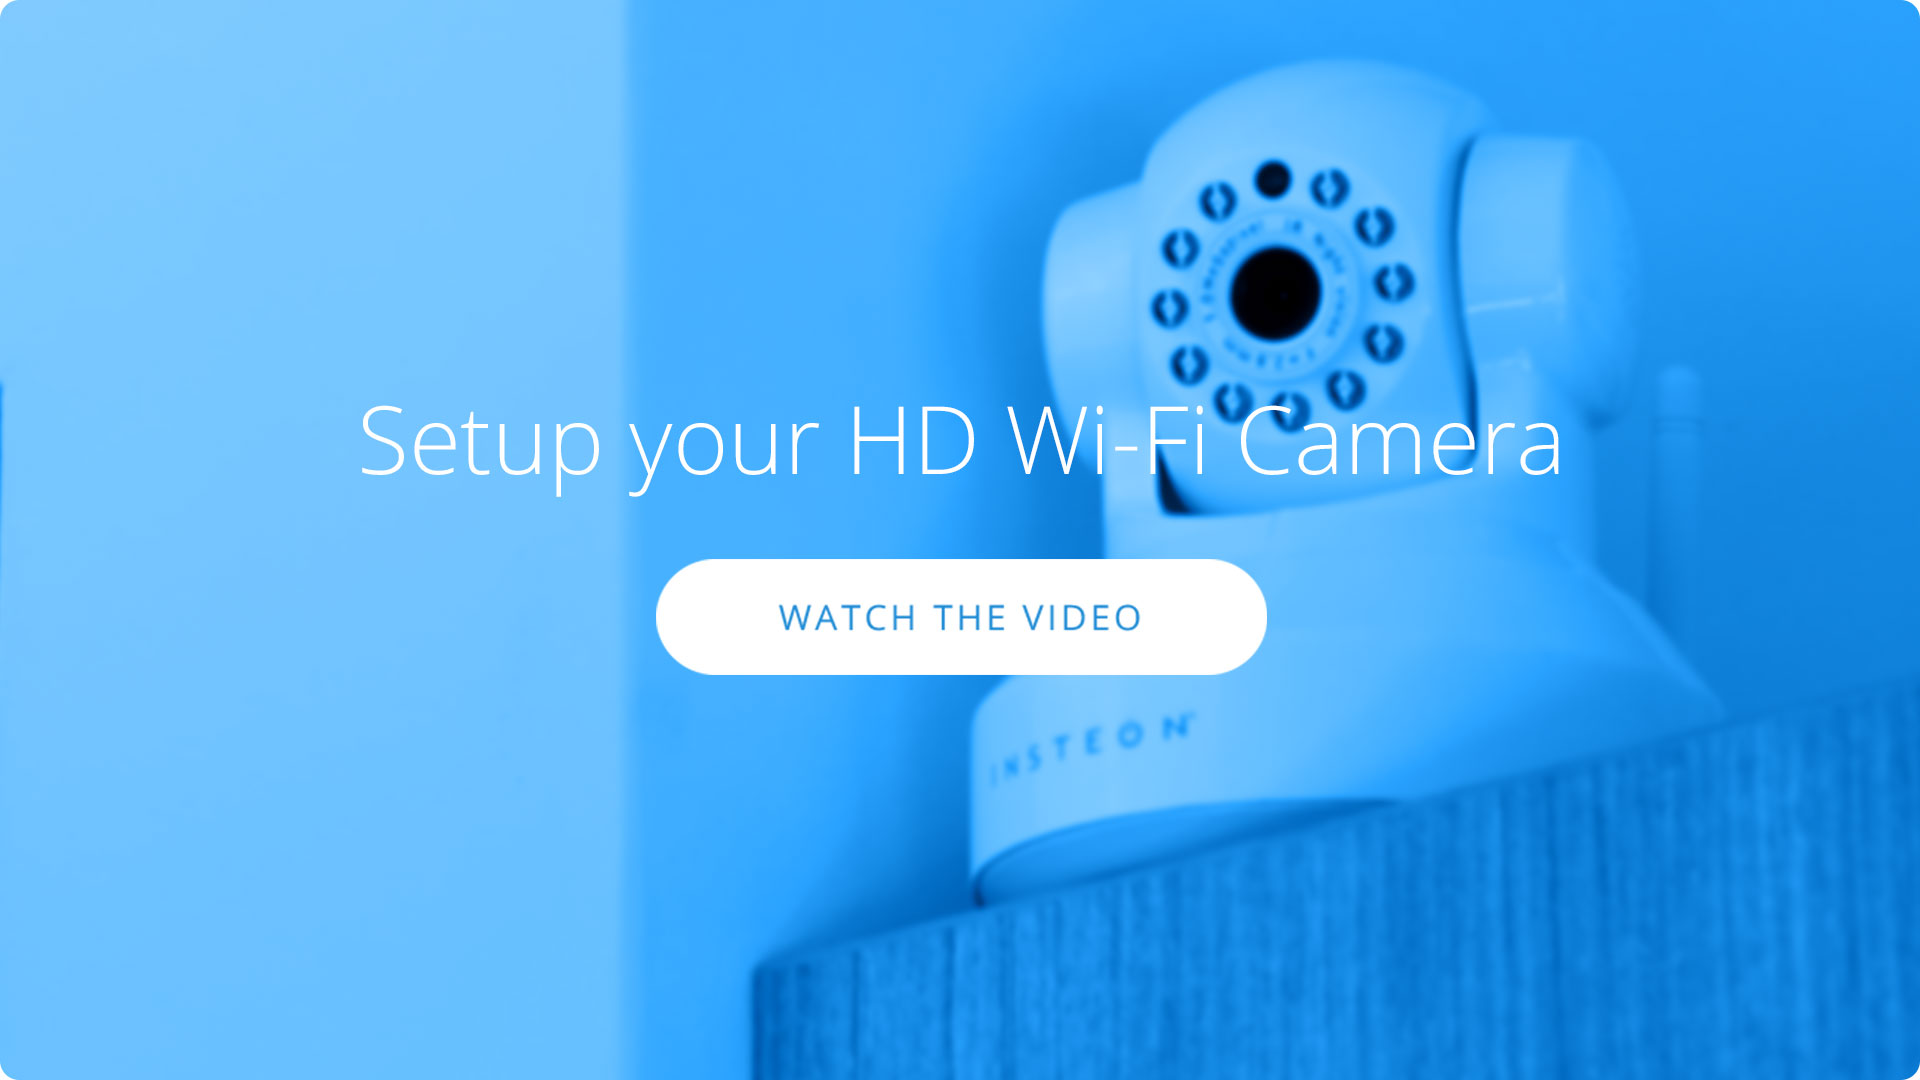
Wi-Fi Camera Setup
Getting Started

Connect the ethernet cable to your router and plugin the power adapter. You can disconnect the ethernet cable after setup is complete.

Connect the cables to your camera.

Guides, Manuals and Downloads
Quick Start Guide
Featured


Owner's Manual
Featured

Downloads
Featured

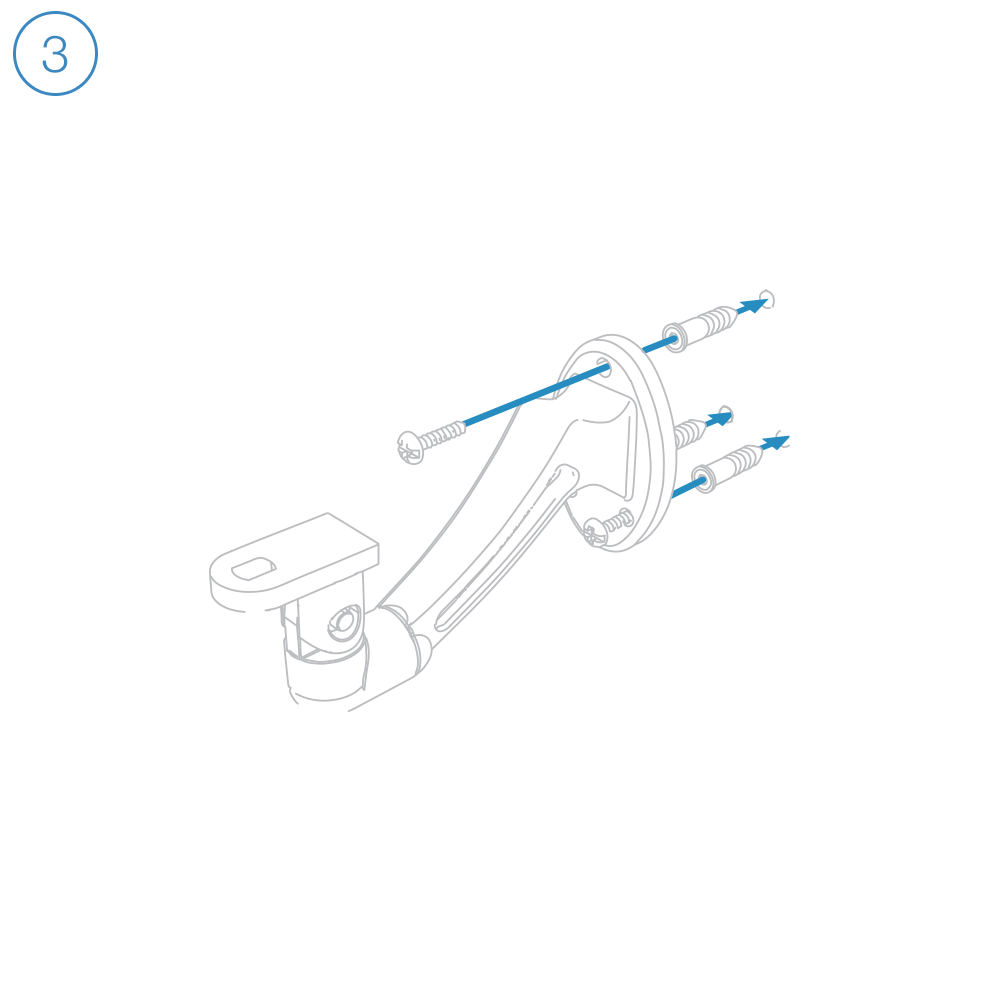
Optional Wall Mount
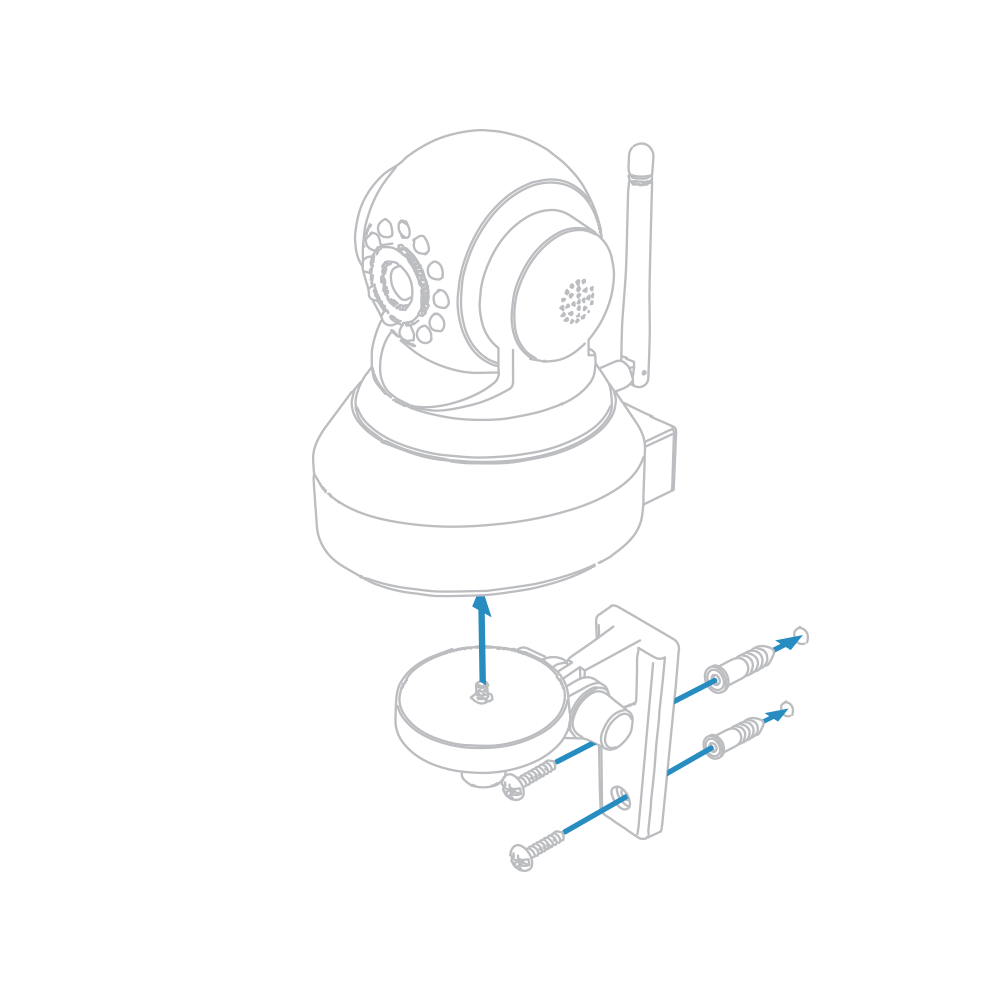
Mount the optional bracket using screws and wall anchors.
Camera Firmware

Current Wi-Fi Camera Firmware
Device 11.37.2.59Web UI 2.001.10.9
Outdoor Wi-Fi Camera Setup
As of December 31 2016 Insteon will no longer provide technical support for standard definition cameras (75791)
Getting Started

Connect the ethernet cable to your router and plugin the power adapter. You can disconnect the ethernet cable after setup is complete.

Connect the cables to your camera.
Mount the bracket using screws and wall anchors.

Position your camera and affix it with the set screw. Secure camera connections in a weather-resistant enclosure.

Guides, Manuals and Downloads
Quick Start Guide
Featured
Owner's Manual
Featured

Downloads
Featured
Camera Firmware
Keep your Outdoor Wi-Fi Camera up-to-date; updates add features, fix bugs and close potential security vulnerabilities.

Current Outdoor Wi-Fi Camera Firmware
Device 11.35.2.59Web UI 2.001.20.6
Outdoor HD Wi-Fi Camera Setup
Getting Started

Connect the ethernet cable to your router and plugin the power adapter. You can disconnect the ethernet cable after setup is complete.

Connect the cables to your camera.

Mount the bracket using screws and wall anchors.

Position your camera and affix it with the set screw. Secure camera connections in a weather-resistant enclosure.

Guides, Manuals and Downloads
Quick Start Guide
Featured

Owner's Manual
Featured

Downloads
Featured
Camera Firmware
Keep your HD Outdoor Wi-Fi Camera up-to-date; updates add features, fix bugs and close potential security vulnerabilities.

Current HD Outdoor Wi-Fi Camera Firmware
Camera Revision 5.0 or Later
System 1.9.3.16Application 2.51.2.33
HD Wi-Fi Camera Setup
Getting Started

Connect the ethernet cable to your router and plugin the power adapter. You can disconnect the ethernet cable after setup is complete.

Connect the cables to your camera.

Open the Insteon for Hub app and select Add a Camera. Insteon cameras require Insteon Hub.
Guides, Manuals and Downloads
Quick Start Guide
Featured

Owner's Manual
Featured
Downloads
Featured
Optional Wall Mount

Mount the optional bracket using screws and wall anchors.
Basic Troubleshooting
Camera Firmware
Keep your HD Wi-Fi Camera up-to-date; updates add features, fix bugs and close potential security vulnerabilities.

Current HD Wi-Fi Camera Firmware
Camera Revision 1.0 - 3.9
System 1.4.1.9Application 2.11.1.12
Current HD Wi-Fi Camera Firmware
Camera Revision 4.0 or Later
System 1.9.3.16Application 2.51.2.33

