Dimmer Switch (2 conducteurs) - Guide de Rapid Départ

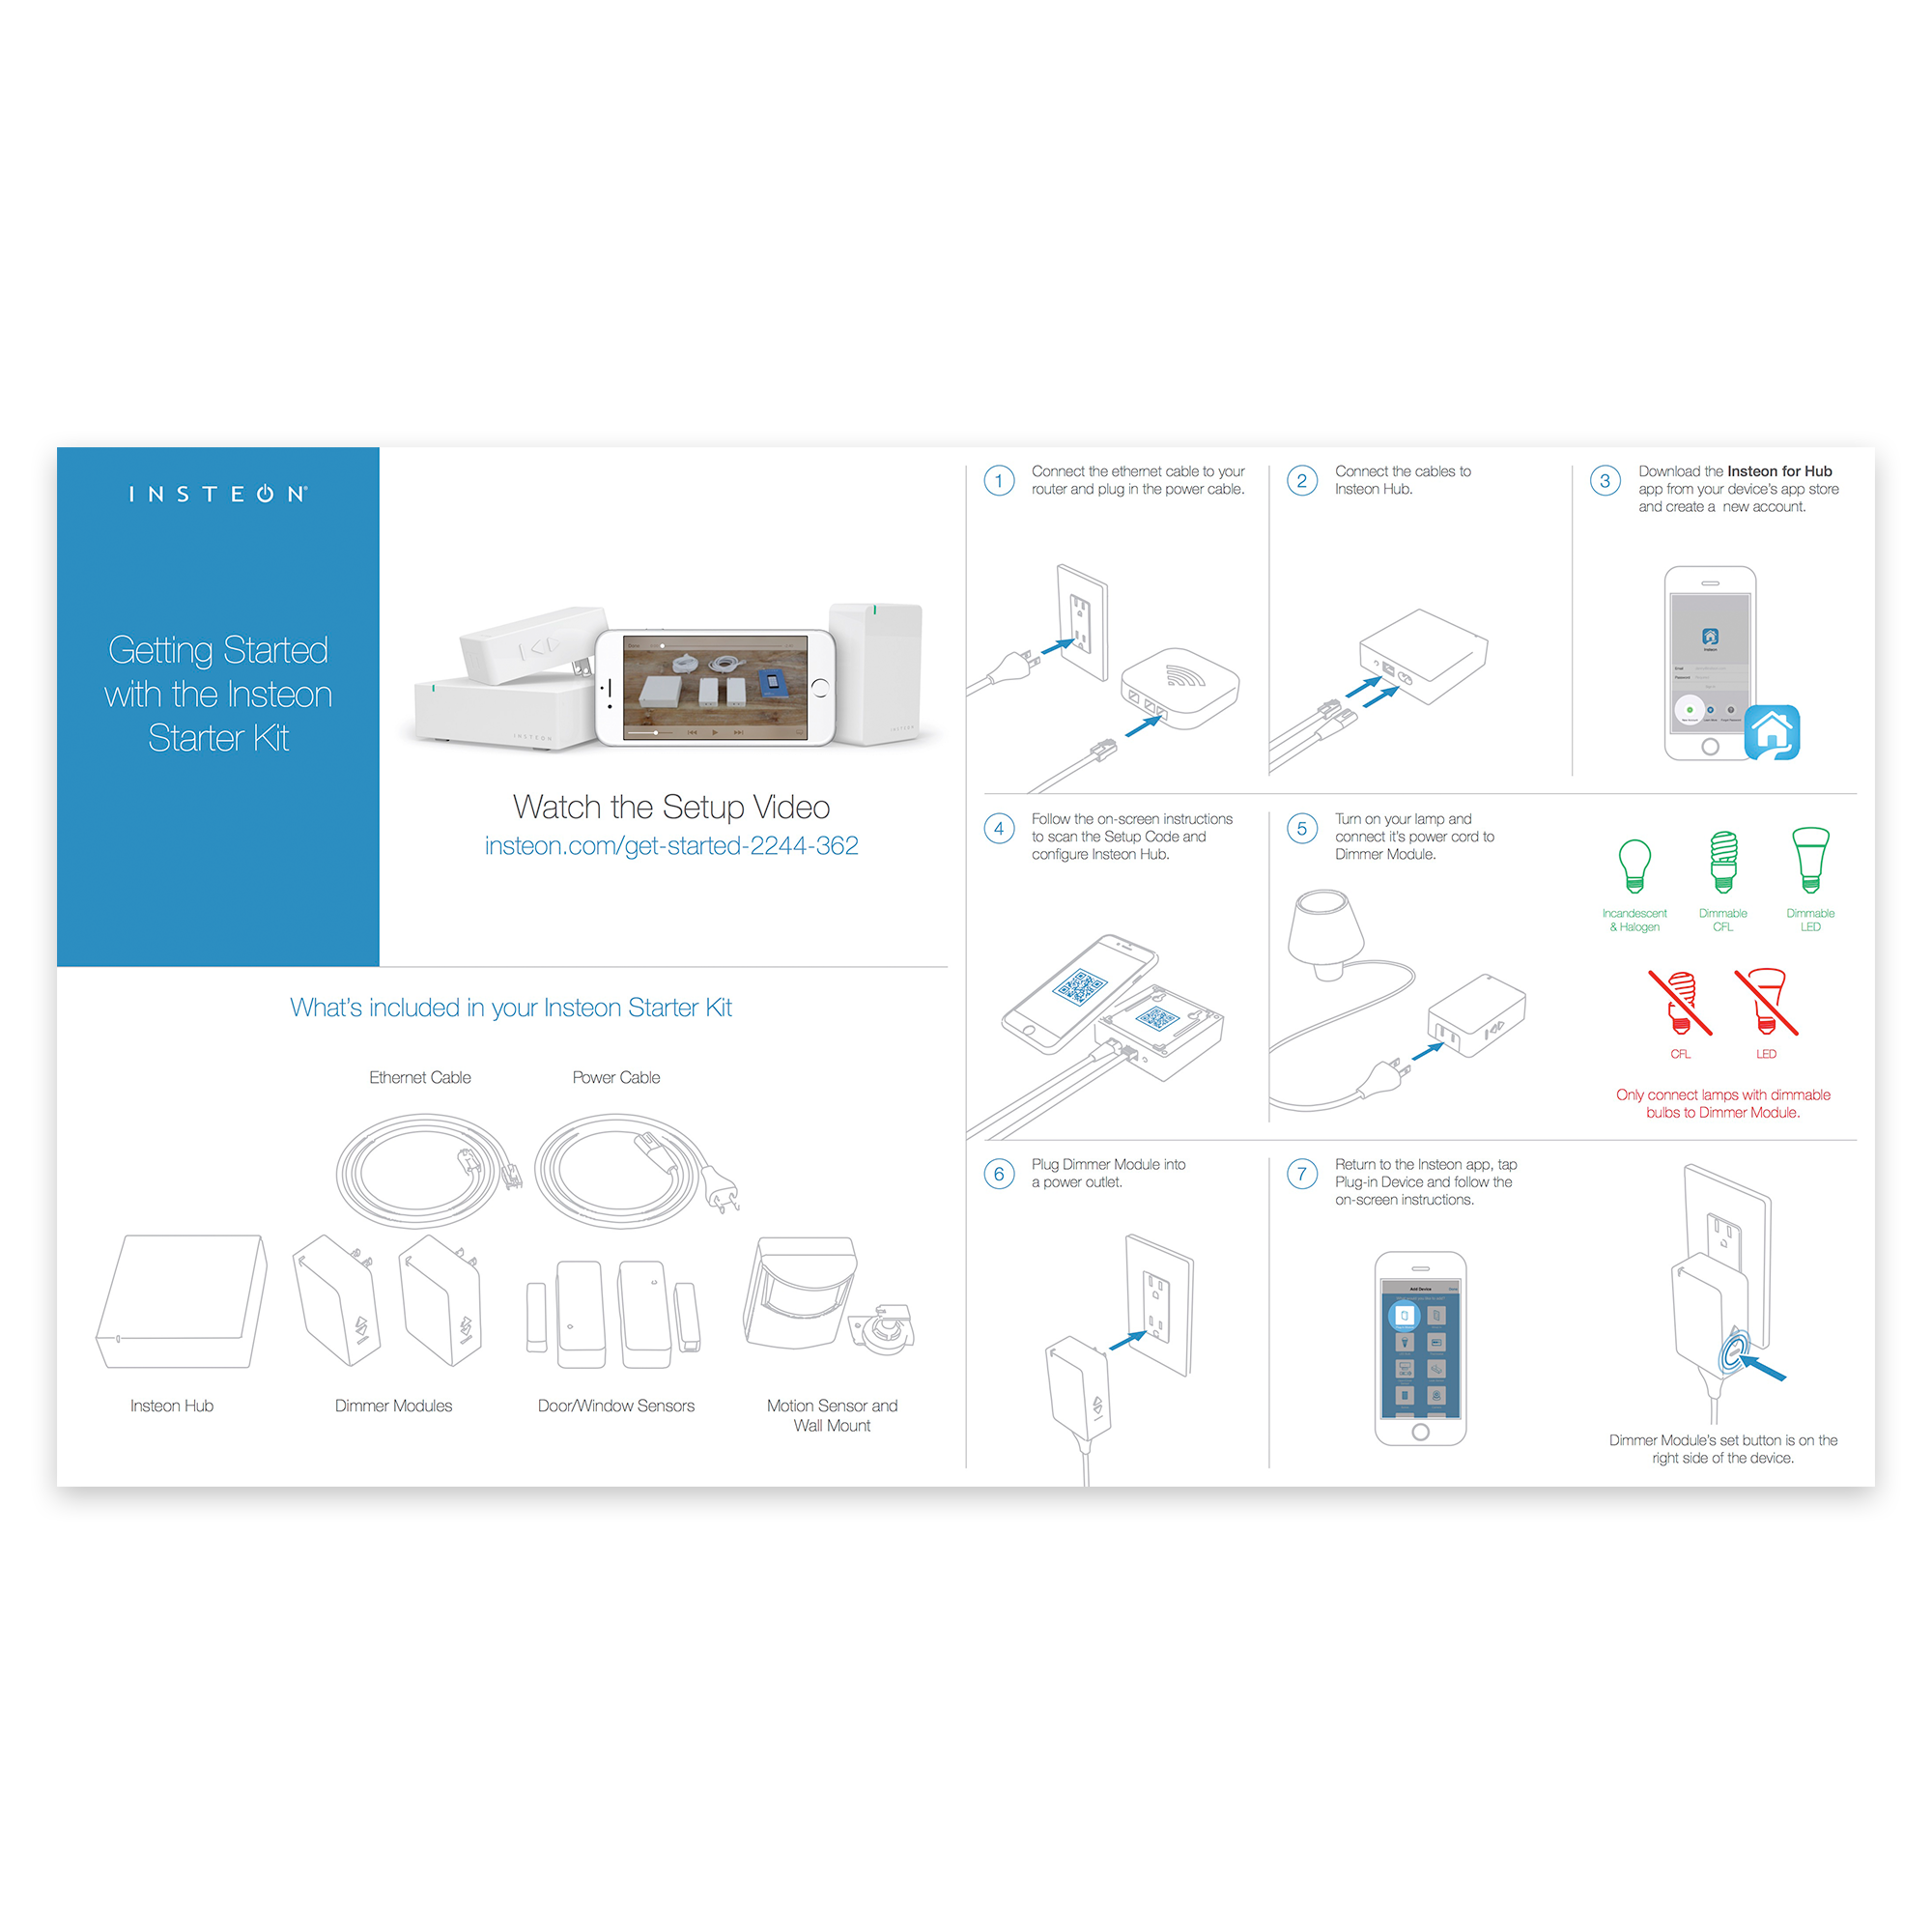
Starter Kit - Quick Start Guide

Dimmer Switch (2-Wire) - Quick Start Guide

Dimmer Switch (2-Fil) Instructions


Commencer
Coupez l'alimentation électrique au panneau de service et retirer l'interrupteur mural existant.

Déplier tous les fils à l'intérieur du boîtier de jonction. Séparer les fils noirs et les plafonner avec des noix de fil.

Mise sous tension et utiliser un détecteur de tension pour identifier le fil conducteur; ceci est votre fil de ligne.

Coupez l'alimentation et connecter les fils correspondants de la boîte de jonction avec le mur Insteon Mettre un bouchon avec les écrous de fil.
Installer commutateur Insteon mur, fixez la plaque murale et mettez sous tension.

Suivez les instructions à l'écran dans l'application Insteon ajouter Dimmer Switch.
Compatibilité ampoule

Ne raccordez que les ampoules à incandescence à gradateur (2-Fil).
Commutateur gradateur (2-Fil) est en mesure d'éviter le besoin d'un fil neutre en remplissant un circuit électrique à travers la charge connectée. Ampoules qui incluent une alimentation électrique comme les ampoules LED et de la LCF peuvent émettre une lumière douce, même lorsque l'interrupteur est éteint.
Guides et manuels
Guide de départ rapide
Le manuel du propriétaire
Featured
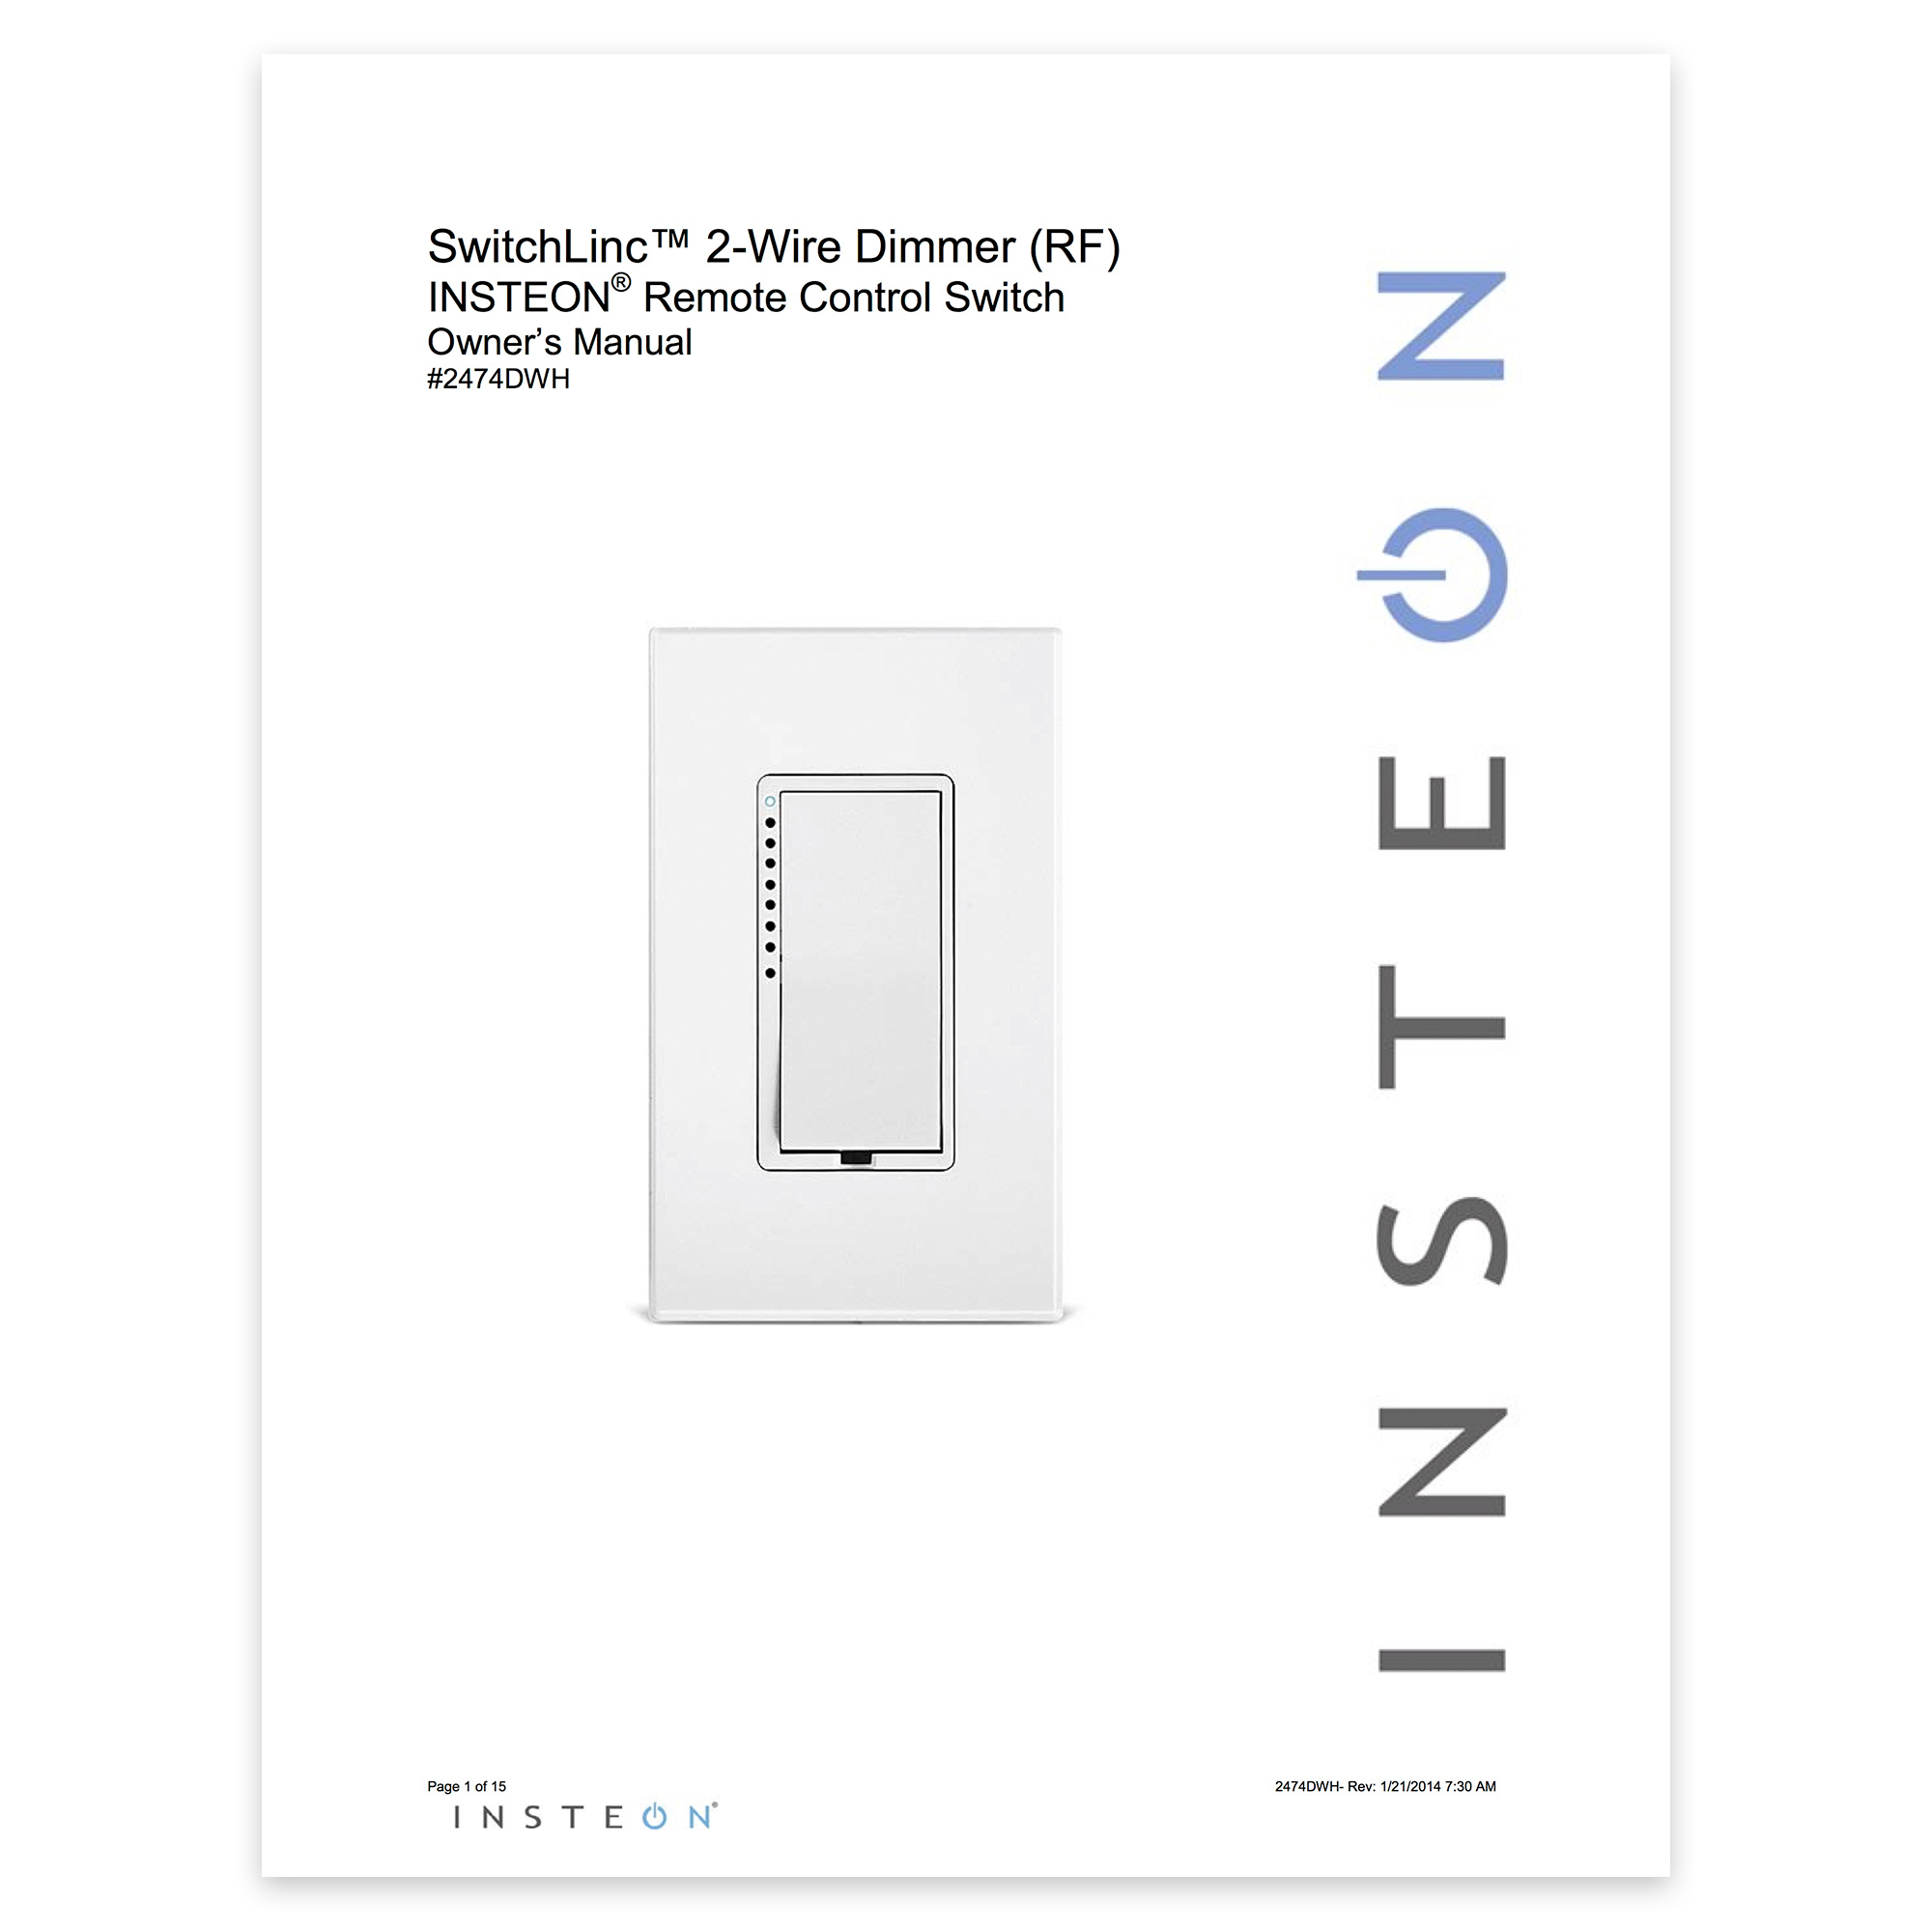
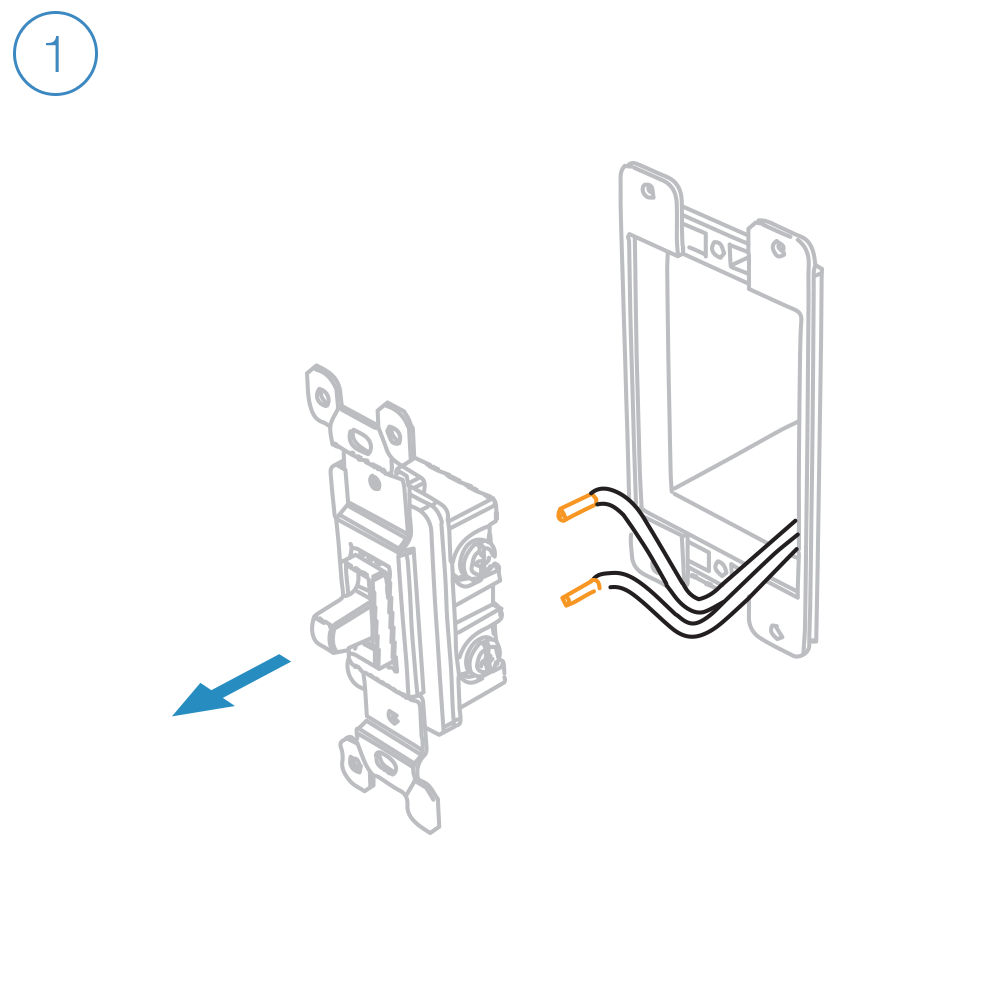
Dimmer Switch (2-Wire) Setup


Getting Started

Turn off power at the service panel and remove the existing wall switch.
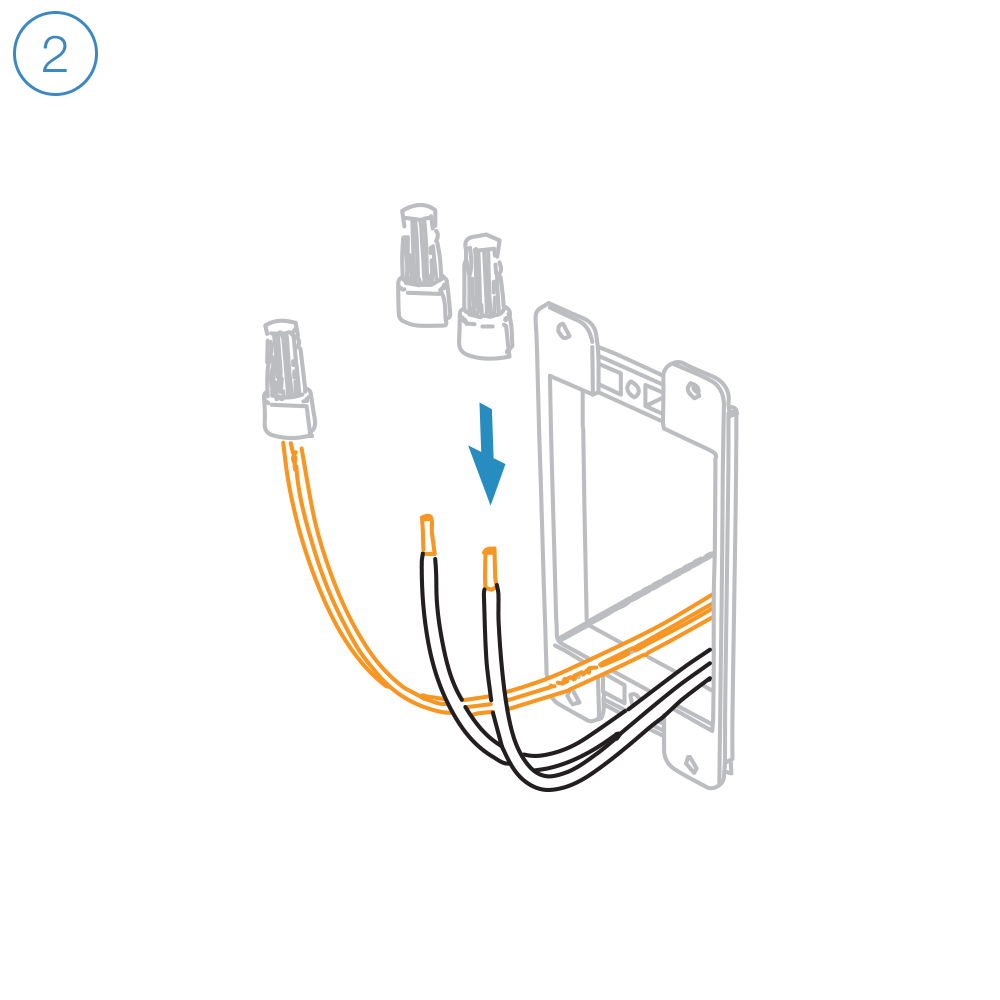
Unfold all of the wires from within the junction box. Separate the black wires and cap them with wire nuts.

Turn on power and use a voltage detector to identify the live wire; this is your line wire.

Turn off power and connect the corresponding wires from the junction box with the Insteon Wall Switch an cap them with wire nuts.

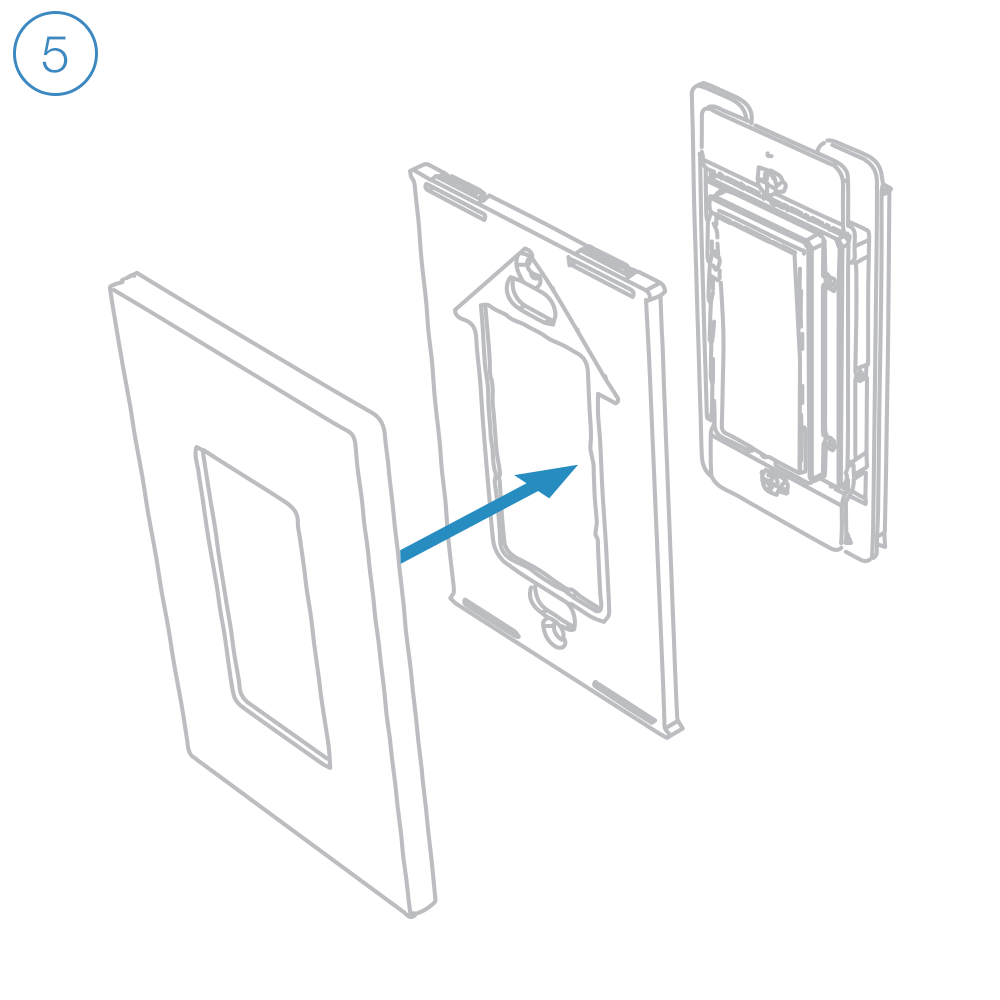
Install Insteon Wall Switch, attach the wall plate and turn on power.

Follow the on-screen instructions in the Insteon app to add Dimmer Switch.
Bulb Compatibility

Due to how this dimmer is able to work using only 2 wires, it is only recommended to use incandescent bulbs.
Dimmer Switch (2-Wire) is able to avoid need of a neutral wire by completing an electrical circuit through the connected load. Bulbs that include a power supply like LED and CFL bulbs may emit a soft glow even when the switch is turned off. However, we have seen applications where dimmable LED bulbs do function with this switch. Typically higher quality LED bulbs and more than one being controlled.
Guides and Manuals
Quick Start Guide
Featured

Owner's Manual
Featured
Automatically Turn Lights On and Off with Sensors

Create Virtual Multi-Way Switches with Director

Amazon Alexa and Supported Insteon Thermostats
Amazon Alexa supports control of several different Insteon Thermostats; you can increase or decrease the temperature and change modes just by asking Alexa. Use the information in this article to identify if you have a compatible Insteon Thermostat.
If you have a supported Thermostat and your Amazon Alexa was configured prior to 18 March 2016, you may need to re-run discovery to identify your Insteon Thermostat. Simply say, "Alexa, discover my devices." Your Amazon Alexa should find your Insteon Thermostats and enable voice control.
Supported Insteon Thermostats
These Insteon Thermostats are compatible with Amazon Alexa and allow full voice control functionality of setting temperature and changing modes.
Insteon Wired Thermostat
- Model 2441TH (Revision 1.1 or later)

Unsupported Insteon Thermostats
These Insteon Thermostats are not explicitly incompatible with Amazon Alexa but are not guaranteed to function as expected.
Insteon Thermostat for Heat Pumps
- Model 2732-242 (Any Revision)

Incompatible Insteon Thermostats
These Insteon Thermostats are incompatible with Amazon Alexa and cannot be controlled.
Insteon Wired Thermostat
- Model 2441TH (Revision 1.0)

Insteon Wireless Thermostat
- Model 2441ZTH
- Model 2441ZTHR
- Model 2732-433
- Model 2732-432

Insteon Venstar Thermostat Adapter
- Model 2441V
- Model 2441VR

Insteon Venstar Integrated Thermostat
- Model 2491T1E
- Model 2491T1ER
- Model 2491T7E
- Model 2491T7ER

Resetting Insteon Hub Time and Location
Deleting your Insteon Account
Communication Types for Insteon Devices
Use this article to determine if your Insteon device can communicate with other Insteon devices via powerline-only, RF-only or powerline and RF (dual-band).
| Powerline | RF | |||
| Dimmer Module | 2456D3 | - | ||
| 2457D2X | - | |||
| 2457D2 | ||||
| On/Off Module | 2456S3 | - | ||
| 2635-222 | ||||
| Outdoor On/Off Module | 2456S3E | - | ||
| 2634-222 | ||||
| LED Bulb | 2672-222 | |||
| LED Bulb for Recessed Lights | 2674-222 | |||
| i3 Paddle | PS01 | |||
| i3 Dial | DS01 | |||
| Dimmer Switch | 2476D | - | ||
| 2477D | ||||
| Dimmer Switch (1000W) | 2476DH | - | ||
| 2477DH | ||||
| Dimmer Switch (2-Wire) | 2474DWH | - | ||
| On/Off Switch | 2476S | - | ||
| 2477S | ||||
| i3 Keypad | KP014 | |||
| Dimmer Keypad (6-Button or 8-Button) |
2486D | - | ||
| 2334-222 | ||||
| On/Off Keypad (6-Button or 8-Button) |
2486S | |||
| 2334-232 | ||||
| Dimmer Outlet | 2474DWH | |||
| i3 Outlet | WR01 | - | ||
| On/Off Outlet (2014) | 2663-222 | |||
| On/Off Outlet (2007) | 2473SWH | - | ||
| Wired Thermostat | 2441TH | - | ||
| Wireless Thermostat | 2441ZTH | - | ||
| Thermostat Adapter | 2441V | - | ||
| Mini Remote (Wireless Switch) |
2444A3 | - | ||
| 2342-242 | - | |||
| Mini Remote (4-Scene) |
2444A2WH4 | - | ||
| 2342-232 | - | |||
| Mini Remote (8-Scene) |
2444A2WH8 | - | ||
| 2342-222 | - | |||
| Wi-Fi Camera | 75790 | - | - | |
| 75790WH | - | - | ||
| HD Wi-Fi Camera | 2864-222 | - | - | |
| 2864-226 | - | - | ||
| Outdoor Wi-Fi Camera | 75791 | - | - | |
| HD Outdoor Wi-Fi Camera | 2864-232 | - | - | |
| Open/Close Sensor | 2421 | - | ||
| 2843-222 | - | |||
| Hidden Door Sensor | 2845-222 | - | ||
| Motion Sensor | 2420M | - | ||
| 2842-222 | - | |||
| Leak Sensor | 2852-222 | - | ||
| Smoke Bridge | 2982-222 | - | ||
| IO Module | 2450 | - | ||
| Ceiling Fan Controller | 2475F | |||
| Dimmer Micro Module | 2442-222 | |||
| On/Off Micro Module | 2443-222 | |||
| Open/Close Micro Module | 2444-222 | |||
| Ballast Dimmer | 2475DA2 | |||
| Dimmer In-Line Module | 2475D | - | ||
| 2475DA1 | ||||
| On/Off In-Line Module | 2475S2 | - | ||
| 2475SDB | ||||
| 220V Load Controller | 2477SA1 | |||
| 2477SA2 | ||||
| Dimmer DIN Rail Module | 2452-222 | |||
| On/Off DIN Rail Module | 2453-222 | |||
| MorningLinc | 2458A1 | - | ||
| Lock Controller | 2862-222 | - | ||
| IRLinc Transmitter | 2411T | - | ||
| IRLinc Receiver | 2411R | - | ||
| SeriaLinc | 2410S | - | ||
| Access Point | 2443 | |||
| Range Extender | 2992-222 | |||
| Energy Display | 2448A2 | - | ||
| iMeter Solo | 2423A1 | - | ||
| SynchroLinc | 2423A5 | - |
Wired Thermostat - Quick Start Guide

Wi-Fi Camera Setup
Getting Started

Connect the ethernet cable to your router and plugin the power adapter. You can disconnect the ethernet cable after setup is complete.

Connect the cables to your camera.

Guides, Manuals and Downloads
Quick Start Guide
Featured


Owner's Manual
Featured

Downloads
Featured

Optional Wall Mount
Mount the optional bracket using screws and wall anchors.
Camera Firmware

Current Wi-Fi Camera Firmware
Device 11.37.2.59Web UI 2.001.10.9
Outdoor Wi-Fi Camera Setup
As of December 31 2016 Insteon will no longer provide technical support for standard definition cameras (75791)
Getting Started

Connect the ethernet cable to your router and plugin the power adapter. You can disconnect the ethernet cable after setup is complete.

Connect the cables to your camera.
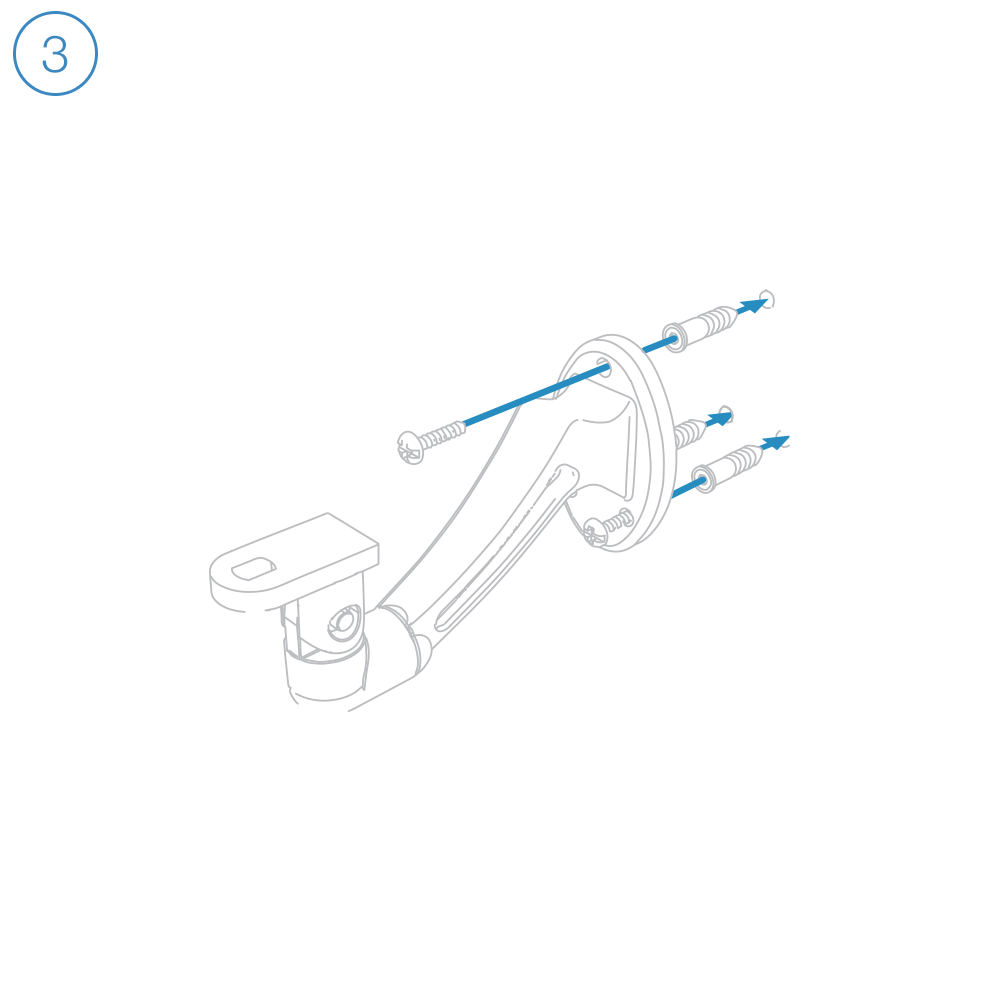
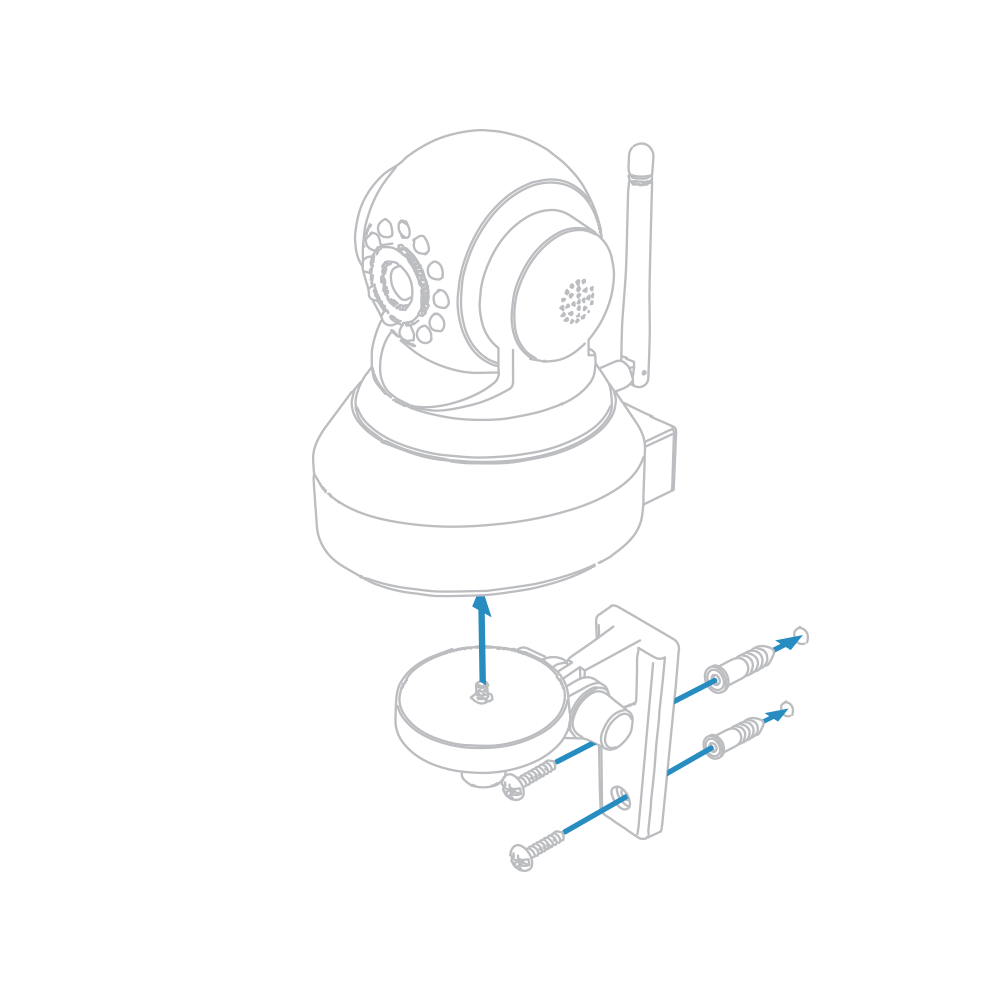
Mount the bracket using screws and wall anchors.

Position your camera and affix it with the set screw. Secure camera connections in a weather-resistant enclosure.

Guides, Manuals and Downloads
Quick Start Guide
Featured
Owner's Manual
Featured

Downloads
Featured
Camera Firmware
Keep your Outdoor Wi-Fi Camera up-to-date; updates add features, fix bugs and close potential security vulnerabilities.

Current Outdoor Wi-Fi Camera Firmware
Device 11.35.2.59Web UI 2.001.20.6
Outdoor HD Wi-Fi Camera Setup
Getting Started

Connect the ethernet cable to your router and plugin the power adapter. You can disconnect the ethernet cable after setup is complete.

Connect the cables to your camera.

Mount the bracket using screws and wall anchors.

Position your camera and affix it with the set screw. Secure camera connections in a weather-resistant enclosure.

Guides, Manuals and Downloads
Quick Start Guide
Featured

Owner's Manual
Featured

Downloads
Featured
Camera Firmware
Keep your HD Outdoor Wi-Fi Camera up-to-date; updates add features, fix bugs and close potential security vulnerabilities.

Current HD Outdoor Wi-Fi Camera Firmware
Camera Revision 5.0 or Later
System 1.9.3.16Application 2.51.2.33
HD Wi-Fi Camera Setup
Getting Started

Connect the ethernet cable to your router and plugin the power adapter. You can disconnect the ethernet cable after setup is complete.

Connect the cables to your camera.

Open the Insteon for Hub app and select Add a Camera. Insteon cameras require Insteon Hub.
Guides, Manuals and Downloads
Quick Start Guide
Featured

Owner's Manual
Featured
Downloads
Featured
Optional Wall Mount

Mount the optional bracket using screws and wall anchors.
Basic Troubleshooting
Camera Firmware
Keep your HD Wi-Fi Camera up-to-date; updates add features, fix bugs and close potential security vulnerabilities.

Current HD Wi-Fi Camera Firmware
Camera Revision 1.0 - 3.9
System 1.4.1.9Application 2.11.1.12
Current HD Wi-Fi Camera Firmware
Camera Revision 4.0 or Later
System 1.9.3.16Application 2.51.2.33
Sonos Player Features and Limitations
Use this article to understand the currently supported features and current limitations of Sonos Player integration.
Supported Features
Control play, pause, volume, and tracks for a Sonos Player from an Insteon Keypad, Mini Remote or Wall Switch
Trigger a Sonos preset from an Insteon Keypad, Mini Remote or Wall Switch
Controlling a Sonos Player from an Insteon device requires creating a scene. Learn more about creating a scene by viewing this article.
Current Limitations
App support is only available on iOS using the Insteon for Hub mobile app
Adding playlists is not currently supported on iOS 14+
A maximum of four Sonos Players can be added to the Insteon app.
Only one Sonos Player can be a member of a scene.
At this time, you are unable to edit Sonos Player functions from within a scene. If you wish to change a Sonos function after a scene has been created, delete the scene and re-create the scene with your desired changes.
At this time, Insteon app-learned presets do not work with all possible Sonos sources. The following sources have been tested and are known to function:
Amazon Music Stations
Apple Music Radio
Pandora Stations
tunein
To facilitate preset playback from an Insteon device, the Insteon app lets you learn source presets. Configuring these playlists is done from within the Insteon app when editing a Sonos Player settings.
You can learn up to ten Insteon app Sonos presets
These presets are shared among all configured Sonos Players
Insteon has tested Sonos support with the following Sonos Players:
Sonos Play:1
Sonos Play:3
Sonos Play:5
Sonos:Connect
Sonos Connect:Amp (ZP series)
Other Sonos Players may work but have not been tested by Insteon
If your Sonos Players or your router are disconnected from power, it may take up to two minutes before your Sonos Players are rediscovered by the Insteon Hub.
Additional Sonos Support
Sonos Player Not Found During Initial Setup
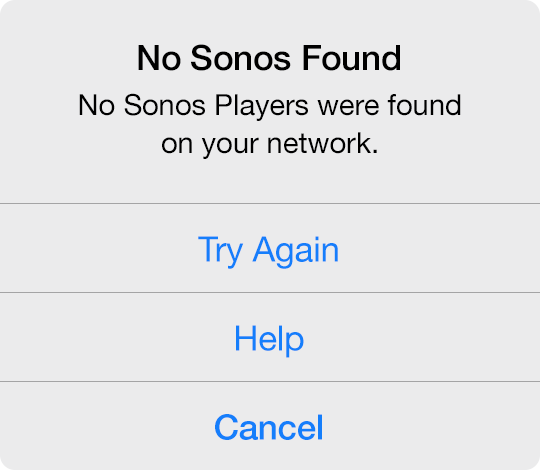
When adding a Sonos Player, you may encounter an alert informing you that the app was unable to find any Sonos Players on your network. There are several reasons why this may occur.
Your Sonos Player is unplugged from power
Your mobile device may be connected to a different Wi-Fi network than your Sonos Player or your mobile device may be connected to cellular only.
Your home's internet router or modem is not functioning properly
Basic Troubleshooting
Ensure that your Sonos Player is connected to a working power outlet. If your Sonos Player is connected via ethernet, check that the ethernet cable is firmly seated. It may be helpful to unplug and reinsert the ethernet cable.
Check to see if you can control your Sonos Player from the Sonos App on your mobile device.
Confirm that your internet router and cable or DSL modem are connected to power and turned on. Learn how to Identify your router and cable or DSL modem.
Try restarting your router and cable or DSL modem.
Additional Sonos Support
You Already Have the Maximum Number of Sonos Players Configured
When adding a Sonos Player, you may encounter a message informing you that you have already configured the maximum number of Sonos Players. Insteon Hub supports a maximum of four Sonos speakers.
Français Canadien