i3 Dial Setup

Sensor No Response - Troubleshooting Sensor Communication Issues
Missing Hub Account Access or Unable to Log In
Insteon Hub Connection Diagnostics
How to find the email address that is associated with your Insteon Hub
If you are unsure which email address is associated with your Insteon Hub, please follow these simple steps.
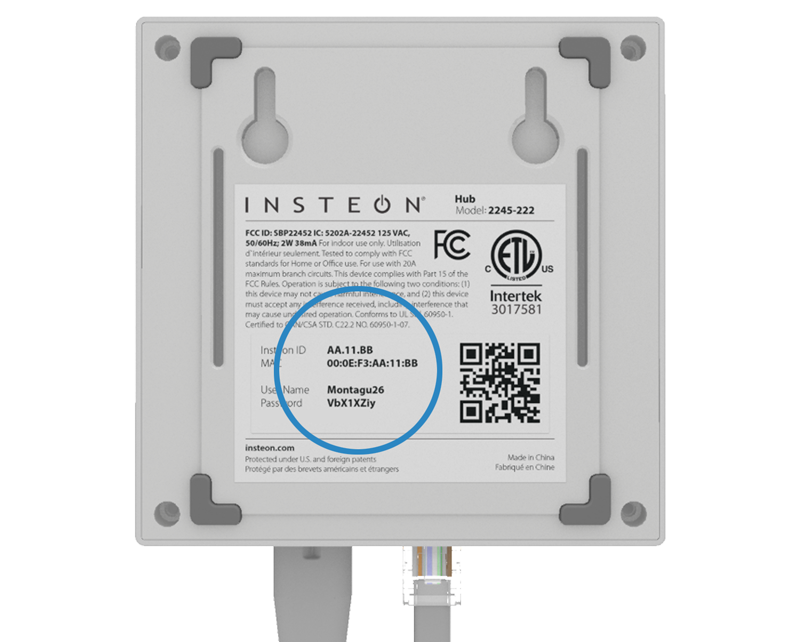
If you are unable to log into the app, contact us at support@insteon.com and include a photo of the bottom of your Hub. We will then provide you with the email associated with that Hub.
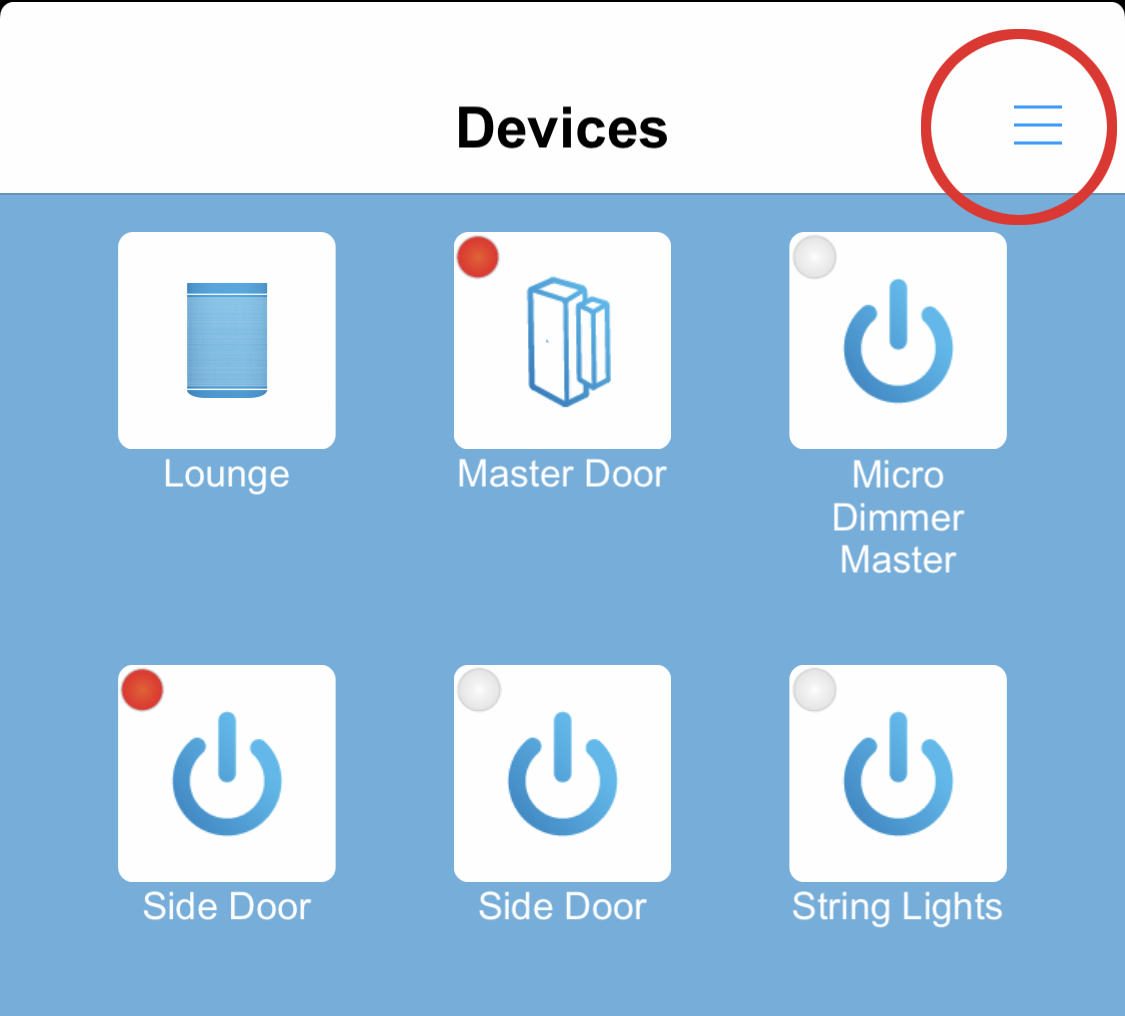
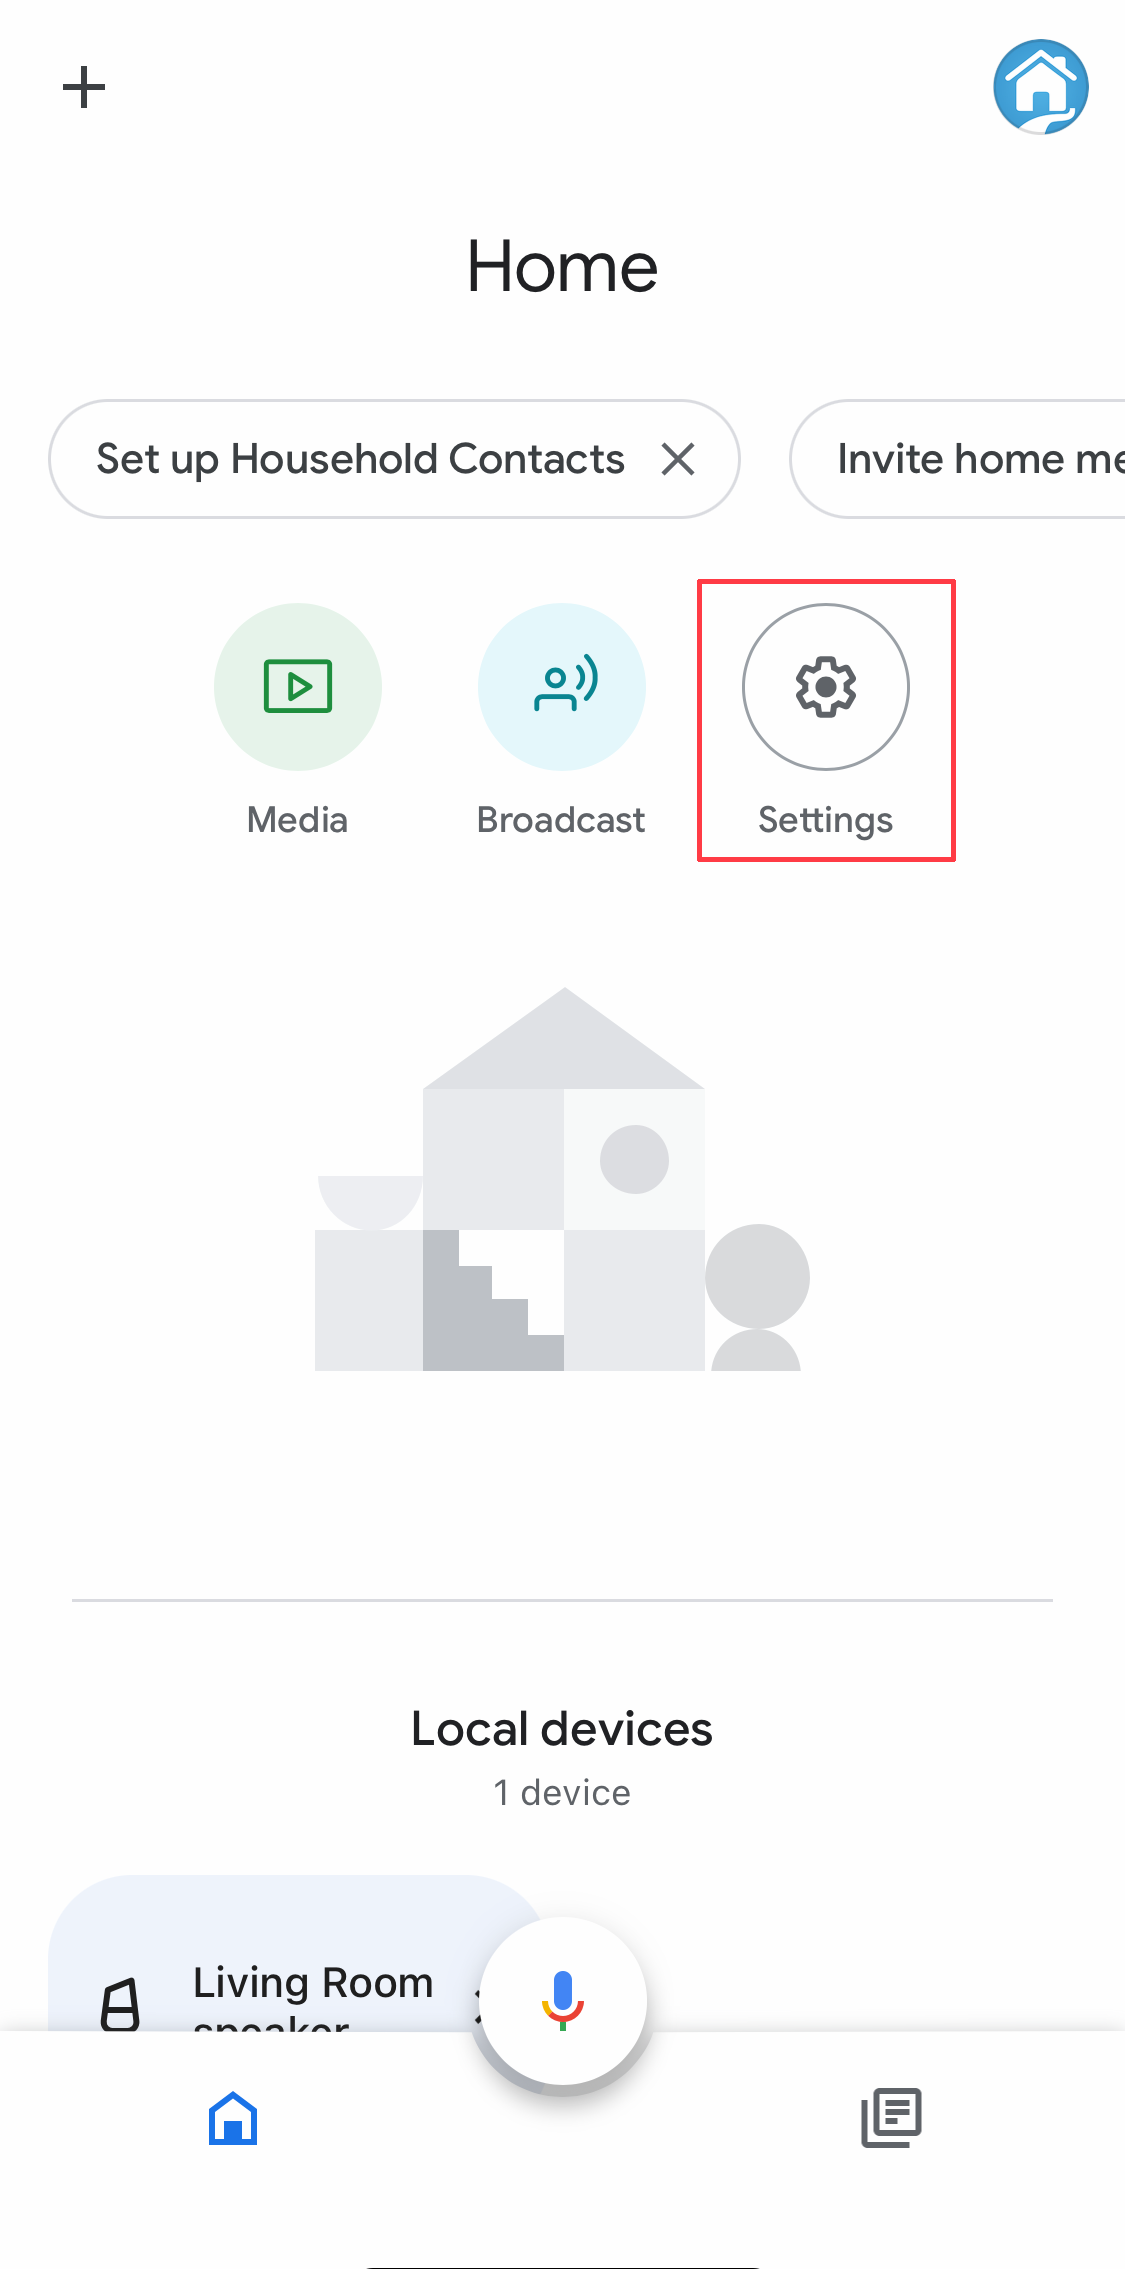
Using the Insteon for Hub app
Step 1
Tap on the menu icon located in the top right.
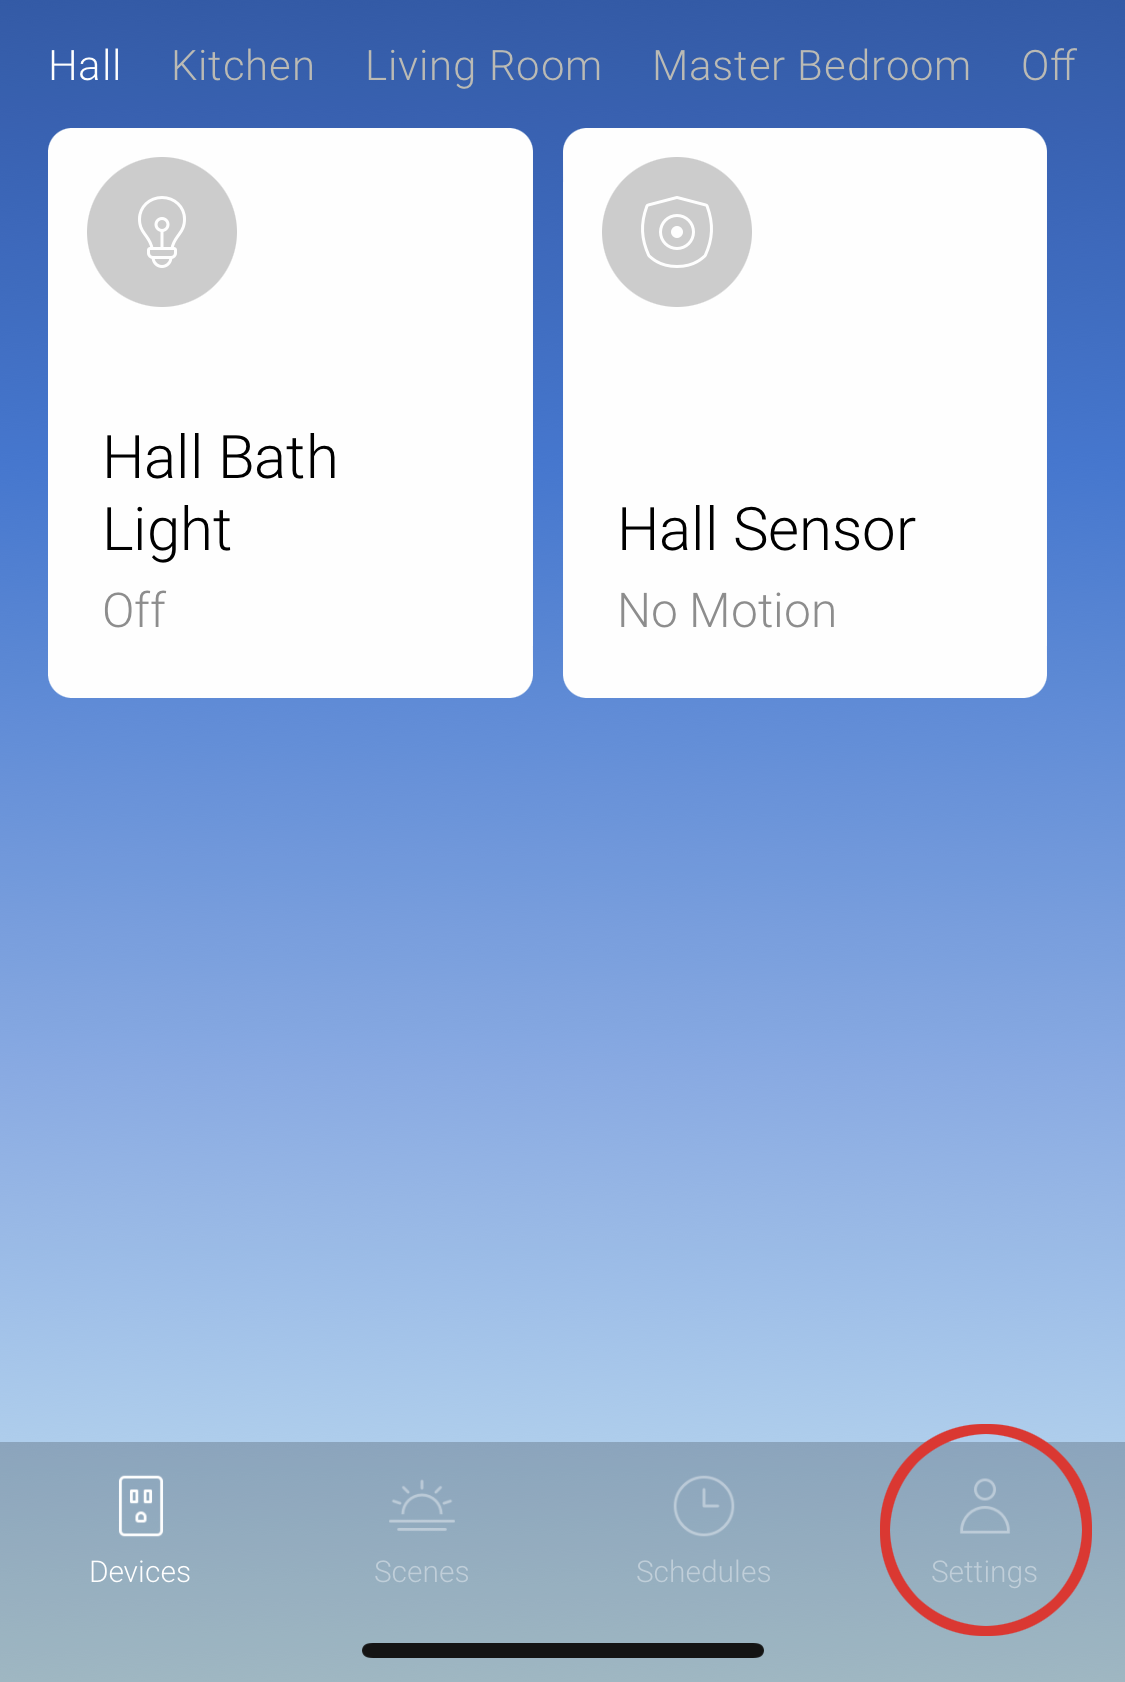
Step 2
Tap Settings.

Step 3
Next to Account is the email associated with your Insteon Hub.

Using Insteon Director app
Step 1
Tap Settings.
Step 2
Under Account is the email associated with your Insteon Hub.

What to expect if you don't purchase a subscription for your Insteon Hub account
Download the Insteon App
Something Went Wrong While Configuring Your Insteon Hub

If you are attempting to add an Insteon Hub and receive an error stating “Something Went Wrong” or “Something’s Wrong” it is most likely because the Hub already registered with an Insteon Account. This could happen for a couple of reasons:
Your Hub is not connected to your router with an Ethernet cable or not powered on.
You purchased the Hub from somewhere other than Smarthome.com or received it as a second-hand device from a friend or family member
You have previously configured the Hub with an Insteon account and don’t have a record of your login information
Note: before continuing with the steps below, if you purchased the Hub to replace one that is no longer working AND you have Insteon devices already set up in your home, you may be entitled to a free warranty replacement. Learn more.
Confirm Account Already Associated with Insteon Hub
Make sure the Hub is connected directly to your router with an Ethernet cable and also plugged into power.
Confirm that the LED indicator located in the front of the Hub is on
Open up a web browser on a device that is connected to your network and visit the following page: https://connect.insteon.com/getinfo.asp
You should see an image on the page that looks similar to this:

If the Insteon Hub that you are trying to configure already has an account on it, it will show up with the “Configured Connect Account” as TRUE. If there is no account on the Hub it will display as FALSE.
In order to clear the account from the Hub, please send an email to support@insteon.com and include the following information
Your name
Your phone number
A request to delete the account associated with the Hub
Attach a photo of the bottom label of your Hub so that the Insteon ID is clearly visible
After we receive the email a member of our support team will be in touch within two business days to assist. Thank you for your patience.
Upgrading from Hub 1 (2242-222) to a Hub 2 (2245-222)
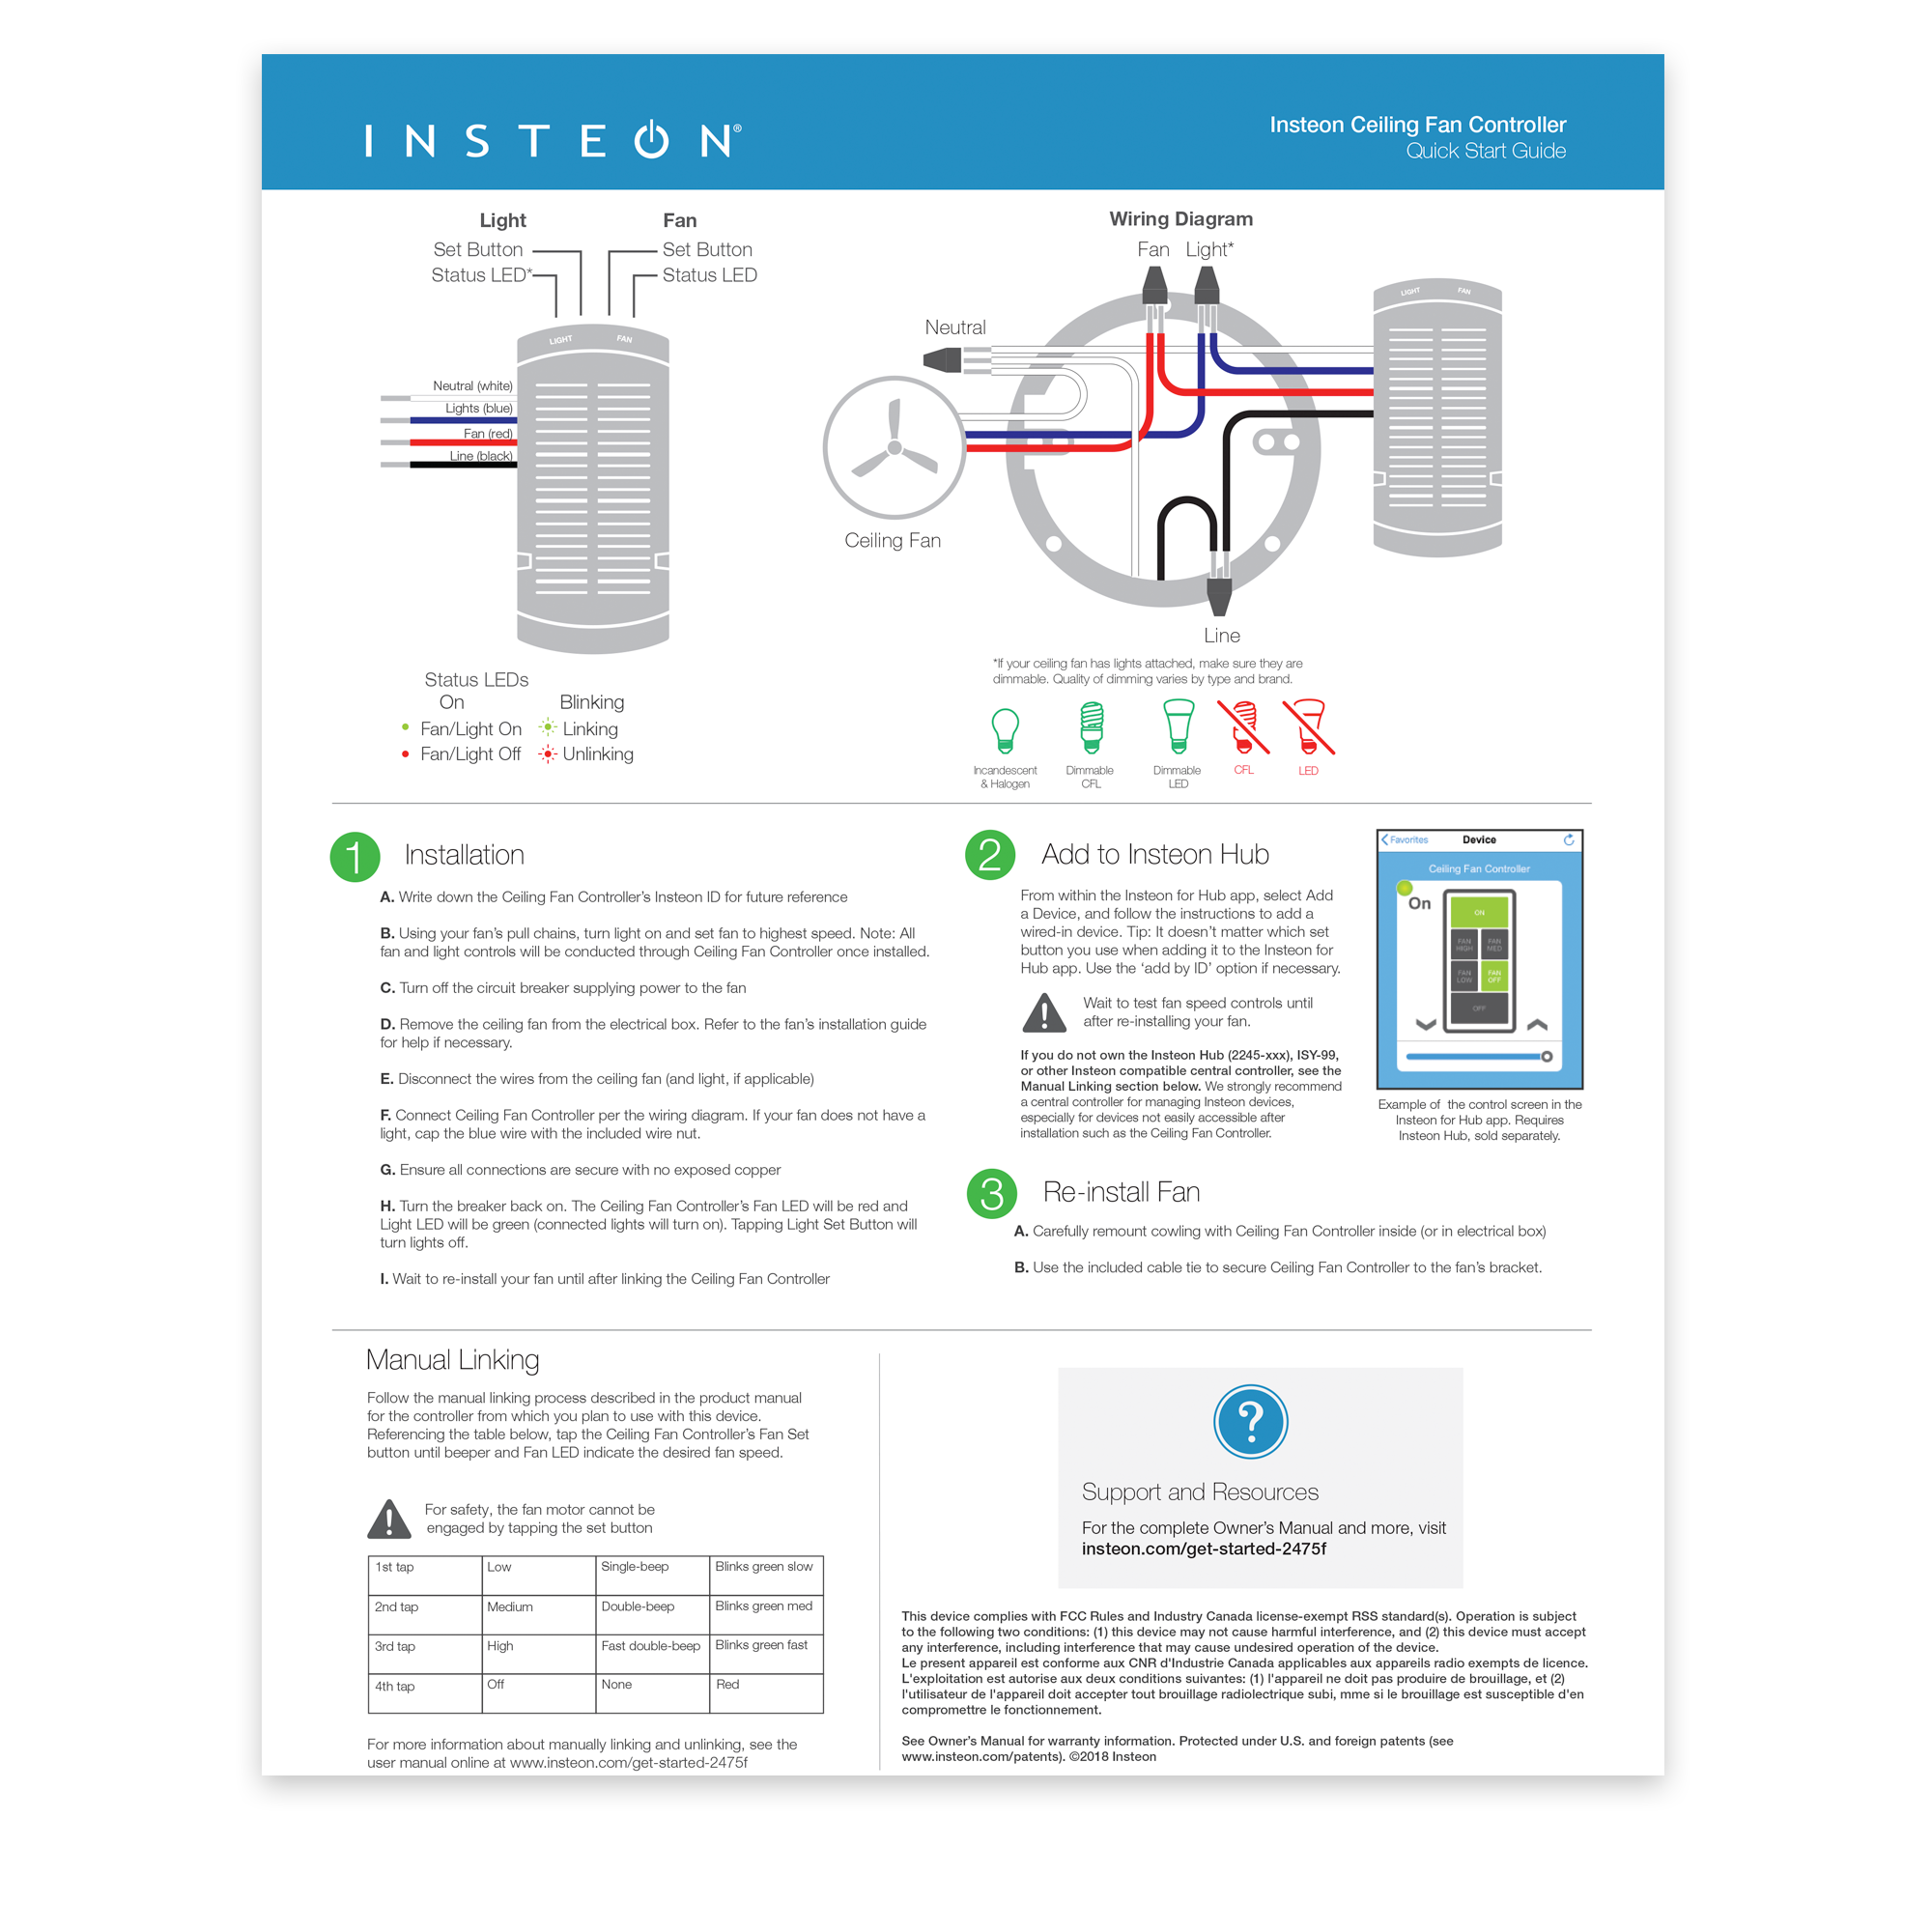
Ceiling Fan Controller Revision 3.0 June 2018 - Quick Start Guide
5 Reasons Insteon is Better than Wi-Fi for Your Smart Home

Insteon and AFCI (Arc-fault circuit interrupter) Circuit Breakers
Years ago, first generation AFCI breakers were manufactured with poor tolerances which caused false triggers from a variety of common appliances, including Insteon powerline signals. Later generations of AFCI breakers are better engineered for real-world electronics and do well at avoiding being falsely triggered. Today there are no issues with using AFCI breakers and our Insteon devices. However, if the installer fails to follow standard wiring rules associated with AFCI circuits, you may experience issues.
Follow these important rules when wiring devices on AFCI circuits:
- Any branch circuits that feed receptacles before switches should be pigtailed connections at the receptacle. This is where you wire the incoming wire and the wire from the panel side and the wire going down stream together with a third wire “the pigtail” that goes to the outlet. DO NOT USE THE OUTLET AS A SPLICE TO CONNECT THE INCOMING AND OUTGOING WIRES BY STABBING THEM INTO THE BACK OF THE OUTLET
- With AFCI breakers it is imperative that wall switches are connected to the same neutral that goes with that circuit. If switch box has two neutrals, only connect the switches neutral wire to the neutral from the circuit the switch is connected to. If an AFCI breaker wont reset after installing an Insteon switch it is because the wrong neutral was used. This can be a result of the electrician crossing neutrals in another box and not the fault of the wiring at the switch box itself.
- Loose or poor splices can cause a situation where an Insteon switch can trip an AFCI breaker. This is not the fault of the switch but the loose connection somewhere in the circuit.
If you are using AFCI breakers and experience false triggers with your Insteon system, please contact us at support@insteon.com and be sure to include the make and model of your AFCI breakers.
Control Insteon Devices from your Google Home
With Insteon Hub (2245-222) and Google Home, you can control Insteon-connected lights and appliances with your voice. The following article covers pairing your Insteon Hub account with the Google Home app.
For Android users with a Home device go to the Google Home support page. If you do not have a Google Home device installed make sure the install the Google Assistant app so that you get access the Google Assistant Home Control settings.
Step 1
Launch the Google Home App and tap the Settings gear icon
Step 2
Scroll all the way to the bottom and tap “Works with Google”

Step 3
Search for Insteon and select Insteon from under the Add new section

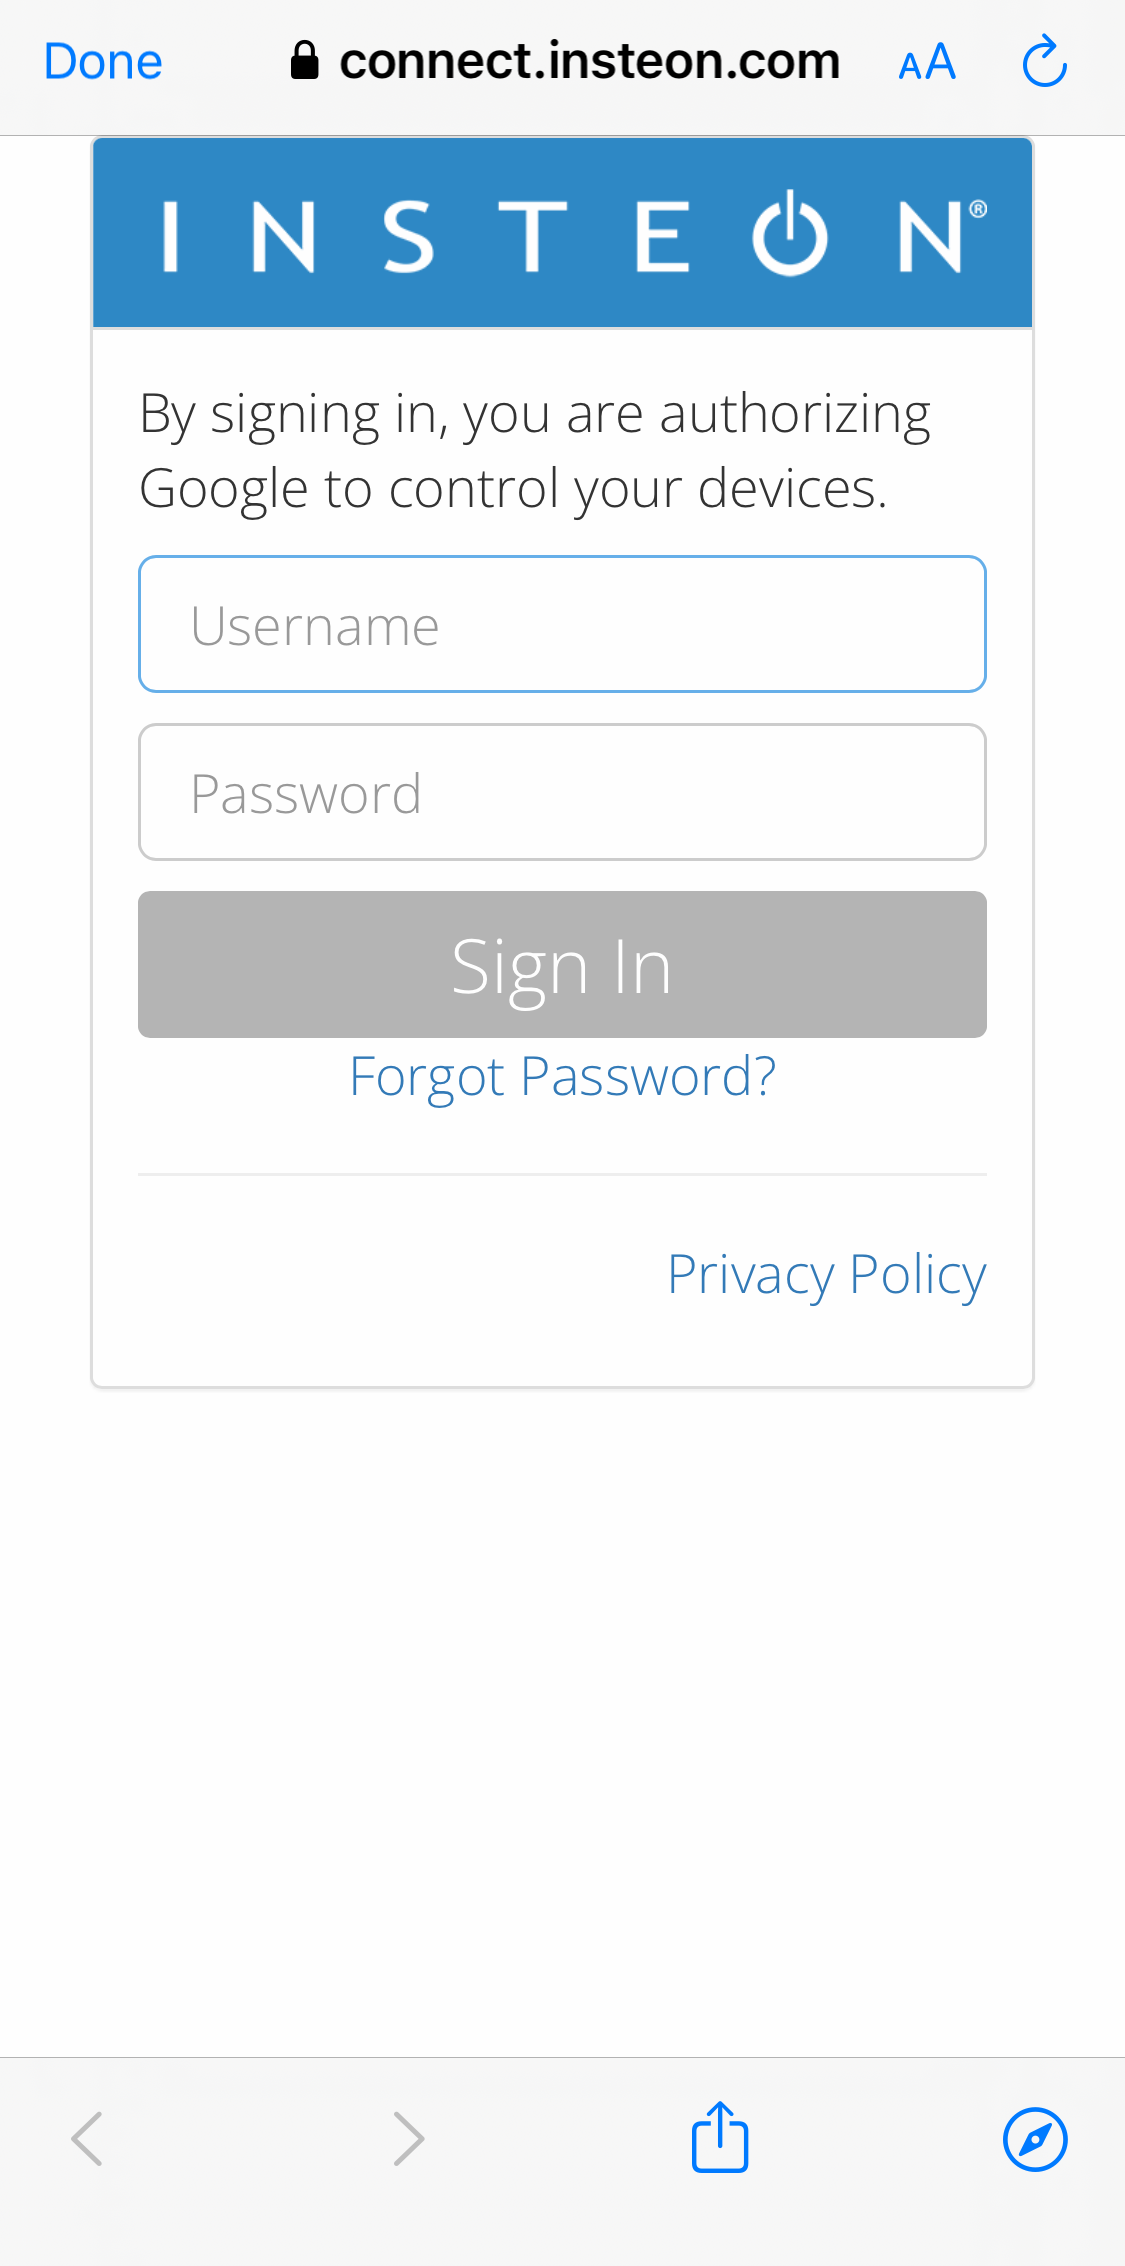
Step 4
Enter your username (email) and password associated with your Insteon Hub account then tap “Sign In”
Step 5
Select the home for your Insteon devices and then tap Next

Step 6
You will see a list of your devices*. Google Home will ask that you place each of the devices into rooms one at a time. To bypass these steps, tap the X (upper right).
*Scenes created in the Insteon mobile apps do not get shown with your devices list. You can still use your voice to activate any scenes you’ve created but to control it from the app, you will need to set up a routine within the Google Home app.

Google Assistant and Supported Insteon Thermostats
The Google Assistant supports control of several different Insteon Thermostats; you can increase or decrease the temperature and change modes just by asking the Google Assistant. Use the information in this article to identify if you have a compatible Insteon Thermostat. Note that an Insteon Hub (2245-222) is required to enable voice control from the Google Assistant.
Supported Insteon Thermostats
These Insteon Thermostats are compatible with Amazon Alexa and allow full voice control functionality of setting temperature and changing modes.
Insteon Wired Thermostat
- Model 2441TH (Revision 1.1 or later)

Unsupported Insteon Thermostats
These Insteon Thermostats are not explicitly incompatible with the Google Assistant but are not guaranteed to function as expected.
Insteon Thermostat for Heat Pumps
- Model 2732-242 (Any Revision)

Incompatible Insteon Thermostats
These Insteon Thermostats are incompatible with the Google Assistant and cannot be controlled.
Insteon Wired Thermostat
- Model 2441TH (Revision 1.0)

Insteon Wireless Thermostat
- Model 2441ZTH
- Model 2441ZTHR
- Model 2732-433
- Model 2732-432

Insteon Venstar Thermostat Adapter
- Model 2441V
- Model 2441VR

Insteon Venstar Integrated Thermostat
- Model 2491T1E
- Model 2491T1ER
- Model 2491T7E
- Model 2491T7ER

Supported Insteon Devices with the Google Assistant
While the Google Assistant supports control of many Insteon devices, not all devices are supported, some devices may not support all features, and some of those features are accessible only through Insteon scenes. Use the table below to identify if your device is supported.
Google Assistant control requires Insteon Hub (2245-222).
| Device | Supported with the Google Assistant |
|---|---|
| Dimmer Module | |
| On/Off Module | |
| Outdoor On/Off Module | |
| LED Bulb (A19) |
|
| LED Bulb for Recessed Lights (PAR38) |
|
| Dimmer Switch | |
| Dimmer Switch (1000W) | |
| Dimmer Switch (2-Wire) | |
| On/Off Switch | |
| Dimmer Toggle Switch | |
| On/Off Toggle Switch | |
| Dimmer Keypad (6-Button) | Controls connected light only - scene buttons are voice controllable through Insteon scenes |
| Dimmer Keypad (8-Button) | Controls connected light only - scene buttons are voice controllable through Insteon scenes |
| On/Off Keypad (6-Button) | Controls connected light only - scene buttons are voice controllable through Insteon scenes |
| On/Off Keypad (8-Button) | Controls connected light only - scene buttons are voice controllable through Insteon scenes |
| Dimmer Outlet | |
| On/Off Outlet (2011) | |
| On/Off Outlet (2014) | Controls top outlet only - bottom outlet is voice controllable through Insteon scenes |
| Wired Thermostat | Not all revisions support control with the Google Assistant. |
| Wireless Thermostat | - |
| Venstar Thermostat Adapter | - |
| Ceiling Fan Controller | Controls connected light when addressing device directly - fan speeds are voice controllable through Insteon scenes |
| Dimmer DIN Rail Module | |
| On/Off DIN Rail Module | |
| Dimmer Micro Module | |
| On/Off Micro Module | |
| Open/Close Micro Module | - |
| 0-10V Ballast Dimmer | |
| Dimmer In-Line Module | |
| On/Off In-Line Module | |
| 220V Load Controller (Normally Open) | - |
| 220V Load Controller (Normally Closed) | - |
| WiFi Cameras | - |
| Open/Close Sensor | - |
| Hidden Door Sensor | - |
| Motion Sensor | - |
| Leak Sensor | - |
| Smoke Bridge | - |
| IO Module | - |
| Mini Remotes | - |
| Door Lock and Deadbolt Controller | - |
| IR Transmitter | - |
| IR Receiver | - |
| Serial Bridge | - |
| iMeter Solo | - |
| SynchroLinc | - |
Insteon Hub Pro (HomeKit-enabled) - Quick Start Guide

Motion Sensor II - Owner's Manual

Motion Sensor II - Quick Start Guide

Motion Sensor II Setup
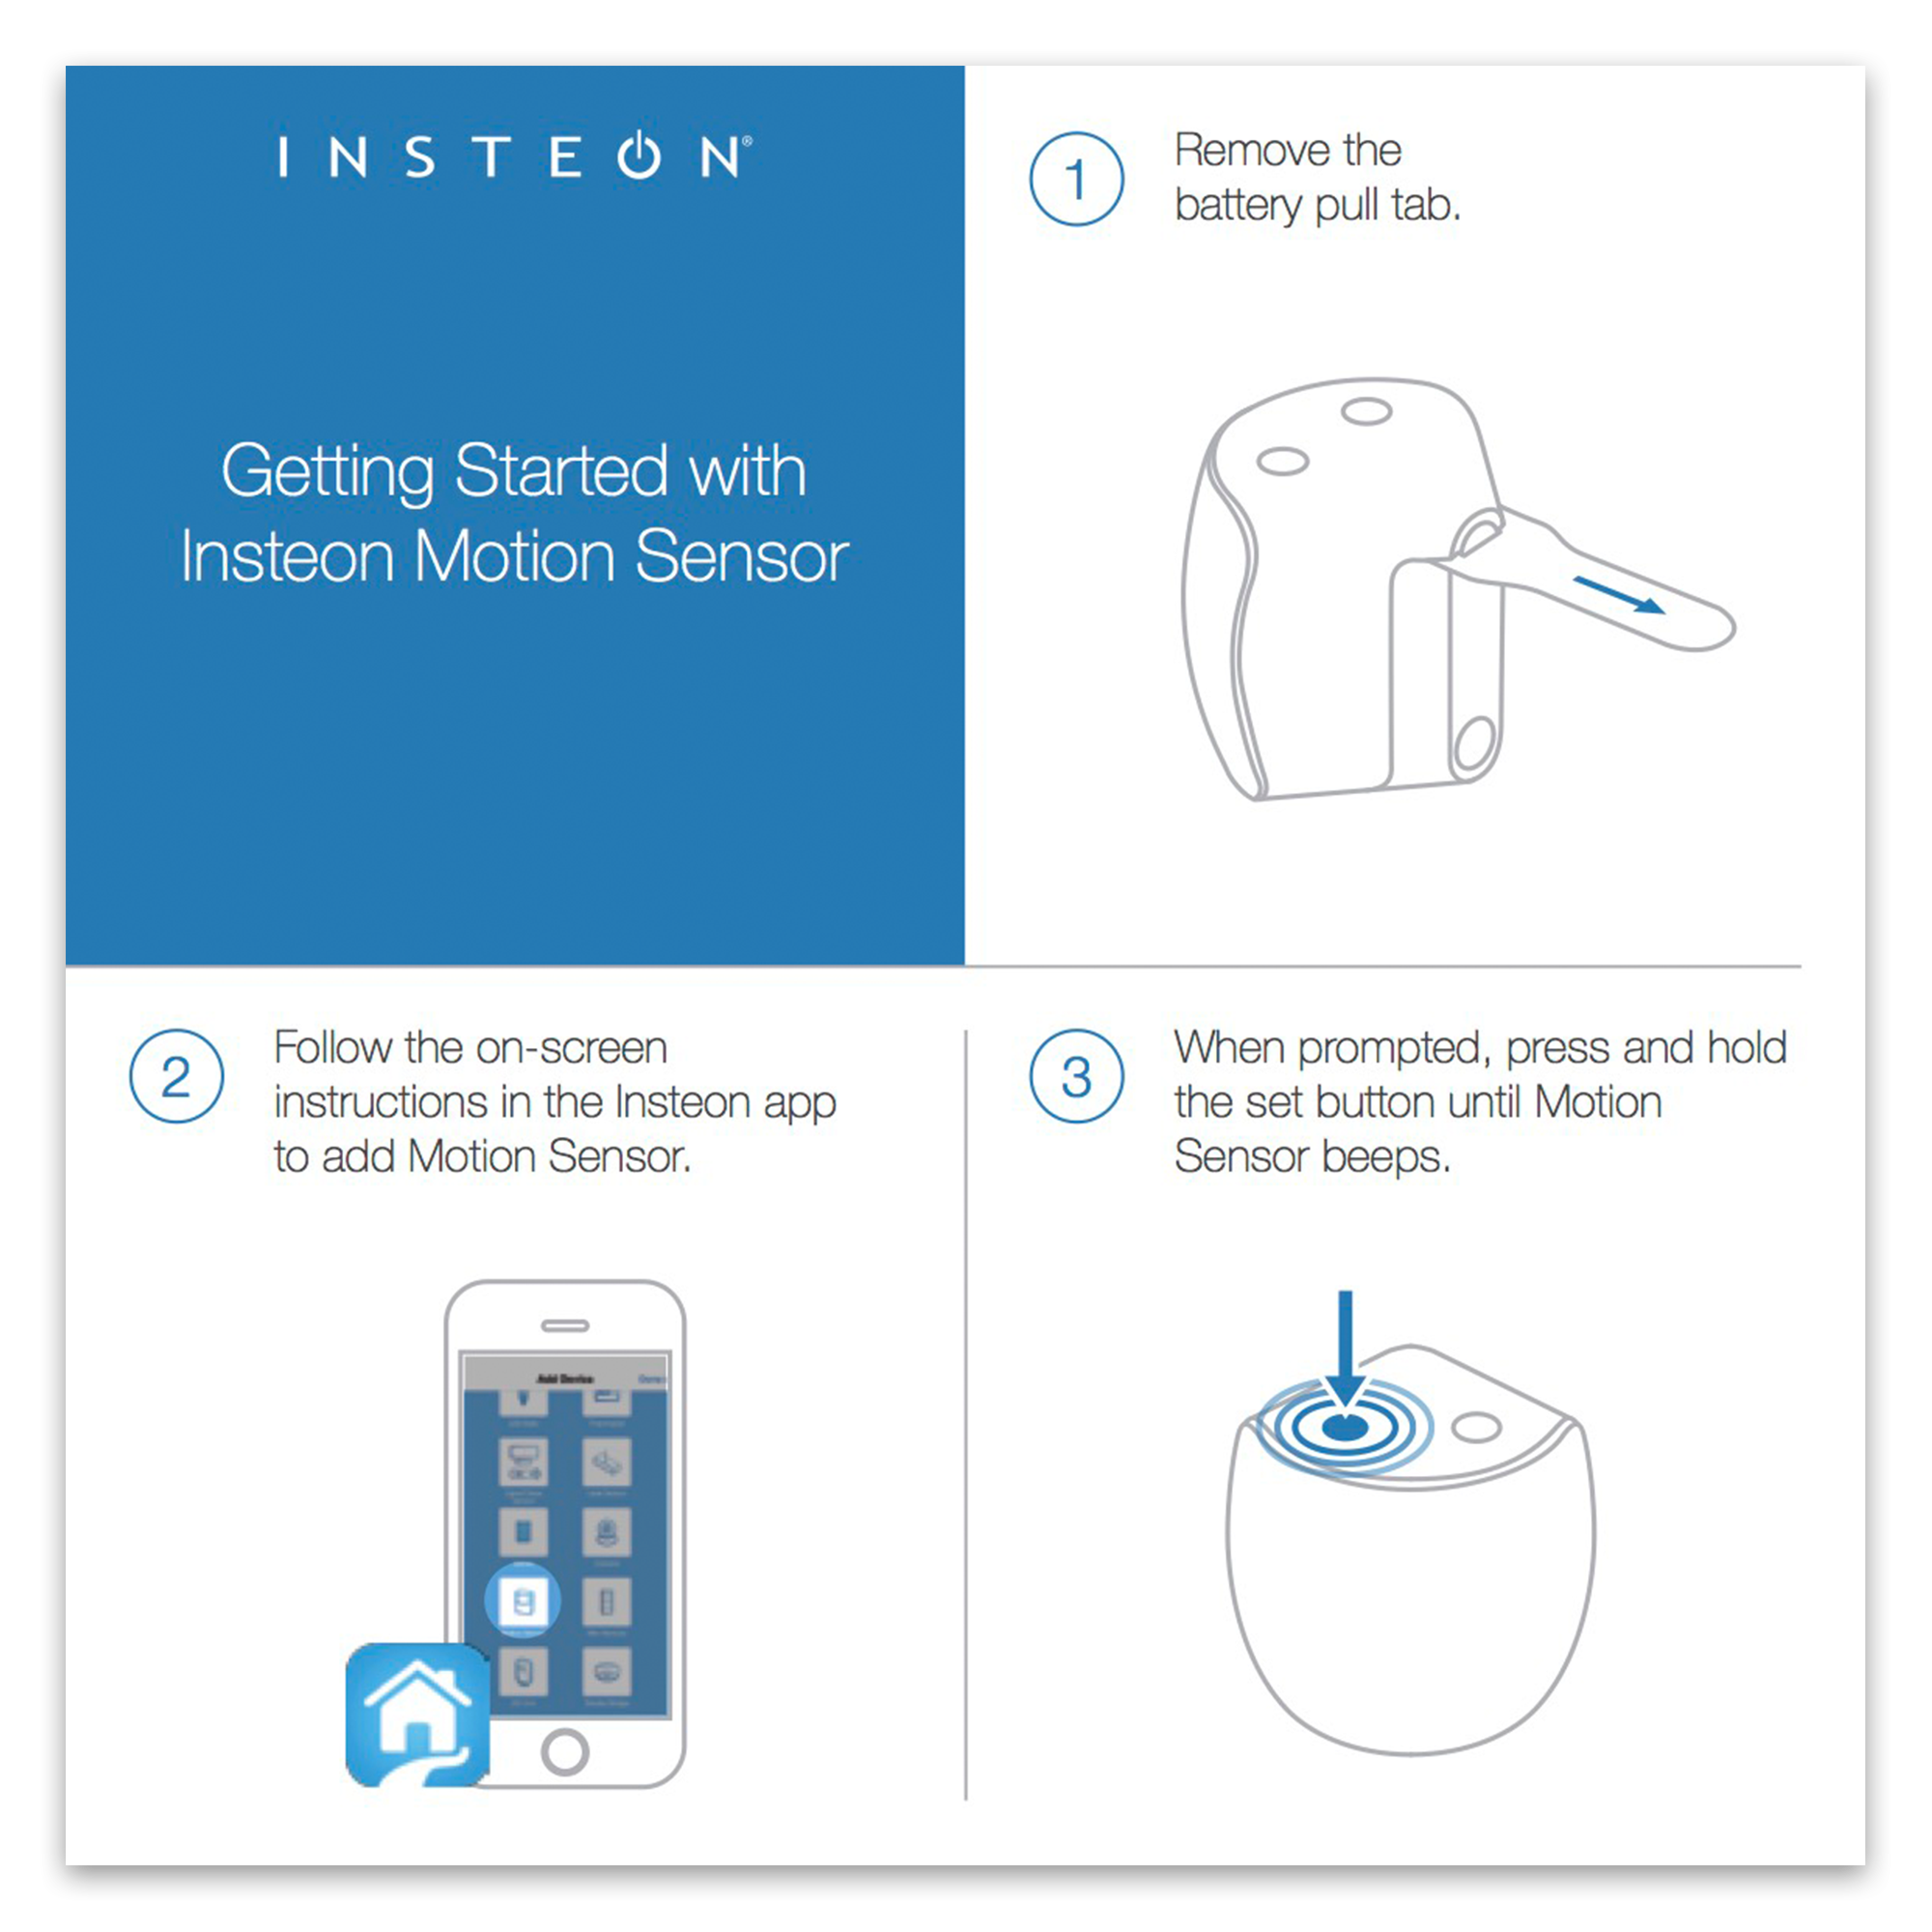
Getting Started
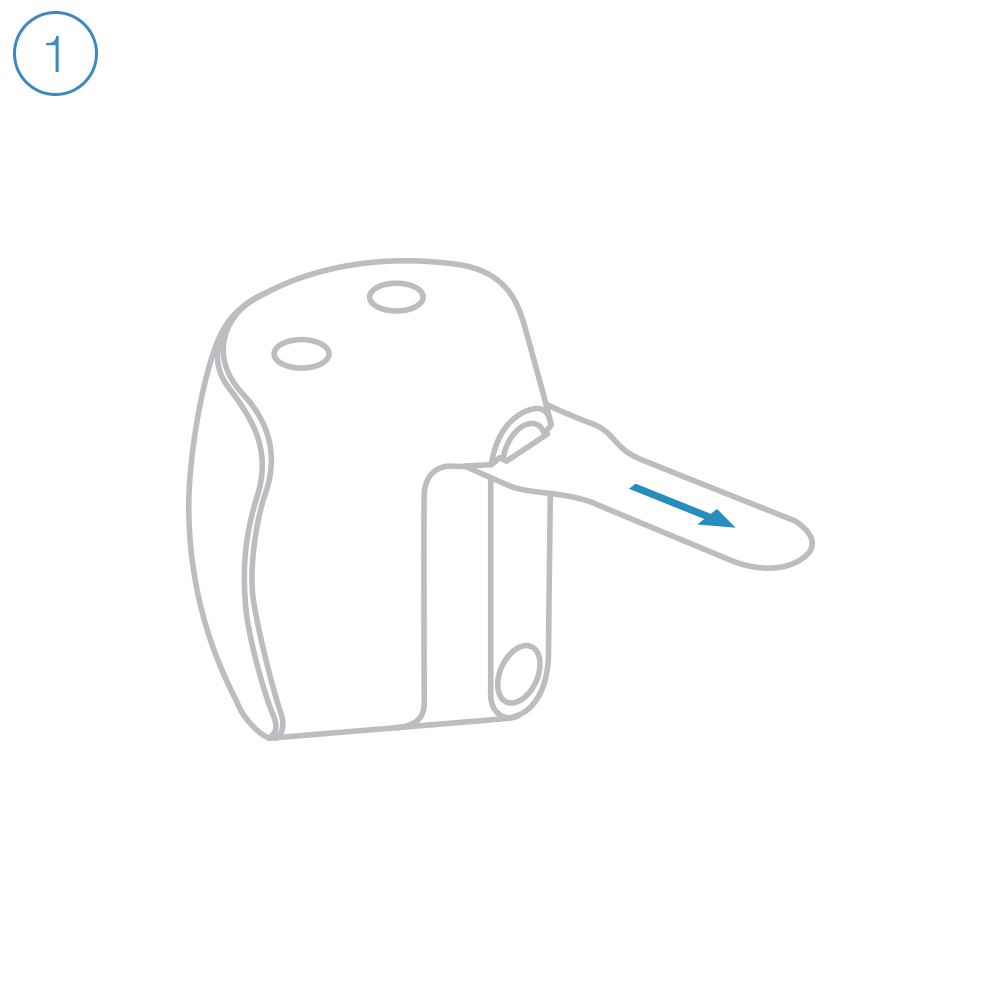
Remove the battery pull tab.
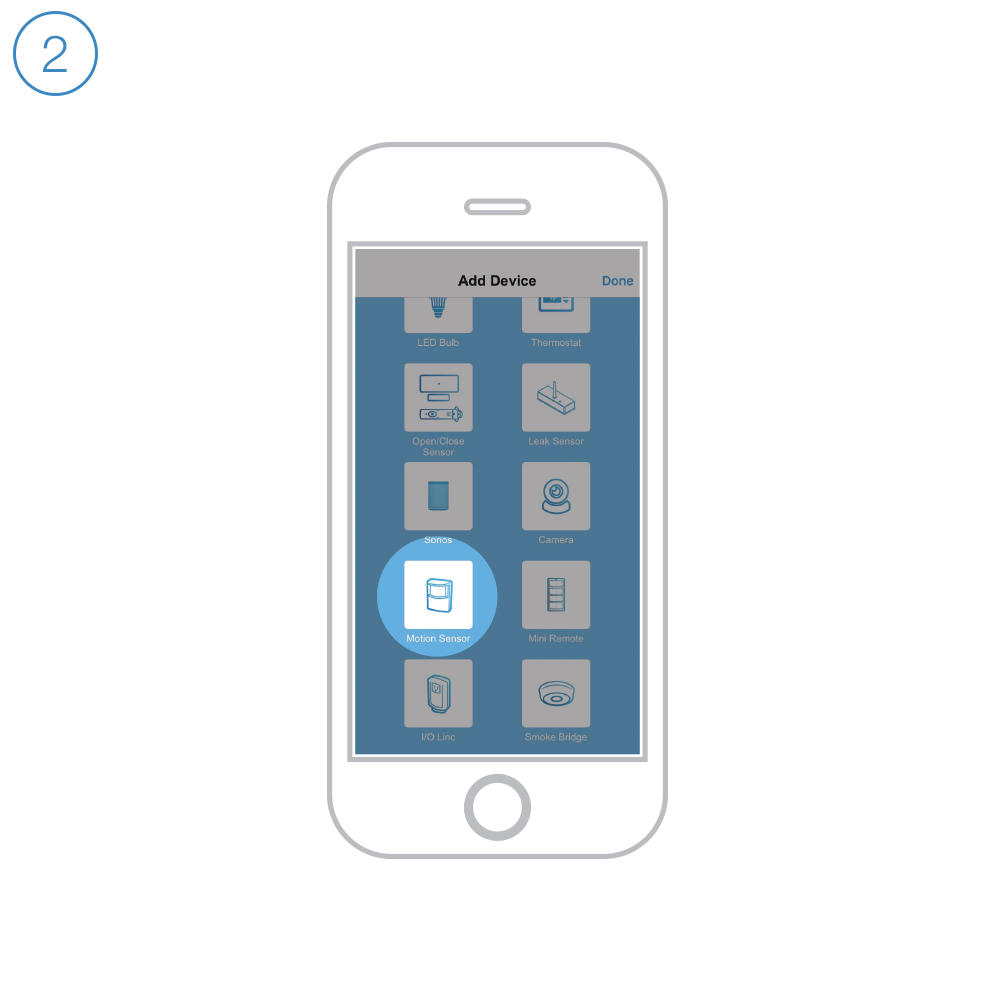
Follow the on-screen instructions in the Insteon app to add Motion Sensor.
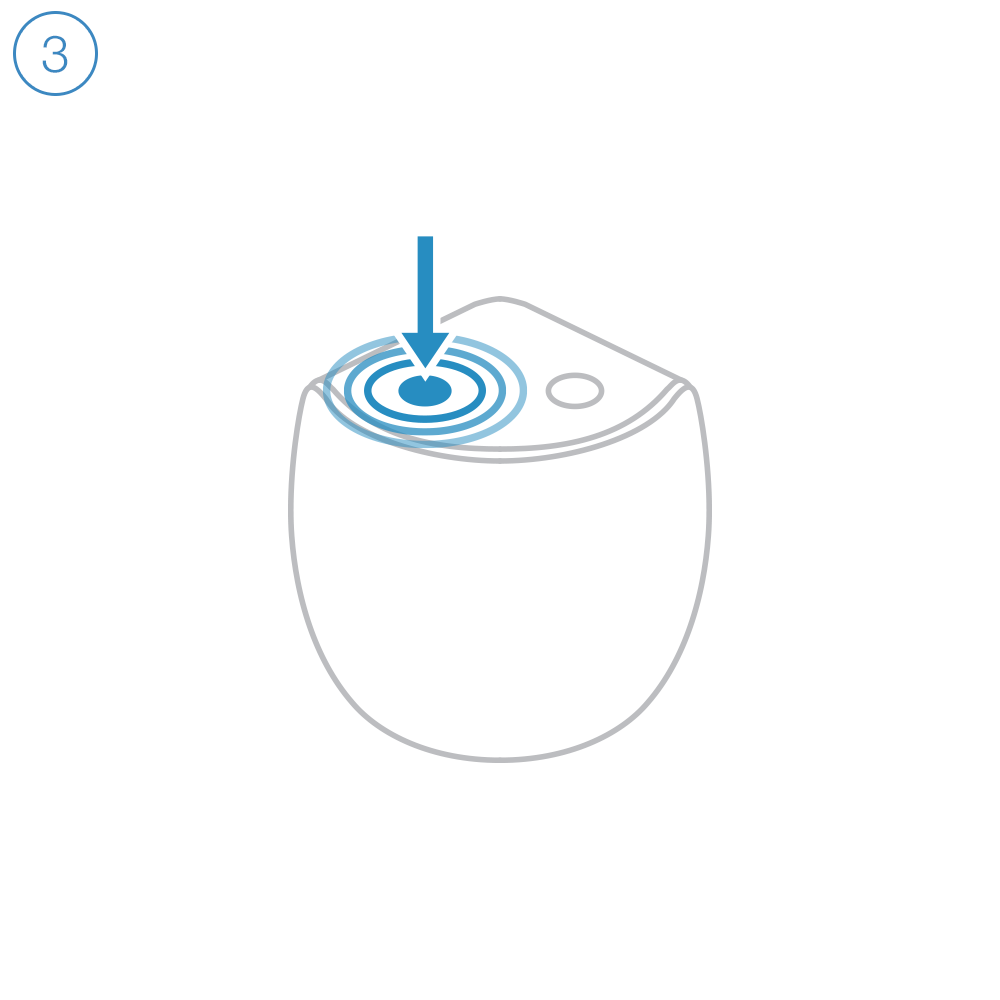
When prompted, press and hold the set button until Motion Sensor beeps.
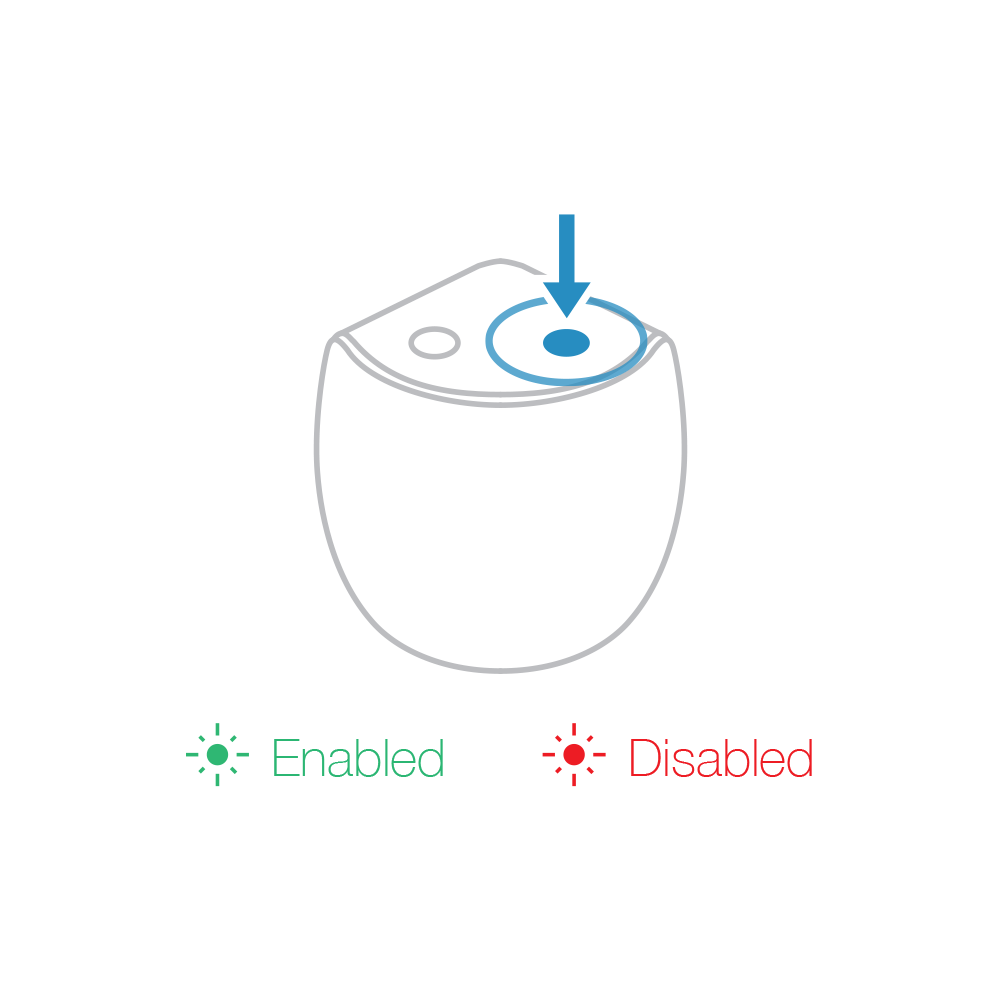
Tap the Motion button to enable or disable motion detection. Default disable time is 12 hours after which motion detection will resume.
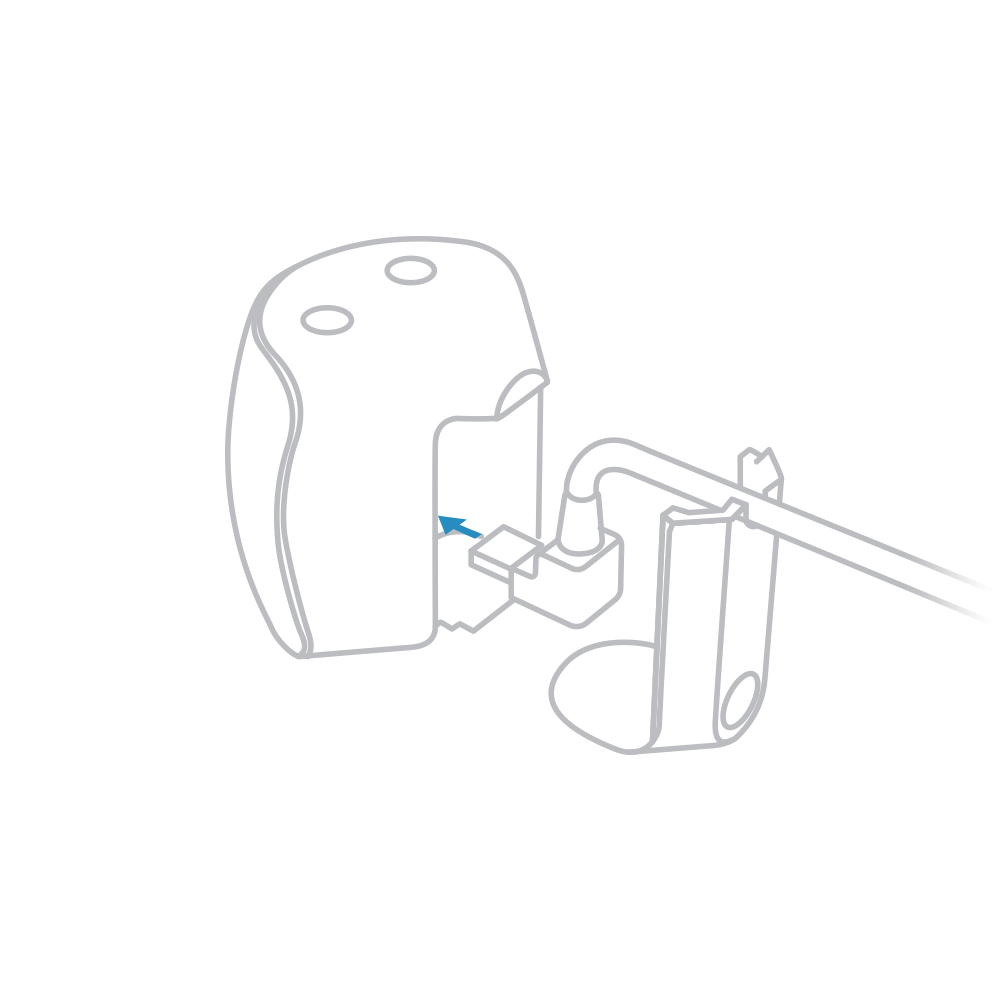
Motion Sensor can be connected to power with an optional Micro USB cable (sold separately).
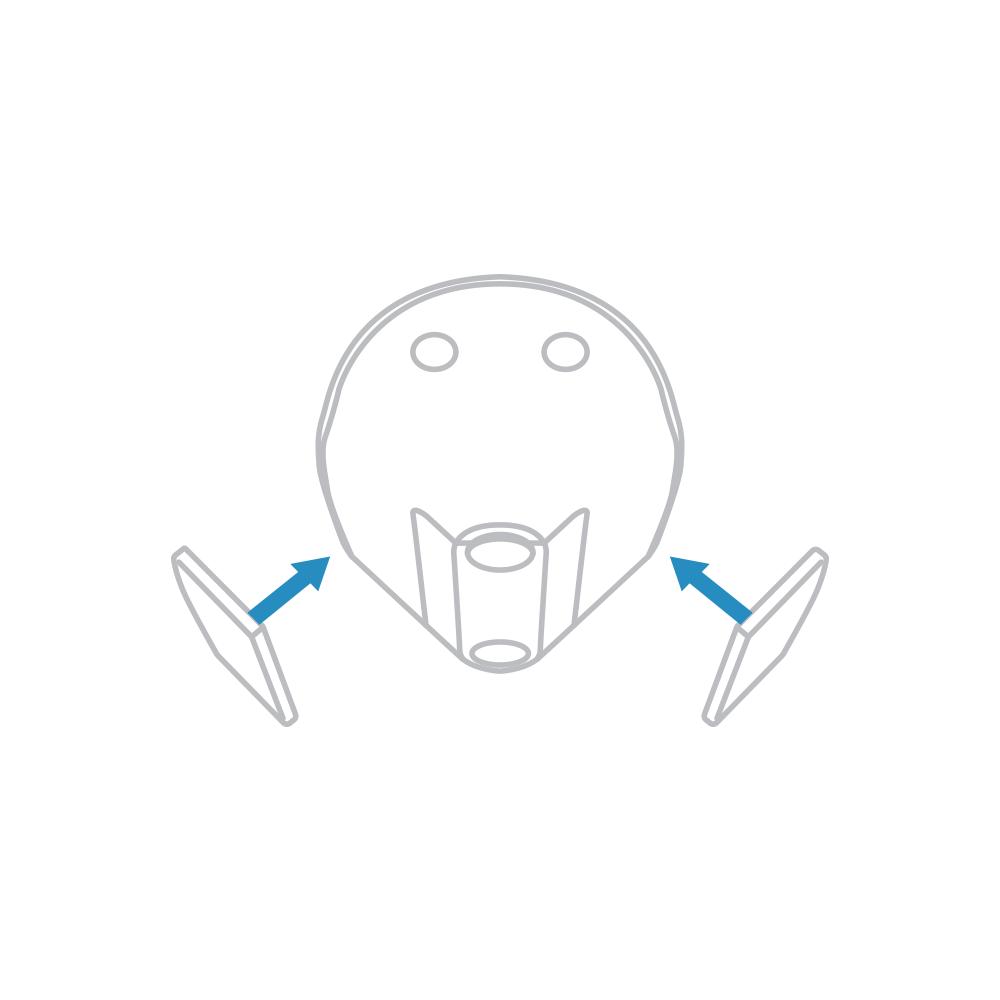
Use the reusable mounting strips for corner placement.
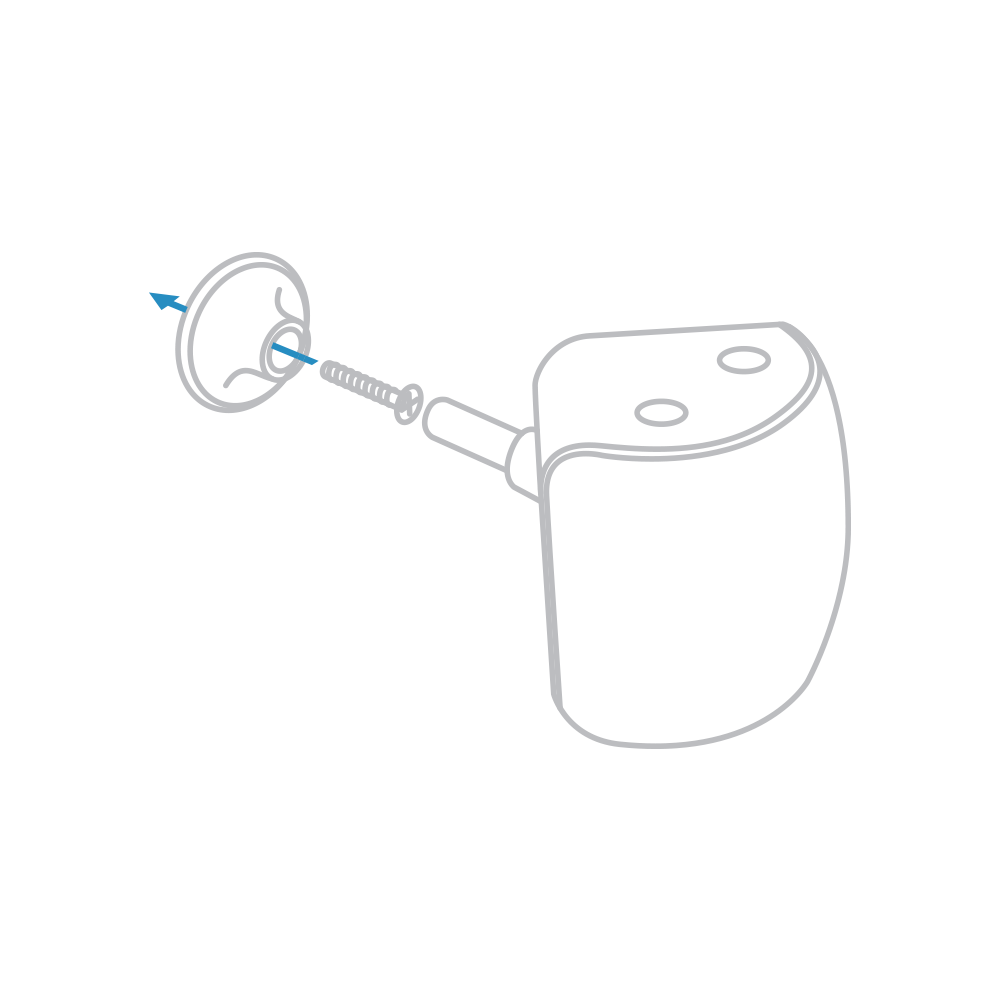
For precise positioning, use the flexible mount.
Guides and Manuals
Quick Start Guide
Featured
Owner's Manual
Featured